PADI Rescue Exercise 7 COVID 19 Guidelines - Update 2021
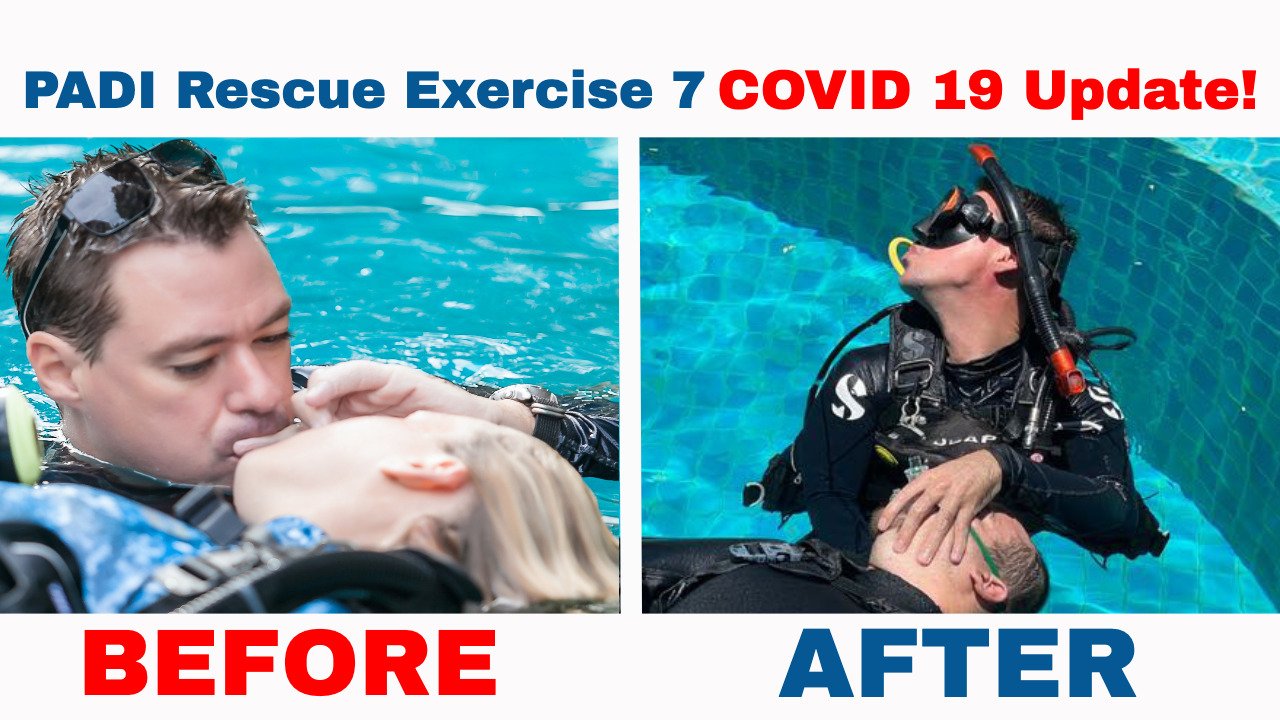
The PADI Rescue Exercise 7 COVID 19 Guidelines Update for the PADI Rescue Course, Divemaster course and IDC Course. This important rescue skill involves close contact. It was therefore essential that PADI updated the Rescue Exercise 7 during this pandemic. In this article, I will explain the PADI Rescue Exercise 7 COVID 19 Update.
Why is the PADI Rescue Exercise 7 important?
It is hard to say how long a person can be without oxygen before brain damage occurs as it varies from person to person. Generally, the brain can withstand three to six minutes without oxygen before brain damage occurs.
For this reason, it is essential to remove a scuba diver from the water while administrating in water rescue breaths in the unlikely event you find an unresponsive non-breathing Scuba Diver at the surface. Once the Scuba Diver is removed from the water you can resume CPR on land, administer 100% O2 depending on local laws and regulations, while waiting for the Emergency Medical Services (EMS) to take over. Performing the PADI Rescue Exercise 7 correctly can improve the chances of survival.
Learn more on how to become a PADI EFR Instructor
Why Covid 19 changed the way we conduct PADI Rescue Exercise 7
The current Covid 19 public health crisis has raised several questions on how to conduct the PADI Rescue Exercise 7 during the PADI Rescue Course, Divemaster Course, and PADI IDC Course and adhere to local health and safety authority guidelines and World Health Organization recommendations to minimize the likelihood of disease transmission. Covid 19 can easily spread through close contact, especially simulating rescue breaths.
Equipment needed to perform the PADI Rescue Exercise 7 Covid 19 Update
In addition to dive equipment required by PADI standards each diver should have;
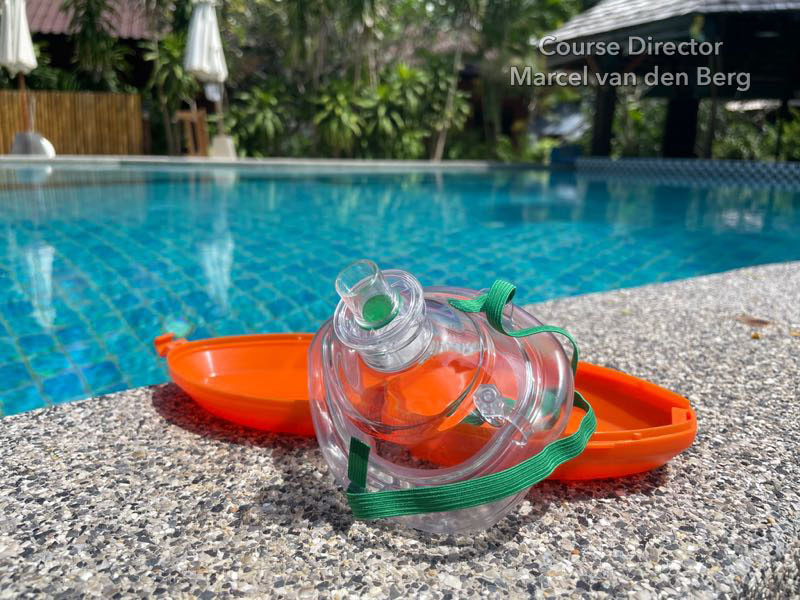
A personal rescue breathing mask (RBM). It is important that you only use the pocket mask of the victim while conducting the PADI Rescue Exercise 7 according to the new COVID 19 Guidelines.
A personal rescue breathing mask (RBM). It is important that you only use the pocket mask of the victim while conducting the PADI Rescue Exercise 7 according to the new COVID 19 Guidelines.
Before and after the exercise each diver’s hands should be sanitized and equipment should be cleaned in accordance with the recent Divers Alert Network guidelines.
Full Steps PADI Rescue Exercise 7
Here are the full steps in order how to complete PADI Exercise 7 COVID 19 Update:
You have now completed the PADI Rescue Exercise 7 according to the new Covid 19 Guidelines.
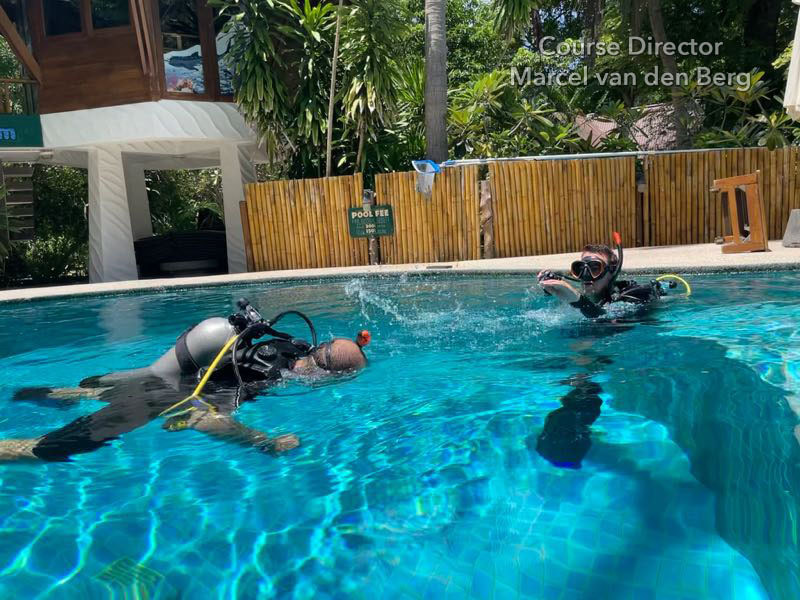
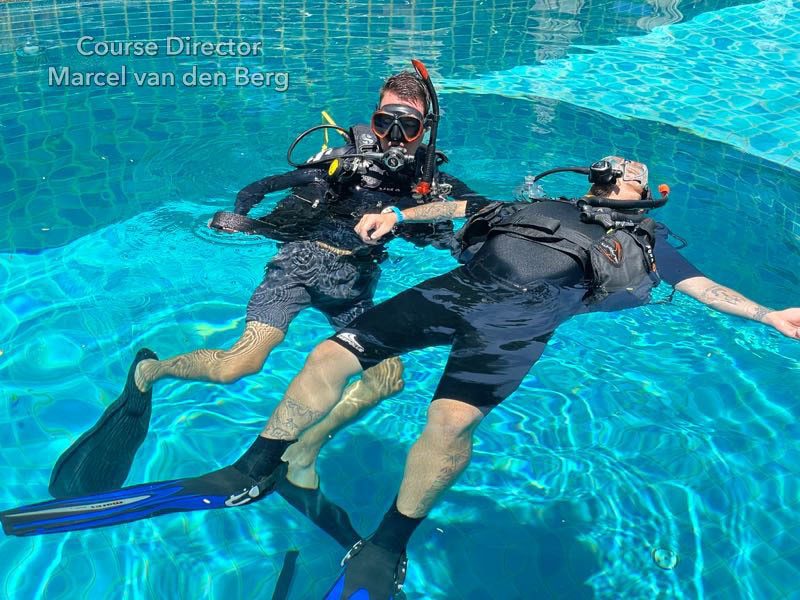
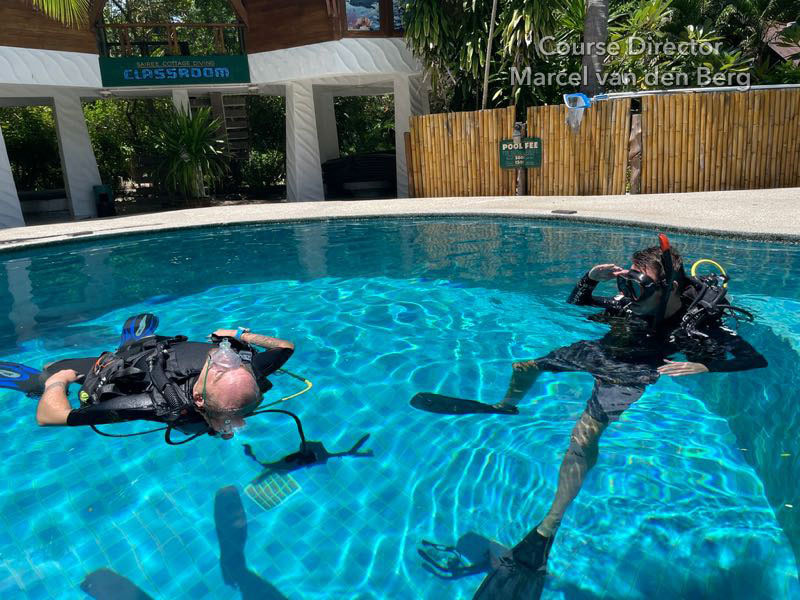
- The rescuer finds the victim face down on the surface.
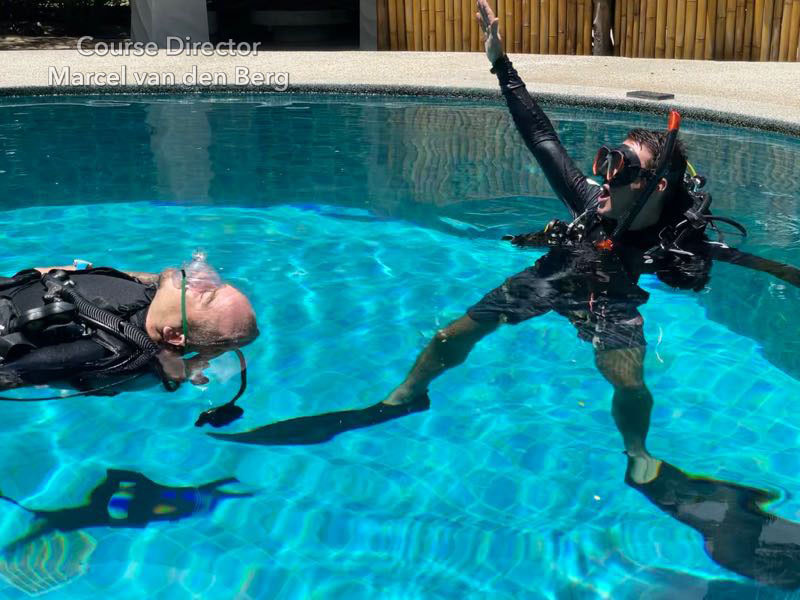
- The Rescuer checks for responsiveness by splashing some water on the victim while shouting: "Diver, Diver! Are you ok?" Repeat this twice.
- When the victim does not respond, the rescuer places his/her regulator in his/her (rescuers) mouth.
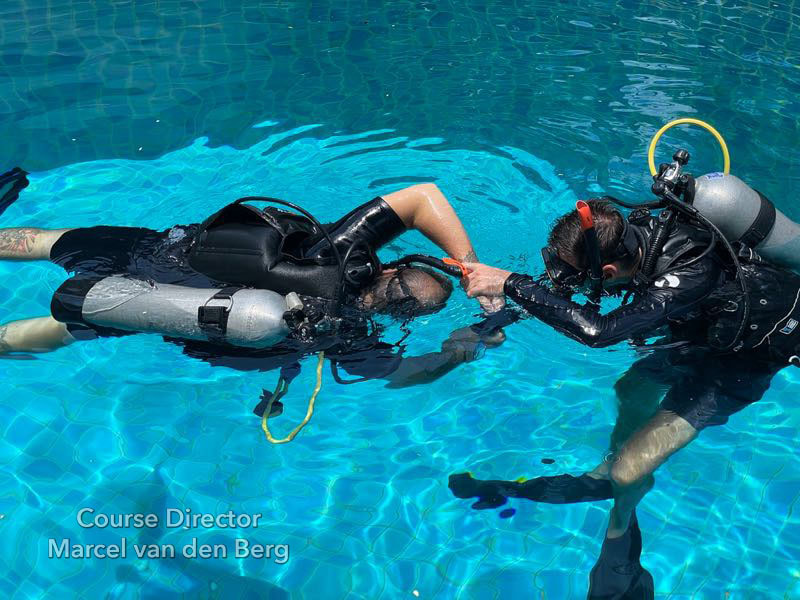
- Rescuer turns the victim to a face-up position by gripping hands or wrists and rolling.
- Keep your (rescuer) regulator in your mouth and first, partially inflate the victim's BCD using the LPI.
- Fully inflate your (rescuer) BCD using the LPI.
- Next remove the victim's weight system.
- Followed by removing your weight system.
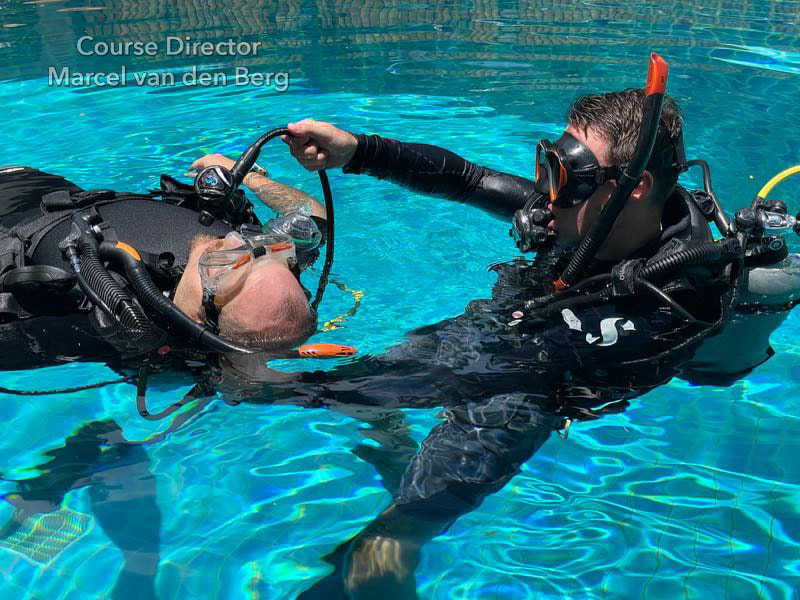
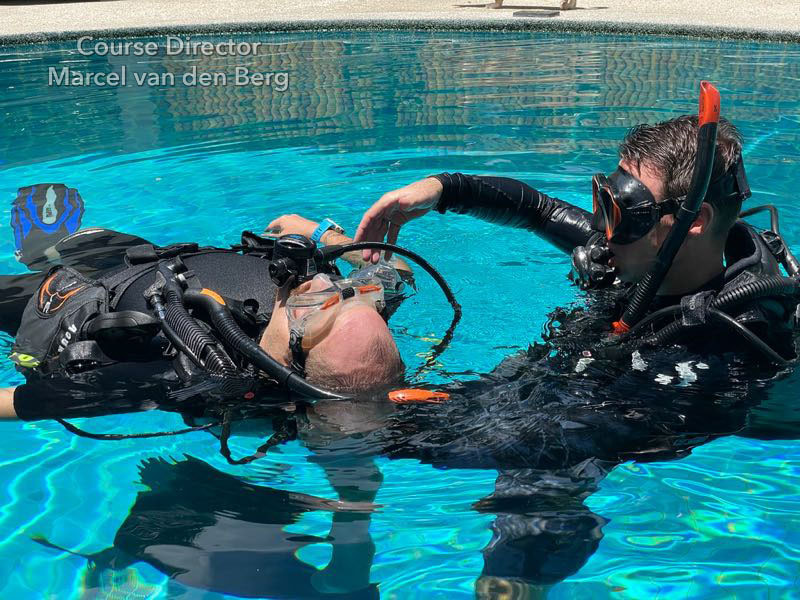
- Remove the victim's regulator by pulling on the second stage hose, avoiding contact with the second stage body, Rescuer keeps the regulator in place.
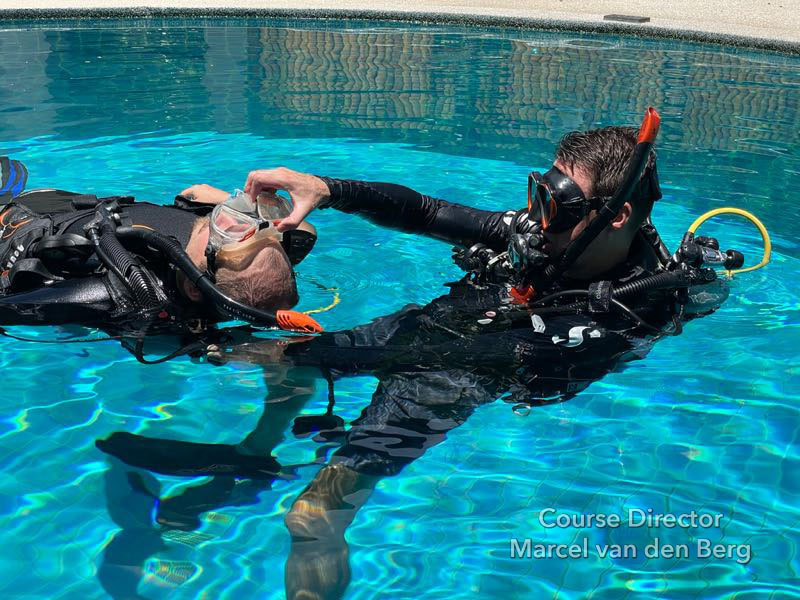
- Remove victim’s diving mask.
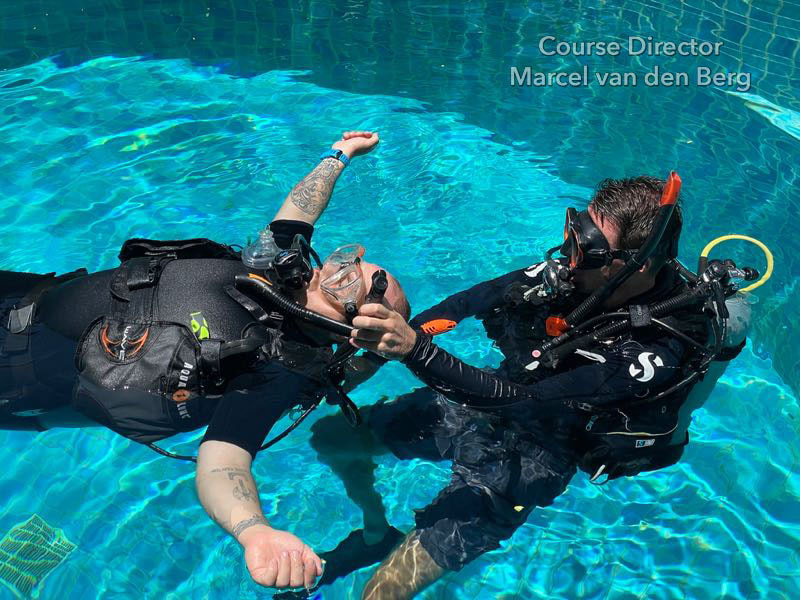
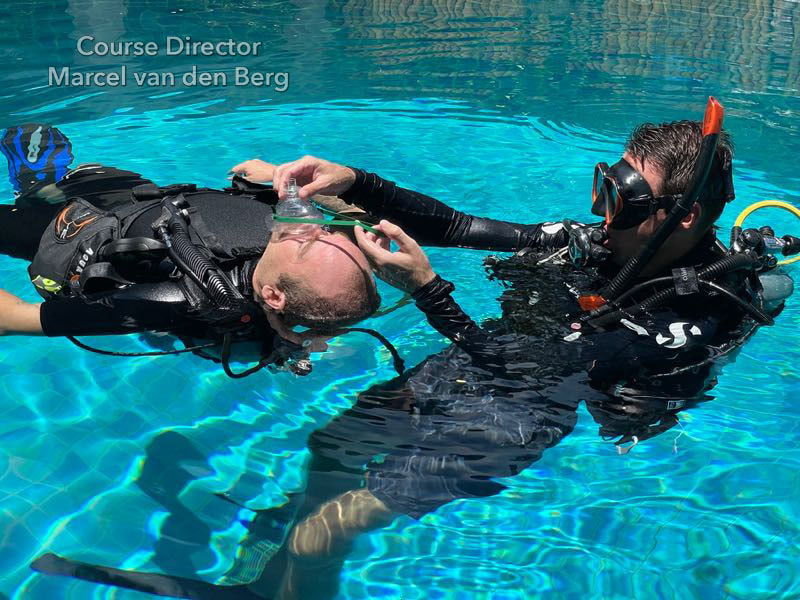
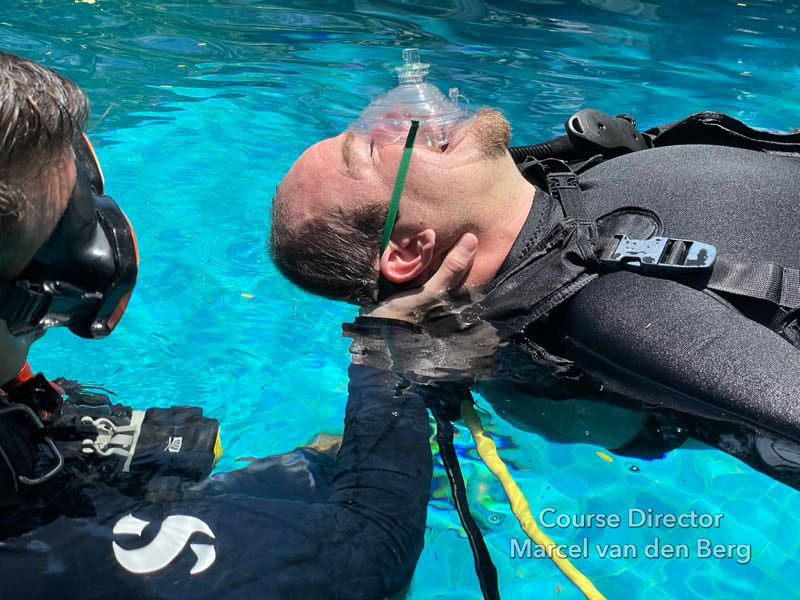
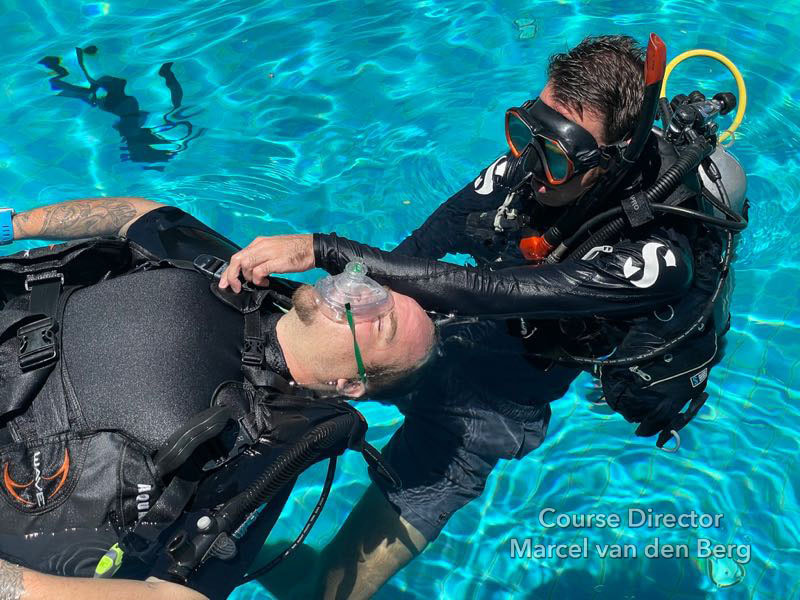
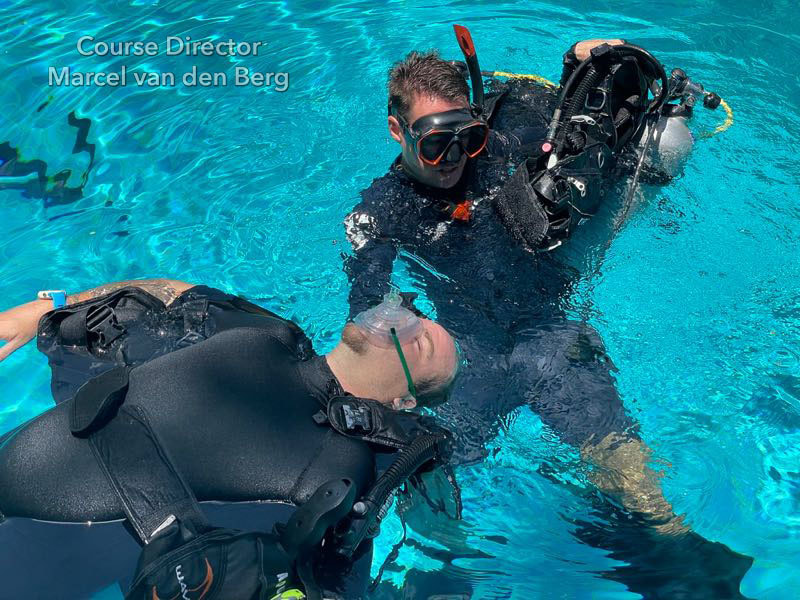
- Immediately replacing it with victim’s RBM ensuring it covers the mouth and nose. Important note: Make sure to only use the victim's Pocket Mask in this case. I recommend having the victim's pocket mask inside his/her BCD pocket or anywhere else where it is easy to access it. This is according to the new PADI Rescue Exercise 7 COVID 19 Guidelines. Rescuer removes regulator and simulates removal of their own mask, whilst keeping the mask in place throughout the exercise.
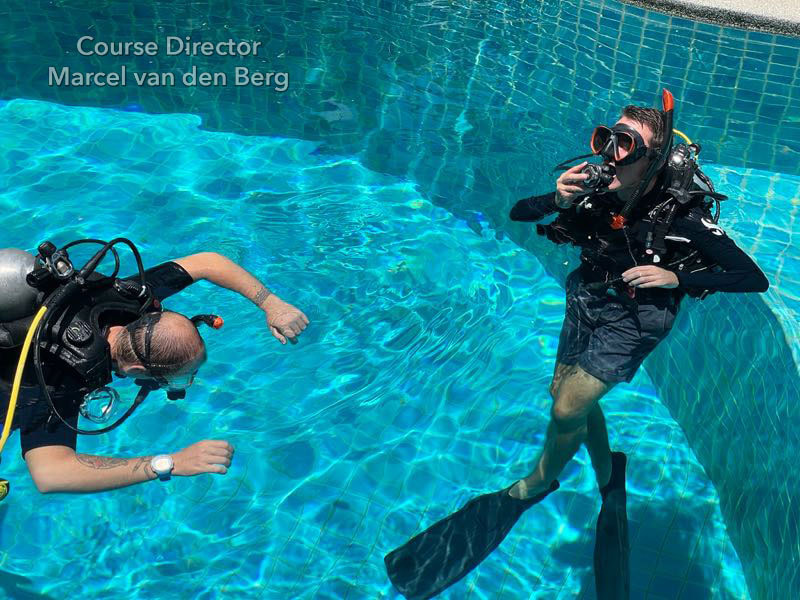
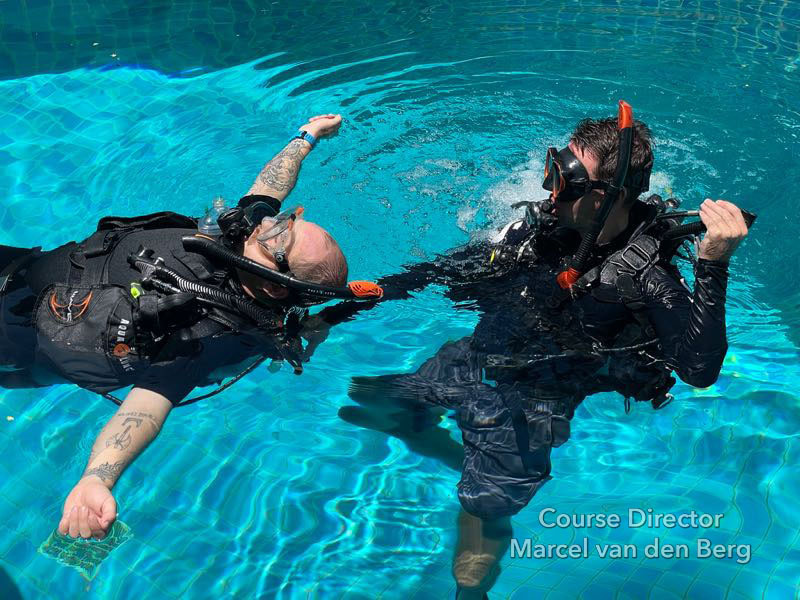
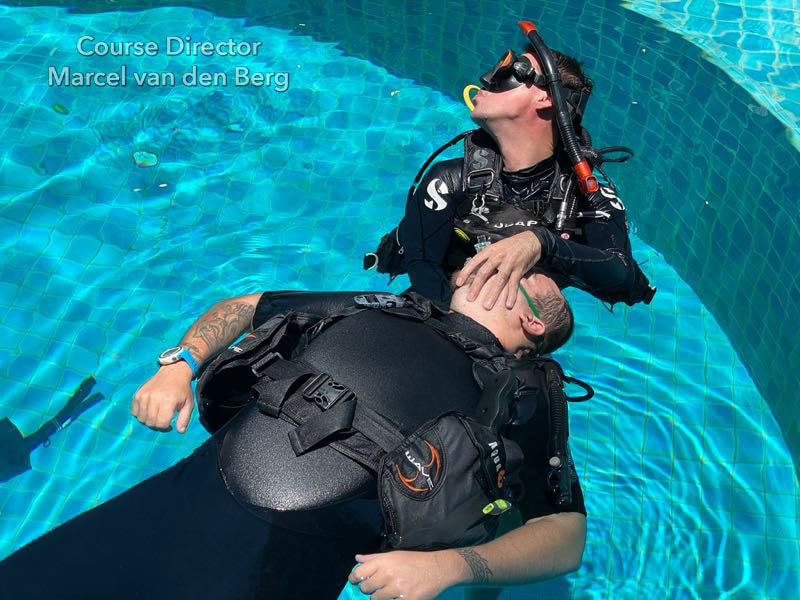
- Stay on the side of the victim far enough to prevent transmission, but still close enough to have a clear view of the victim's face, mouth, chest, and belly. Check for breathing by slowly looking at the victim's face, mouth, chest, and belly while verbally explaining that in a real-life scenario you would open the airway of the victim with your hand and closely look, listen and feel for breathing.
- After you (the rescuer) confirm that the victim is not breathing call for help by shouting: “Help, Help! Non-breathing diver at the surface, please alert EMS and get the Oxygen ready!”
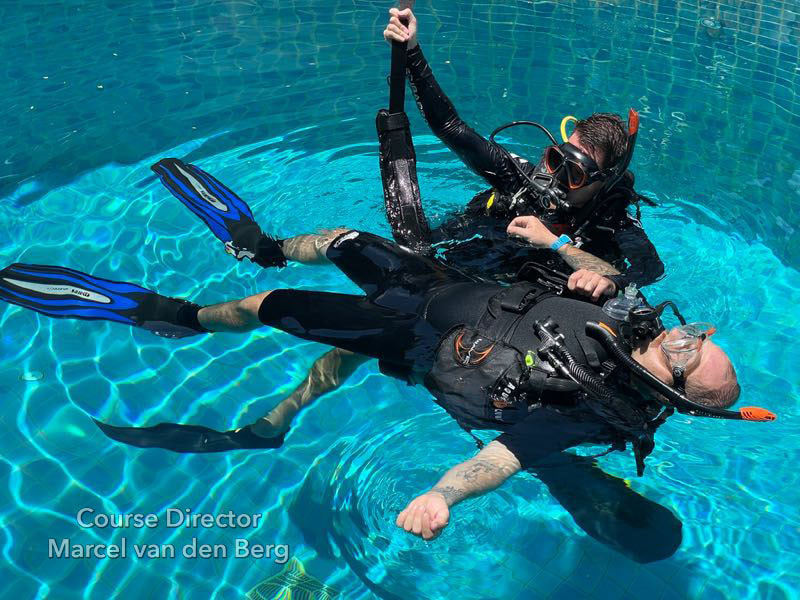
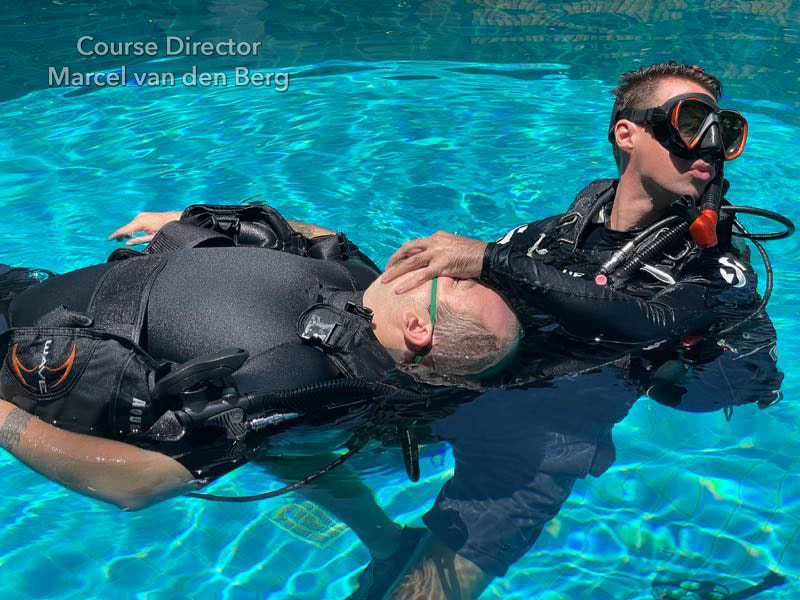
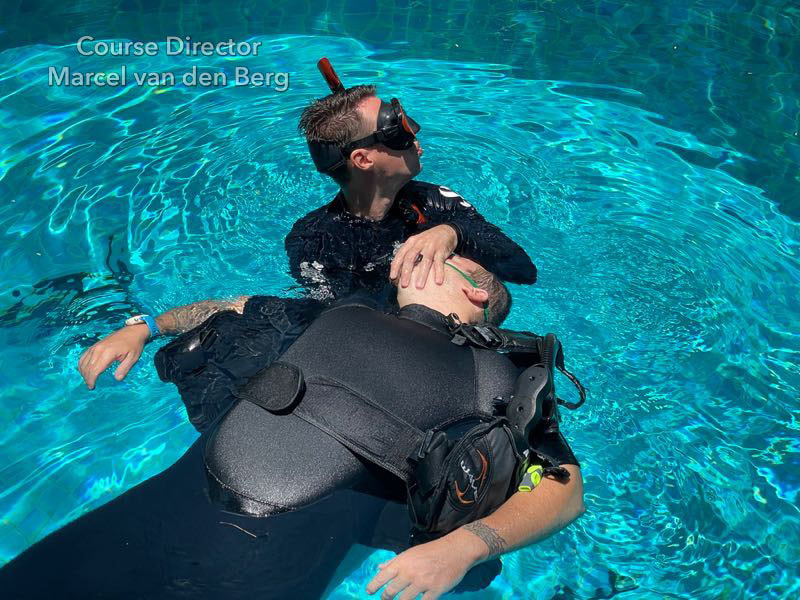
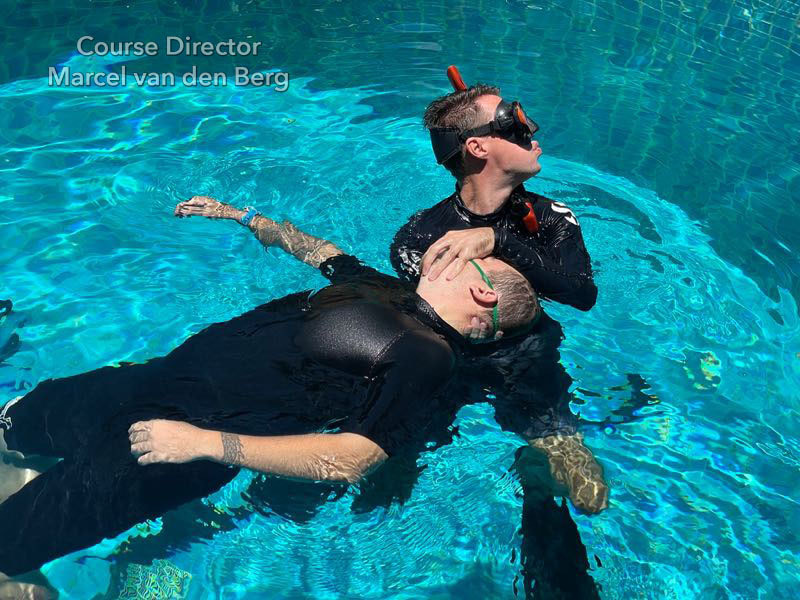
- Place your right hand under the victim's head for support.
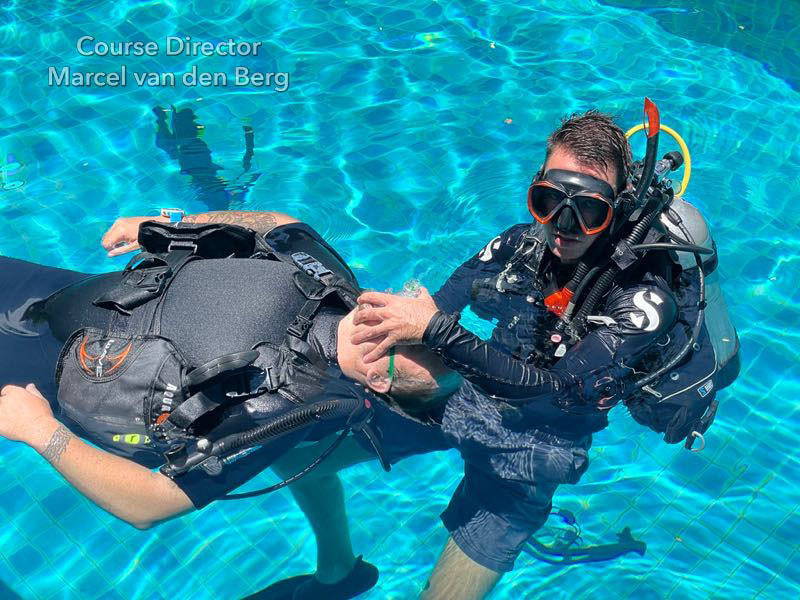
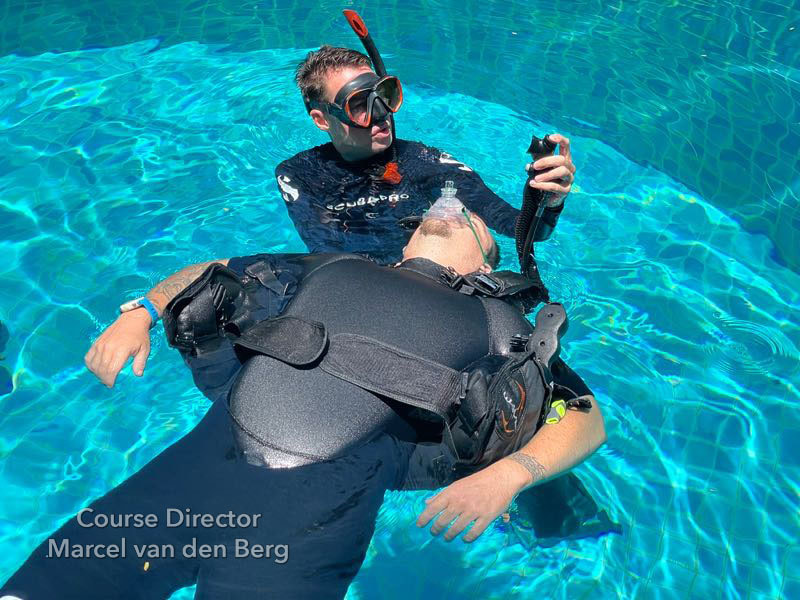
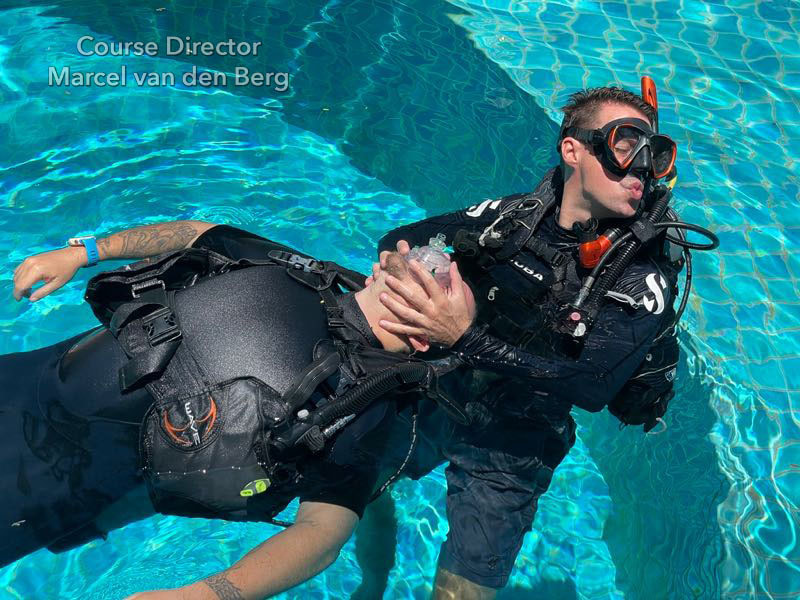
- With your left hand make an EC Clamp seal around the victim's pocket mask, cheek, and left jaw/chin. Then turn the victim's head almost 90 degrees towards you (You can also use 2 hands with 4 fingers. We will discuss them further in this article).
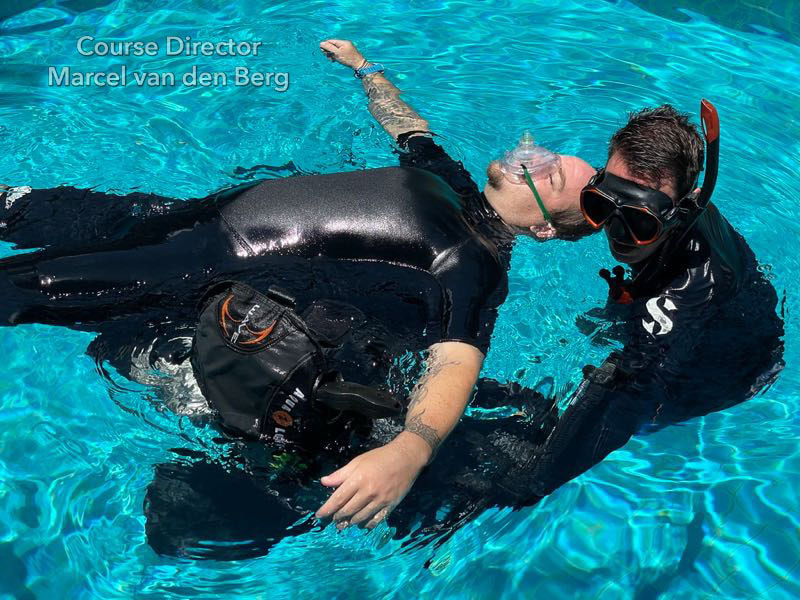
- Administer two simulated full rescue breaths being careful not to make contact with the shell of the RBM or the face of the victim, by blowing out over your left or right shoulder away from the victim's face/pocket mask. Note that you can verbally explain again what you are doing or just simulate it without talking. This is up to you and doesn’t affect PADI Standards. I personally prefer to minimize talking throughout the skill to make it more realistic.
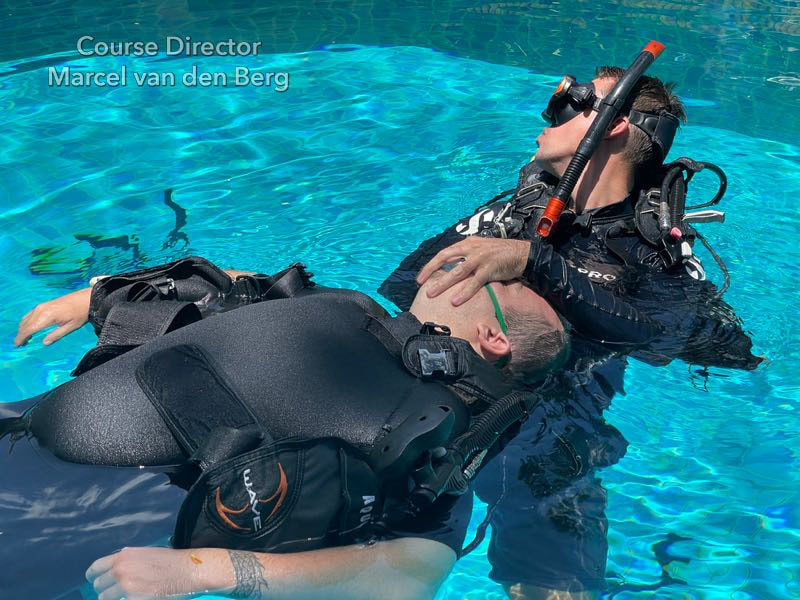
- After administrating 2 breaths you start to swim while towing the victim to the exit point, unclip one shoulder strap, maybe 2, and then simulate this time 1 rescue breath every 4 seconds the same way as in step 16.
- At all times leave the right hand under the victim's neck for support, always keep swimming/towing, resume unclipping all buckles/connections on the BCD, and optionally remove the alternate air source from the victim's BCD. It is important that you should pause removing the victim's BCD to administer 1 rescue breath every 5 seconds. (To not skip this step you can count 5 seconds out loud, in your head or a trick is to just unbuckle 1 buckle and give a breath. All versions are allowed. Choose whatever makes it easy for you to not miss this important step).
- I recommend that once the victim's BCD is fully open (or with only the vector strap attached) to leave it under the victim's back (so he/she can still float on it). Then you can start removing your scuba equipment while still administering 1 rescue breath every 5 seconds.
- Once you unclipped all buckles of your (rescuer) BCD you can remove it fully. Make sure you use your fins to kick yourself up to stay above the surface.
- Give another rescue breath (remember to keep swimming/towing the victim all the time towards the exit point).
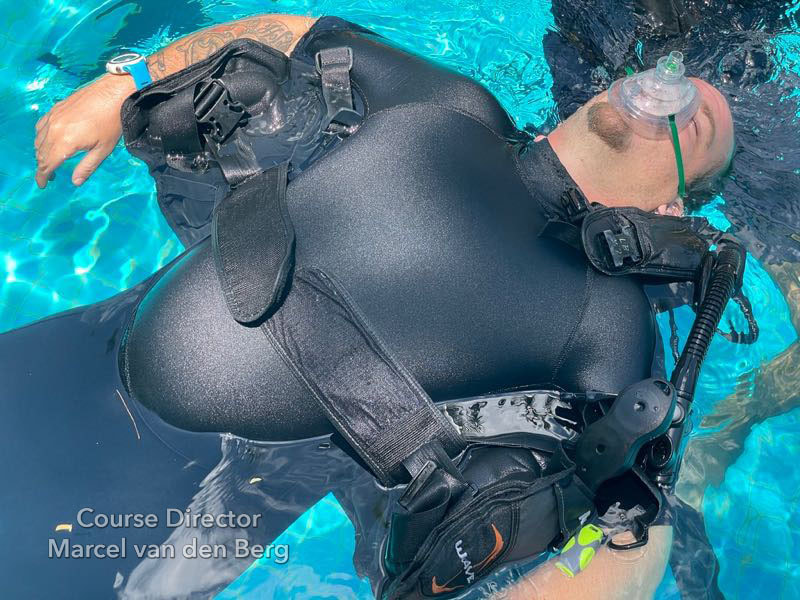
- Deflate the victims BCD a little bit.
- Then remove the victim’s BCD by pushing the first stage down and instantly pull the first stage so the victims BCD easily get removed.
- Throughout the exercise, you have never removed your right hand under the victim's neck, so this will provide support to finish the PADI Rescue Exercise 7 by administrating 2 rescue breaths in the end. You can do this before or after you removed the victim's scuba equipment, that is style and up to you to decide.
You have now completed the PADI Rescue Exercise 7 according to the new Covid 19 Guidelines.
What has changed in performing the Rescue Exercise 7 according to the Covid 19 Guidelines?
According to the PADI update, you should commence rescue as normal with the exception that the victim’s RBM (Pocket Mask) should be on the rescuer’s wrist or some location known and easily accessible to the rescuer.
There is no change to the setup of the skill or the way the rescue is performed up until the point the rescuer makes physical contact with the victim. From that point forward the rescuer is to;
These are the changes from the normal pre-covid style to the new post-covid style. Keep reading below for the in-depth step-by-step explanation of how to perform the PADI Rescue Exercise 7 Covid 19 Update from the beginning to the end.
- Avoid making contact with the head of the victim during the check for responsiveness.
- Turn victim to face-up position by gripping hands or wrists and rolling.
- Establish victim and rescuer positive buoyancy by removing weights and partially inflating the BCD with the LPI.
- Remove victim's regulator by pulling on the second stage hose, avoiding contact with second stage body, Rescuer keeps regulator in place.
- Remove victim’s diving mask, immediately replacing it with victim’s RBM (Pocket Mask) ensuring it covers mouth and nose.
- Rescuer removes regulator and simulates removal of their own mask, whilst keeping the mask in place throughout the exercise.
- Avoid contact with the airway of the victim or the RBM during the breathing check. The rescuer should adopt a position which, with a small adjustment, would allow an effective breathing check to be conducted and verbally describe the actual correct position that they would adopt for a proper breathing check. NB: Examiner should determine whether the breathing check could be effectively administered from the position adopted by the rescuer, together with the rescuer’s verbal description.
- Administer two simulated full rescue breaths being careful not to make contact with the shell of the RBM or the face of the victim. The rescuer should adopt a position which, with a small adjustment, would allow effective rescue breaths to be administered and verbally describe the actual correct position they would adopt to administer an effective rescue breath. NB: Examiner should determine whether rescue breaths could be effectively administered from the position adopted by the rescuer together with the rescuer’s verbal description.
- Administer one simulated rescue breath every 5 seconds adopting the same technique as in 8 above whilst beginning to remove scuba equipment from both victim and rescuer.
- Complete rescue as usual until complete equipment removal from both victim and rescuer giving a simulated rescue breath every five seconds.
These are the changes from the normal pre-covid style to the new post-covid style. Keep reading below for the in-depth step-by-step explanation of how to perform the PADI Rescue Exercise 7 Covid 19 Update from the beginning to the end.
PADI Rescue Exercise 7 COVID 19 Update Tips
Here are my best Tips to Conduct the PADI Rescue Exercise 7 Covid 19 Update:
- Do everything slowly in a calm manner. Remember that you are simulating/demonstrating the PADI Rescue Exercise 7 skill. But even in real life, you should not perform any step too quickly. I know that your gut tells you to do it super quick as someone's life is in danger. However, we have found out that when you perform the steps too quickly, you rush, which leads to making unnecessary mistakes and getting stuck with removing the scuba equipment. This in turn leads to extra delay’s which can make you even be slower, than when you just stayed calm and performed the PADI Rescue Exercise 7 slowly. My favorite quote, in this case, is: “Slow is Smooth and Smooth is fast”
- Make sure you have an equipment handler to give the weight system when you perform this skill in deep open water or if you don’t want to damage the bottom floor of the swimming pool.
- Try to teach the same order/style to your Rescue, Divemaster, and IDC students/candidates. This ensures consistency, efficiency, reduces confusion in students, and greatly helps other PADI instructors/course directors down the line. It also ensures the highest scores on the PADI IE and is very efficient for memorizing the PADI Rescue Exercise 7 in the unlikely event you need to perform this in real life. Yes, there are different styles on how you can teach this, but we recommend sticking with the style PADI recommends.
- Should I count out loud or not? I prefer to teach and perform the skill with no counting out loud as it feels a bit unrealistic. However, lots of students, Dive Instructors, and Course Directors prefer this, to make sure that the important step of administrating a rescue breath every 5 seconds does not get skipped. In the end, it does not manner if you count outlaid or not, what matters is that you don’t forget to administrate the 1 rescue breath every 5 seconds. So choose whatever makes you feel comfortable.
- Do NOT remove your right hand under the victim's neck once you placed it throughout the entire exercise.
- Remember to keep swimming/pulling towards the exit point. During the PADI IDC course and the PADI IE, you usually swim in a circle around the PADI Course Director / Examiner to simulate you moving towards the exit point. This can be different depending on the location, Course Director, and/or Examiner.
- Did I mentioned already “Slow is Smooth and Smooth is fast”?
- To simulate realism try to picture that this is a real-life scenario. Don’t just do the steps like a robot, try to care about your victim, and the whole skill performance will look and feel so much better. This also prevents silly mistakes. Trust me on this one.
- Make sure you have a proper seal with your hands around the mask and the face of the victim.
- Finally, did I mentioned “Slow is Smooth and Smooth is fast” already?
Hand Position PADI Rescue Exercise 7
You can choose what hand position you prefer for the PADI rescue Exercise 7. The 2 best hand positions for a good seal are the EC Clamp Seal and the 4 finger pocket mask seal:
Try to conduct the PADI Rescue Exercise 7 in the same style on all PADI courses.
There are different styles on how to perform this skill. On the Instructor Examination (IE) PADI evaluates the PADI Rescue Exercise 7 according to the COVID 19 Guidelines. Teaching the same style during the PADI Rescue course, Divemaster course, and IDC Course will greatly help the students to complete each performance requirement and pass the IE. Performing the PADI Rescue Exercise 7 COVID 19 Update Guidelines also ensures the best way to increase survivability in the unlikely event of a real-life unresponsive non-breathing diver at the surface.
Final word
I hope that this helped you understand the PADI Rescue Exercise 7 according to the Covid 19 Guidelines changes. You can use this information to teach the PADI Rescue Diver, Divemaster, and IDC Course as a Diving Instructor or you can use this information if you are a PADI Rescue Diver, Divemaster or IDC Candidate/Student.
Learn more about the PADI IDC Skill Circuit here
The PADI Rescue Exercise 7 COVID 19 Guidelines are not hard, just perform it in a slow and controlled manner. The faster you are the more likely you will make mistakes. PADI takes this skill very seriously, but if you perform this skill the way I described you will not only pass your Rescue Diver and Divemaster Course, but you will receive full scores on your PADI IE evaluated by a PADI Examiner.
Finally, I would like to thank the PADI Instructor Development team for all the great tips and help for this article.
I wish you all best of success with the PADI Rescue Exercise 7 COVID 19 Update, and one more time remember: “Slow is Smooth and Smooth is fast”.
Would you like to become a Diving Instructor and do you want me to teach you the PADI IDC Course? Then check out my website for more information
|
|
|
|
Marcel van den Berg
PADI Platinum Course Director
PADI Platinum Course Director
SCUBA DIVING TIPS
Privacy Policy
Disclaimer
As an Amazon Associate I earn from qualifying purchases.
All content on this website and URL are owned by Sairee Cottage Diving PADI 5-Star IDC Center S-36452
Copyright 2017 - 2022 | All Rights Reserved
Disclaimer
As an Amazon Associate I earn from qualifying purchases.
All content on this website and URL are owned by Sairee Cottage Diving PADI 5-Star IDC Center S-36452
Copyright 2017 - 2022 | All Rights Reserved

