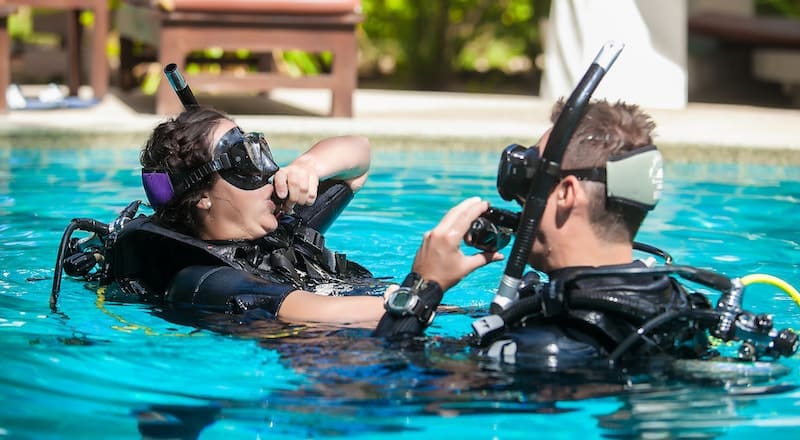
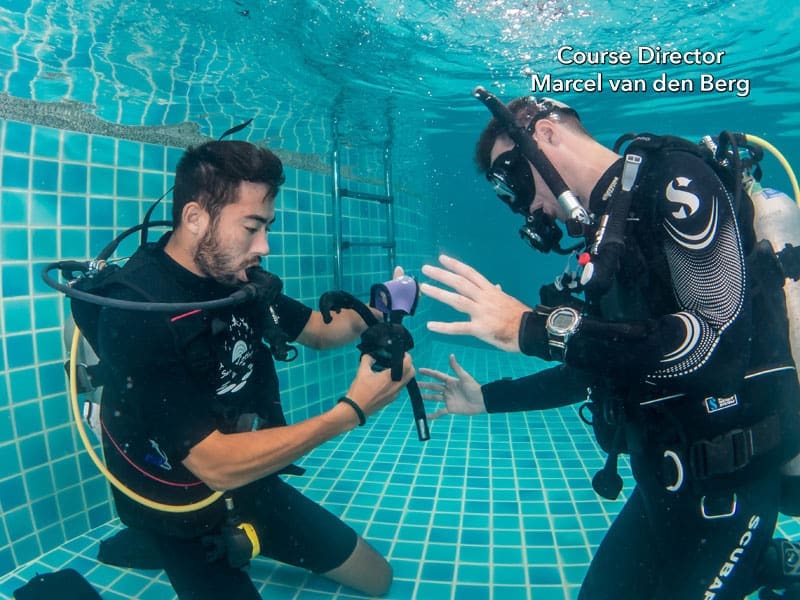
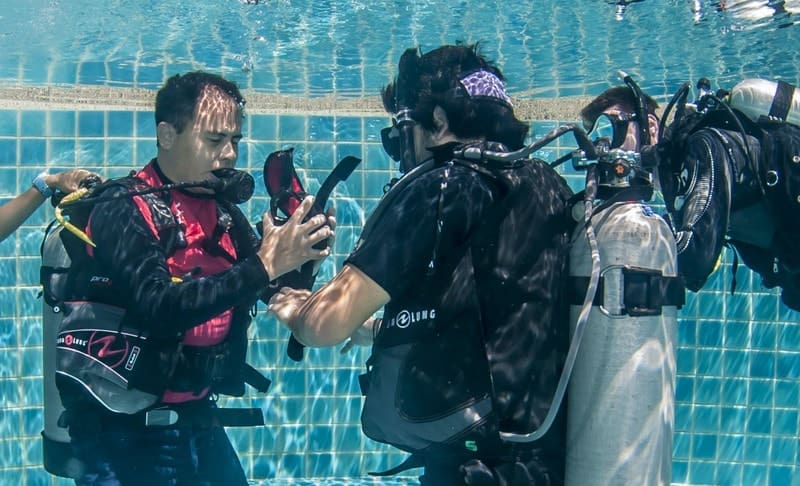
Do you struggle with Mask Clearing? Then try No Mask Breathing at the surface first! No Mask Breathing is an amazing trick that can help you later perform any scuba mask clearing skills more easier.
No Mask Breathing at the Surface
This is an old school trick that many diving instructors use and it works fantastically. At the very beginning of the confined open water or scuba diving pool session, have student divers wear their diving masks around their necks and breathe in shallow water from their regulators with just their faces in the water. This is best to do before you start the confined dive briefing so students don’t see it as a difficult skill, but just a fun activity.
Tip for No Mask Breathing at the Surface
My tip is to not relate this No Mask Breathing on the Surface to the mask removal and replacement skill or any other another mask skills that you will be teaching soon. Just say it’s to get comfortable breathing through the regulator. Using the No Mask Breathing on the Surface technique it is very easy to recognise if someone is breathing through their nose as they will instantly stand up. If you already used my first tip then you already have selected the potential problem students, I advise you to stay close to them as that lowers their fear-levels significantly.
If someone does stand up after breathing some water up the nose, then wave it off with a friendly laugh and get them to repeat it. Do this quickly, as waiting too long or talking too much about it will only put the fear into their minds. Once the brain records something as scary it will be much harder to overcome.
If a diving student keeps having a hard time just breathing through their mouths instead of their nose, then I recommend you hold their shoulders gently and close their nose for them for around 45 seconds and then slowly let go of the nose while still holding their shoulder to reassure them. It is very important that your scuba diving student keeps their ears above the water to be able to listen to your advice. Giving advice with a gentle and calming voice while performing No Mask Breathing on the Surface will work fantastically as it helps relax the student.
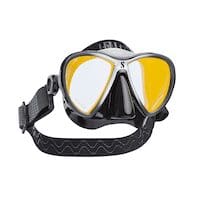
Best Scuba Mask to have
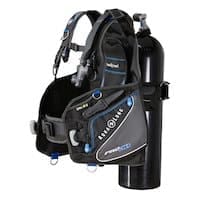
Many dive shops will include a free scuba mask in your scuba diving package, but we highly recommend you to get your own scuba mask as it can create a much better seal. Here we made a selection for you for the best scuba mask own:
How to check your buoyancy and weight distribution at the surface for the PADI Open Water Diver Course is easy. Doing a good buoyancy check scuba is important to make sure that you enjoy your dive better. Having great buoyancy helps to stay of the bottom, not damage aquatic life, is better for your air consumption and so much more.
Buoyancy control has a lot to do with having the right weight distribution. By performing this padi buoyancy check you can easily find out if you have this right buoyancy and weights.
PADI Buoyancy Check steps
1. Make sure your have your scuba mask on your face
2. Put your regulator in your mouth
3. At the surface deflate your BCD fully, while holding a full breath (holding your breath at the surface is ok, make sure you NEVER do this underwater)
4. While holding a full breath, with a deflated BCD, you should float at eye level
It is important to do a buoyancy check before every dive. Just remember that you have a full scuba cylinder that is more heavier before the dive than after the dive. It also depends if you are diving on a steel tank or Aluminum tank. Some people prefer to do a second buoyancy check after the scuba dive as they say it is better on an almost empty cylinder. Try different styles yourself to see what is best.
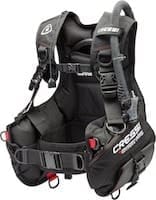
Good buoyancy control is all about owning the right BCD and having the right amount of weights. Check out this Scuba BCD and weights that we recommend you to invest in improve your buoyancy:
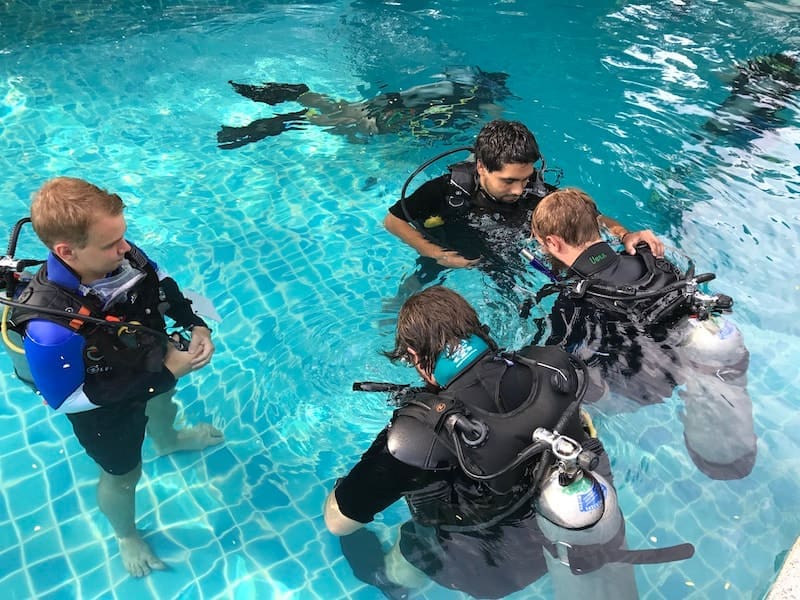
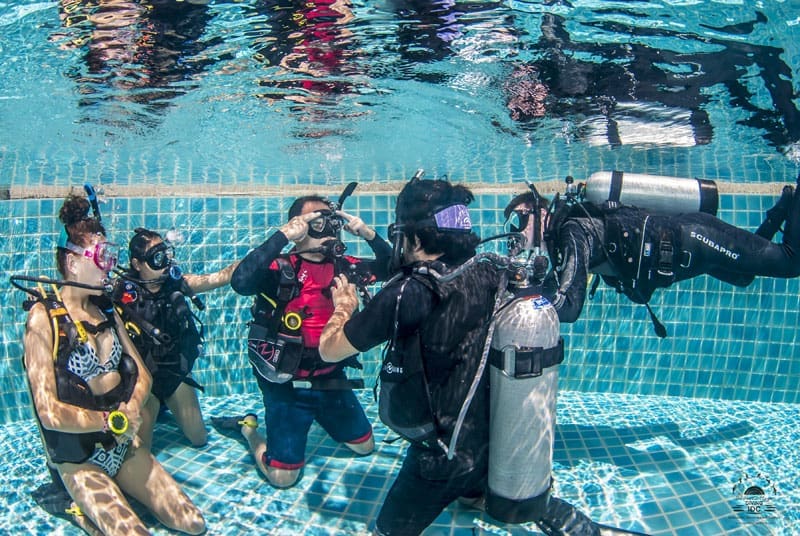
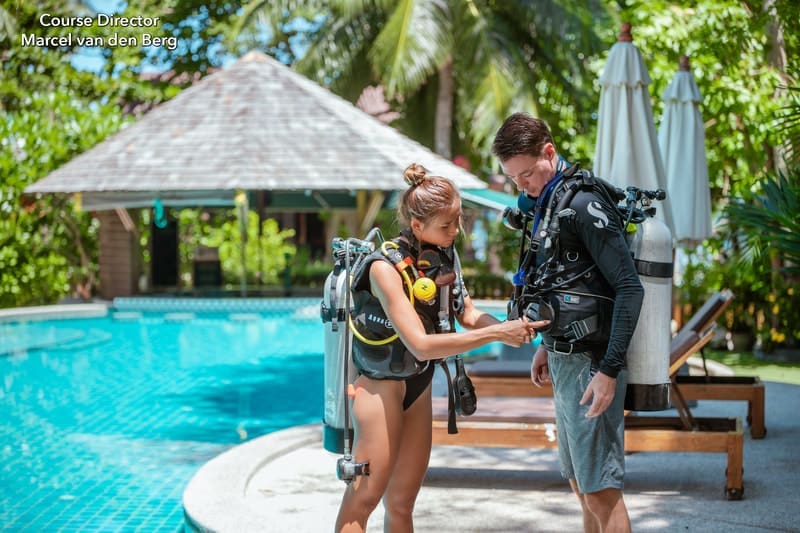
PADI Confined Water Dive 1 is the first time for most people to experience scuba diving. PADI Confined Water Dive 1 is part of the PADI Open Water Diver Course. In total there are 5 separate PADI Confined Water Dives that you can also combine (in order) if you want to.
PADI Confined Water Dive 1
Combine or Not Combine PADI Confined Water Dives
Combining or not combining Confined Water Dives depends mostly on the location of where you are doing your PADI Open Water Course. In Europe for example you will in most cases do the PADI Confined Water Dives separately. This is because people work or go to school and they can only do small parts of the Open Water Diver course in the evenings and weekends. In this case you would do PADI Confined Water Dive 1 on a Monday evening, followed by Confined Water Dive 2 on a Friday evening.
In places like Asia for example most people are on holiday and don’t have these time restrictions, so they can combines confined dives to save time and to speed up the course. In Europe an PADI Open Water course can take around 6 weeks compared to Asia where it can be done in 3 to 5 days. Depending on the Dive Instructor the quality is the same, just different schedules.
Do I have to worry about PADI Confined Water Dive 1?
We understand that it is normal to be nervous about your first scuba diving experience. However, we can tell you right now that for most new scuba divers these nerves will go away soon. Scuba Diving and breathing underwater is surprisingly easy, once your mind accepts the new feeling or breathing underwater.
This is the reason for Confined Water, they don’t just trow you in the sea for the first time and ask to do a skill at like 53m of depth. First we practice in the shallow water of confined (pool or open water with pool like conditions) and then when you are comfortable you move slowly to deeper water and repeat some of the scuba skills.
Do I have to neutrally buoyant in confined dive 1 or can I kneel?
This has been a major debate for year between Divemasters and Diving Instructors. We believe it depends a lot on the situation, how many students, your comfort level, confined water dive location and so much more. Please check out this article wrote about Neutrally Buoyant vs Kneeling in Scuba Diving.
Organisation of PADI Confined Water Dive 1
Every PADI Diving Instructor has their own styles and teaches a bit different. But all Dive Instructors need to follow PADI Standards. In the PADI Instructor manual is states that you have to complete all the performance requirements of PADI Confined Water Dive 1 before you move onto Confine Dive 2.
A typical organisation of Confined Dive 1 would that you start with learning how to set up your dive equipment, learn how to do a buddy check, enter the water, practice some surface skills, practice some scuba skills in shallow water, move to deeper water, finish surface skills, exit the water and finally disassemble your dive equipment.
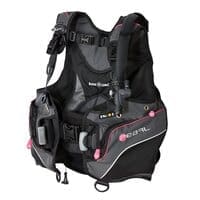
As you are starting out with your first scuba diving experience you have 3 options for dive equipment. You can rent (included in the diving course price), buy a few dive equipment items or buy a full set of dive gear.
What you choose depends mostly on your budget, but one thing is clear. Owning you own dive gear is much better as it is clean, you know all the features, in most cases better serviced, looks better and you don’t have to share. Especially if you are a bit nervous to go scuba diving we highly recommend to purchase your own dive gear.
However, if you budget is low we recommend to add least buy your own scuba mask as that will help you a lot with the mask clearing skills. Below we have selected a set of dive gear and a scuba mask we highly recommend for beginner scuba divers:
Orally Inflate BCD at the Surface can be really important for when your inflator button does not work properly or when you run out of air. In both cases you can still add air into your BCD by Orally Inflating it. You can easily orally inflate your BCD using these steps.
Accidents are very rare in scuba diving, but they can happen. From the few accidents that did happen, there were some cases where scuba divers did not inflate their BCD correctly at the surface. Especially someone is in panic and run out of air they might not think straight to inflate their BCD’s Orally. For this reason it is very important to practice to inflate your BCD orally at the surface skill correctly.
Deflate the BCD, then orally inflate it until positively buoyantIn this Skill video below we explain in an easy way how to orally inflate your BCD at the surface for the PADI Open Water Diver Course:
PADI Orally Inflate BCD at the Surface Skill Steps
Make sure before you start that you locate your BCD hose and know how to press the inflator/deflator button correctly.
1. In water to deep to stand in, start by deflating your BCD fully
2. Make sure you kick up to stay on the surface
3. While kicking, start to orally inflate your BCD
4. When you are fully inflated and established positive buoyancy you finish the skill
It is important to have long, strong fin strokes to easily stay on the surface. Breath deeply into the BCD to minimise the amount of breaths you have to take.
Check out the PADI Orally Inflate the BCD at the Surface video 👇
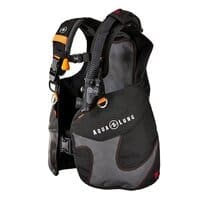
Some BCD’s inflate orally better others. We recommend the Aqualung BCD’s for the best oral inflator hoses. Especially these 3 models are great for orally inflating the BCD:
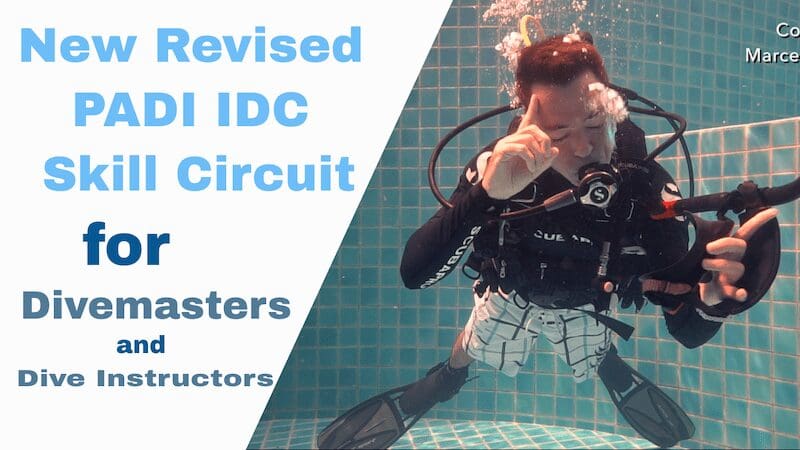
PADI IDC Skills Circuit for the New Revised PADI IDC Course is finally out! We at made this brand new video showing you all the 24 PADI IDC Skills Circuit skills in order.
The new PADI IDC Skills Circuit has been long awaited for by PADI IDC Candidates, Divemasters, DMT’s and Course Directors. Most skills in the PADI IDC Skills Circuit have stayed the same, but some have been replaced with new skills. PADI now recommends to demonstrate the PADI IDC Skills Circuit neutrally buoyant, or at least the PADI Regulator and the Mask Removal Skill.
PADI IDC Skills Circuit – New PADI Revised IDC Course
PADI New IDC Skills Circuit – Skills:
1. Equipment assembly, adjustment, preparation, donning and disassembly [00:00]
* To earn a 5 on this new IDC Skills Circuit, a diver must demonstrate skill while neutrally buoyant in the New Revised IDC Course
Please check out the New IDC Skills Circuit YouTube Video below, you can find individual skills by looking at the starting times described above.
Evaluation Criteria PADI IDC and Divemaster Skills Circuit :
1 – participant unable to perform exercise 2 – exercise performed with significant difficulty or error 3 – exercise performed correctly, though too quickly to adequately exhibit (or illustrate) details of skill 4 – exercise performed correctly and slowly enough to adequately exhibit (or illustrate) details of skill 5 – exercise performed correctly, slowly and with exaggerated movement (appeared “easy”)
You can still demonstrate all the new PADI IDC Skills Circuit on your knees (unless a mobile skill). However, if you want to get full points (a 5.0) on Regulator, Removal and Recovery and the mask removal and replacement skill, then you need to demonstrate those neutrally buoyant. Demonstrating skills neutrally buoyant is growing in popularity. For this we reason we decided to show demonstrating most skills of this new PADI IDC Skills Circuit neutrally Buoyant.
Tips to get the most out of your new PADI IDC Skills Circuit or Divemaster Skill Circuit:
1. Do it Slowly, the slower you demonstrate the new IDC Skill, the easier it is to remember your next step and it also makes you look good. 2. Don’t be a robot! Remember that no-one wants to watch or get’s inspired from a static, boring Divemaster or Diving Instructor. Try to move fluidly. 3. Care about your scuba diving students. During your new PADI IDC Skills Circuit demonstration you should try and look people in the eye’s, smile a bit and make people feel relaxed. 4. Use strong, but friendly scuba diving hand signals during your new PADI IDC Skills Circuit demonstrations. Maybe check out this Scuba Diving Hand Signals here:
To get a 5.0 full points on your PADI Skills Circuit on the New Revised PADI IDC Course you need to demonstrate the Divemaster and IDC Skills exercise performed correctly, slowly and with exaggerated movement. Just remember that your beginner scuba diving students don’t have to do that.
The purpose of this the PADI Mask Removal 1 Minute skill is to feel comfortable breathing with no mask for at least 1 minute while underwater. This makes you focus a lot on just slowly breathing in and out through your mouth instead of your nose. Some new scuba diver worry a bit for this skill, but after all that practice, this skill is more relaxing than scary for most people.
PADI Mask Removal 1 Minute
Steps for the PADI Mask Removal 1 Minute Skill
1. Grab the scuba mask with left hand
2. Remove the scuba mask strap with your right hand
3. Take off the scuba mask and remember to hold onto it
4. Hold it in your hands for 1 minute and breath without your mask
5. A tip is to breath slowly in and out of your mouth only
6. After 1 minute, replace the scuba mask on your face
7. Make sure the the scuba mask strap is high above the ears and no hair in the mask
8. Touch the scuba mask frame with your fingers
9. Breath into your mouth and out of your nose while gently looking up to clear you mask
Tip 1: We recommend that you hold onto your scuba mask during the skill exercise.
Tip 2: Stay calm, relaxed and breath slowly in an out of your mouth when you have the mask off
Tip 3: Don’t worry about keeping track of time. Your PADI Diving Instructor should keep an eye on you and the time and will let you know when you can put your scuba mask back on.
Tip 4: You can keep your eyes open or closed. Many Dive Instructors say that you have to have your eyes open for safety and standards reason. This is not true, some people prefer to keep their eyes closed because of the salt water, swimming pool chlorine or they wear contact lenses. It is really what makes you more comfortable in the end. So you can choose to keep your eyes open or closed while you perform any PADI Mask Clearing Skill.
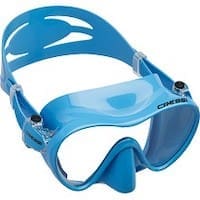
Owning your own Scuba Diving Mask
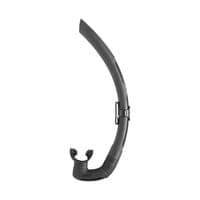
We recommend you to get your own Scuba Diving Mask as it will make your future diving experiences much better. Besides having a much better quality mask, owning your own is also good to get a better seal, feeling more comfortable, better vision and easier to clear from water. We recommend the Mares Liquid Skill Mask the most. Have a look here:
This PADI Open Water Skills List contains a full list of all the scuba dive skills that you can expect during the PADI Open Water Diver Course. To be able to safely enjoy scuba diving you first need to learn some basic skills that can help you underwater to solves problems, this is the Ultimate PADI Open Water Skills List.
Scuba Diving is considered a fairly safe activity and problems rarely occur. If problems do occur during a scuba dive you can in almost all cases easily solve them by knowing these skills from this PADI Open Water Skills List.
Are you new to scuba diving or diving all the time? Then I highly recommend you get a Dive Insurance. It is best to be covered for that unlikely event. I just switched to this DiveAssure and I am so happy with it!
DiveAssure’s annual and short-term DiveSafe plans offer the coverage you need. The DiveSafe plan includes coverage for medical expenses, emergency medical evacuations, hyperbaric treatments and more. Check it out yourself here on the DiveAssure website.
You can learn these PADI Open Water Skills by enrolling in a PADI Open Water Diver Course at any PADI Dive Shop. You can check out the nearest dive shop using the PADI Dive Shop Locator. After you successfully completed the course with a PADI Instructor you receive the PADI Open Water Certification.
Further on this page we explain every skill with video’s, so keep reading 👇
Are the skills from this PADI Open Water Skills List hard to learn?
A lot of people worry that the PADI Open Water Skills are difficult to learn. Well, I can tell you right now please don’t worry. The PADI Open Water Skills are surprisingly easy to learn and most people enjoy practicing them a lot. Best of all you get rewarded with a scuba diving certification after completing all the skills.
Tips to Complete the PADI Open Water Skills List
Practicing the scuba skills from this list can be fun, but sometimes also stressful. Every person is different and it depends on your comfort level and motor skills how easy completing the PADI Open Water Diver Skills will be.
Tip 1: Stay relaxed and calm. Enjoying scuba diving and being underwater mainly depends on you breathing in a relaxed manner through your scuba regulator. We recommend you to breath in slowly and deeply at all times. This makes you feel really relaxed and then you can focus much more easier on completing the Open Water Skills.
Tip 2: Choose a dive shop and PADI Dive Instructor that you feel comfortable with. In every industry we have good and bad dive instructors and the same counts for the dive industry. Some diving instructors are amazing while other, just rush and only think about money. Also choose a PADI Dive Shop with good facilities to learn your open water diver course skills with. Finding a good dive shop and diving instructor is not always easy, so please check this article with great tips on how to find the best dive shop.
Tip 3: Don’t rush! You can easily complete all the PADI Open Water Skills within a few days, but if you feel uncomfortable then just ask for more time or choose a dive shop that has a more flexible schedule.
Tip 4: Choose a small or larger group depending on what you prefer. You cannot always choose the PADI Open Water Course group size, but if you can then think about what you feel more comfortable with before starting the course. Small groups can be great for personal attention and more time to practice, while larger open water groups can be really fun and you will be able to learn from each other.
Tip 5:Clearing your scuba mask is not so hard if you stay calm and relax. Just remember that you breath into your mouth and then gently out of your nose while looking up. A lot of people overthink this, get stressed and then breath in with their nose. This is not got you just remember to breath out of your nose.
Please check some video’s below on how to do the mask clearing skill easy. Also it really helps that you have your own mask as the latex from the scuba mask will form around your face. If you worry the mask clearing skill, I highly recommend you to get a MARES Liquid skin mask as that is very soft latex for an amazing seal. Check it out on Amazon:
Tip 6: Try to have fun and don’t overthink your diving skills. That is why we made this PADI Open Water Diver Skills list to prepare you for what is to come. Hopefully you can see that the skills can be easily done and don’t forget that you are learning these scuba diving skills to be able to enjoy an incredible underwater environment with amazing aquatic life!
You will find the full PADI Oper Water Diver Course List below. In this PADI Open Water Skills list we explained the steps on how to perform the skills and each skill with have a YouTube Video related to the scuba diving skill.
1. Inspect the tank, visual inspection sticker and the hydrostatic test date 2. Check the O-Ring 3. Open the tank valve and give a little burst to clean the valve 4. Put the BCD correctly over your scuba cylinder 5. At least 4 fingers from the top 6. Attach the Safety Strap 7. Make sure everything is attached correctly 8. Grab your regulator and unscrew the dust cap from the first stage 9. Place the first stage over the valve 10. Gently screw the first stage on the tank valve (Only 3 finger tight) 11. Attach the low-pressure inflator hose to the BCD 12. Attach the alternate air source 13. Streamline everything 14. Turn the SPG glass away from anyone 15. Slowly open up the tank valve 16. You finished assemble the dive equipment
After finishing Assembling the Dive Equipment, you should do a full dive equipment check up:
COULDN’T ADD BUY ME A COFFEE LINK
1. Fully inflate the BCD to check for leaks and the LPI 2. Orally Inflate the BCD 3. Purge, smell and breath through the second stage, while checking the SPG 4. Check the alternate air source 5. Make sure the dive equipment is streamlined 6. Gently place your equipment on its side and that is How To Assemble Dive Equipment
Helping your diving buddy into his dive equipment the correct way is important so you minimise the risk of a back injury.
PADI Buddy Check on this PADI Open Water Skills List
Steps for the PADI Buddy Check Scuba Diving BWRAF:
1. First we need to test each others BCD’s 2. Using the LPI button, start inflating your buddy’s BCD (you can do this at the same time to save some time 3. Once you are sure the power inflator works and your buddy’s BCD is not leaking, then deflate the BCD. 4. Next step for the Buddy Check in Scuba Diving is to Orally inflate each others BCD, this time a few breaths will be enough as you already tested for leaks before. 5. After checking the BCD, check the weight system, making sure nothing is entangled, streamlined, no weights are missing and that the weight system quick release mechanisms works properly 6. Then check the releases on your buddy’s dive equipment, no entanglement, all releases secure, especially check your Buddy’s Cylinder Band / Strap 7. After that, the most important part of the buddy check scuba diving is checking your buddy’s Air 8. First make your you Buddy’s Air is fully open (Double check which way is open and close on the side of the turn valve) 9. After you both checked each others tank valve, grab your regulators and purge, smell and breath from them while looking at your SPG (When you breath the pressure gauge needle should NOT move) 10. Then check the alternate air source on each other for the Buddy Check 11. Finally the Final OK in the Buddy Check, which means fully check all the dive equipment, do we have fins, a scuba mask, snorkel, are all hoses streamlined… If all good then give the Final OK to your Buddy and then we are ready to Scuba Dive!
2. Stand on the side of the pool or boat, with your toes on the side and your fins going over
3. Put your left hand on your weight belt and hold the buckle (if you have a weight belt)
4. Make sure you have your scuba mask on you face and your regulator in your mouth
5. With your right hand hold your regulator and mask in place (regulator in the palm of your hand and 2 fingers on your scuba mask
6. Look down and check if nothing is in the water and you are clear to enter
7. When everything is ok, look straight forward to the horizon
8. Make a big step (not jump) forward (Giant Stride) into the water
9. When you surface keep holding the regulator into your mouth and you scuba mask on your face
10. first fully inflate the BCD
11. Then you can take out your regulator (remember mouth piece down)
12. Switch to your snorkel
13. Give an ok signal to anyone that looked after you entering the water
14. Swim away so other scuba divers can also enter the waterLearn more about the Giant Stride
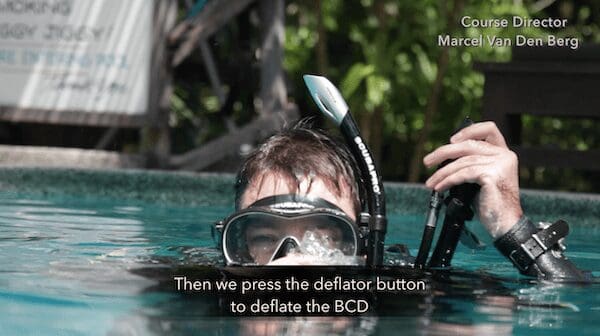
PADI Inflate/Deflate BCD at the Surface
How to perform the PADI BCD Inflate and Deflate skill:
1. Make sure you have your mask on and your snorkel in your mouth 2. Fully inflate your BCD by pushing the inflator button until air releases from your BCD 3. Lean Backwards 4. Make sure that you are completely positively buoyant 5. Float a bit 6. Stand back up make sure you are completely vertical 7. Stretch that deflator hose as high as you can 8. Fully deflate your BCD 9. Use your right hand to squeeze the last remaining air out of your BCD 10. Simulate that you are going down
1. Make sure your have your scuba mask on your face 2. Put your regulator in your mouth 3. At the surface deflate your BCD fully, while holding a full breath (holding your breath at the surface is ok, make sure you NEVER do this underwater) 4. While holding a full breath, with a deflated BCD, you should float at eye level
Do you struggle with Mask Clearing? Then try No Mask Breathing at the surface first! No Mask Breathing is an amazing trick that can help you later perform any scuba mask clearing skills more easier. This is not officially part of the PADI Open Water Skills list, but is a very affective way to learn how to breath through your scuba regulator.
1. Make sure your BCD is fully inflated 2. Have your scuba mask on and your snorkel in 3. Lay on your belly face down 4. Look forward and breath slowly though the snorkel 5. Start swimming by kicking your legs 6. Stay streamlined and only use your legs to swim while snorkeling
1. Signal to your buddy: OK to go Down 2. Orientate yourself and look underwater 3. Switch from your snorkel to your regulator 4. Check your dive computer / watch 5. Equalise your ears and deflate your BCD 6. Slowly descent, equalize your ears and stay close to your buddy 7. Make sure you look down and add some air to the BCD to achieve neutral buoyancy and don’t touch the bottom during the descent
1. For the first method take a deep breath 2. Take out your regulator 3. Remember to have the mouth piece down and blow bubbles 4. Keep holding onto the regulator 5. Put the regulator back in your mouth 6. Clear it by exhaling forcefully (Like a spit) 7. For the second method take another deep breath 8. Remember to have the mouth piece down and blow bubbles 9. Keep holding onto the regulator 10. Use your tongue as a “splash guard” 11. Clear the regulator by gently pressing the purge button
1. Take a deep breath in 2. Take out the regulator, have the mouth piece down and blow bubbles 3. Move your hand to the right and drop the regulator behind the shoulder 4. Lean right, stretch your right arm, touch your knee, the tank and slide your arm in a sweep forward 5. Catch your regulator on your right arm 6. Recover the regulator, make sure it’s the right way up 7. Replace the regulator in your mouth 8. Clear it either way you like it, by exhaling or purging 9. Resume breathing
1. Remain calm and think that it will feel the same as putting your face under the shower 2. Believe that this skill is easy, and it is in a way. Into your mouth and out of your nose 3. Put water in the scuba mask from the bottom and not the top of the scuba mask 4. Put water just under eye level 5. Try NOT to look down, like many scuba dive instructors teach, just look forward 6. Important: Just tilt your head SLIGHTLY up, 7. Take a relaxed and MOST important slow breath into your mouth 8. Exhale through your nose, while again just slightly looking up 9. If there is still some water in the scuba mask, then relax and repeat breathing out of your nose until the mask is clear.
PADI Alternate Air Source Stationary for 30 Seconds
Steps for the PADI Alternate Air Source use Stationary Skill:
1. Signal your buddy that you are out of air 2. Your buddy will now present his/her alternate air source 3. Take a breath and switch to the alternate air source (don’t forget to blow bubbles) 4. clear the alternate air source anyway you like 5. Stay close to your buddy by holding each other with a roman arm shake 6. Signal: OK and UP to each other 7. Elevate the LPI and press the deflator button 8. Breath comfortably though the alternate air source for at least 30 seconds 9. Simulate and ascent by moving a bit (PADI Dance), but stay stationary underwater
How to perform the PADI Swim Over a Sensitive Bottom skill:
1. It’s important that you are in perfect trim 2. Make sure you are completely streamlined with your equipment 3. You can put your arms in front of you and have them close together 4. To swim around you can use the scissor kick or the frog kick, we recommend the frog kick if you can 5. Throughout the swim make sure that you check that you don’t touch the bottom accidentally 6. Don’t touch the surface 7. Keep checking if your equipment is still streamlined 8. Keep swimming nicely and slowly 9. Keep swimming around the pool
PADI Air Check
This Air Check Scuba Diving Skill video explains in an easy way how to check your air while scuba diving for the PADI Open Water Diver Course.
PADI Skin Dive
The PADI Skin Dive is an easy skill to learn and greatly helps people confidence, swimming and equalising techniques without Scuba Equipment – Skin Diving is the same as Free Diving.
PADI Snorkel to Regulator Exchange
Steps for the PADI Snorkel to Regulator Exchange Skill:
1. Stay fully buoyant on the surface 2. With your face in the water, please take a few breaths into your snorkel 3. Then take out your snorkel, blow bubbles and switch to your regulator (clear it anyway you like) 4. After a few breaths through you regulator, take a deep breath and switch back to your snorkel 5. Clear the snorkel by using the blast method 6. Take a few breath through your snorkel
PADI Fully Flooded Mask
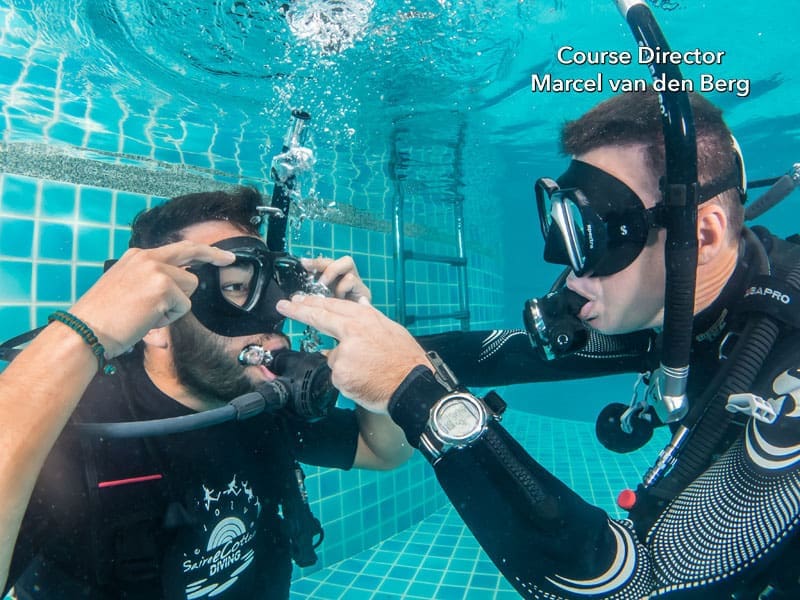
Steps for the How to clear a scuba mask underwater skill:
1. Fully flood the scuba mask by pulling down the top of the frame 2. Touch the top of the frame with your fingers 3. Breath into your mouth 4. Breath out of your nose while gently looking up 5. If there is still a bit of water in the mask then repeat the previous steps 6. Until the scuba mask is clear from water
How to perform the PADI Mask Removal and Replacement skill:
1. Take off your mask with the left hand 2. With the right hand take off the strap 3. Then take off the mask and snorkel from your face 4. Make sure that you hold onto it, and you don’t drop it 5. Then make sure the snorkel is on the side and feel the nose pocket So the mask is not upside down 6. Move the strap away and take your hairs out of the away 7. First, put the mask on your face 8. Then put the strap all around and make sure it is not twisted and the strap is high above your ears 9. Double-check that everything is OK, 10. With two fingers touch the top frame of your mask 11. Breath in through your mouth and out through your nose while gently looking up until all the water is removed from the mask.
This Air Depletion and Signal Out of Air Skill video explains in an easy way how to recognise running out of air and how to deal with that situation for the PADI Open Water Diver Course.
1. Grab the scuba mask with left hand 2. Remove the scuba mask strap with your right hand 3. Take off the scuba mask and remember to hold onto it 4. Hold it in your hands for 1 minute and breath without your mask 5. A tip is to breath slowly in and out of your mouth only 6. After 1 minute, replace the scuba mask on your face 7. Make sure the the scuba mask strap is high above the ears and no hair in the mask 8. Touch the scuba mask frame with your fingers 9. Breath into your mouth and out of your nose while gently looking up to clear you mask
This is how you perform the Exit Using the Ladder skill:
1. First of all grab the ladder with two hands 2. Then put your two feet on the ladder 3. Make sure that everything is clear around you 4. And especially no one is behind you 5. Then slowly pull yourself up 6. Step for step 7. With all your equipment on and climb out of the pool 8. Grab your fins
PADI Cramp Release at the Surface (with a buddy)
Steps for the PADI Cramp Release Diving at the Surface Skill:
1. At the surface Signal to your buddy that you have a cramp in your leg 2. Grab (or let your scuba diving buddy grab) the top of your fin 3. Stretch your leg, while pulling back the top of your fin 5. You can also massage your calf 4. Balance yourself with your other arm
Fin Pivot LPI
Steps for the PADI Fin Pivot Skill:
1. Make sure you are fully deflated 2. Lay flat on your belly 3. Spread your legs and try to stretch them 4. Inhale and see if you start to rise 5. If not than add a little bit of air into your BCD by using the inflator button of your LPI 6. Take another deep breath (if you still don’t rise, then repeat the steps before) 7. When you inhale you should start to rise 8. When you start rising start exhaling as there is a delay in buoyancy and the size of your lungs 9. try not to kick, scull and do “push-ups” with your hands 10. Be streamlined and only rise and fall using your lungs
Steps for the PADI Cramp Release Scuba Diving Skill:
1. Signal to your buddy that you have a cramp in your leg 2. Grab (or let your scuba diving buddy grab) the top of your fin 3. Stretch your leg, while pulling back the top of your fin 5. You can also massage your calf 4. Balance yourself with your other arm
Hover for 30 seconds
Steps for the PADI Hover Scuba Diving Skill:
1. Make sure you are fully deflated 2. Breath in and see if you start to rise 3. If not, add a little bit of air into the BCD by using the LPI (Repeat if needed) 4. Breath in and you start to rise 5. While breathing in, start slowly breathing out to slow down the rise 6. When you start to sink , start slowly breathing in (it takes time for the longs to adjust buoyancy) 7. By using normal breathing try to stay level for at least 30 seconds 8. After 30 seconds deflate the BCD
Alternate Air Source Swim for 1 Minute (with a buddy)
Steps for the PADI Alternate Air Source Swim for 1 Minute Skill:
1. Signal your buddy that you are out of air 2. Your buddy will now present his/her alternate air source 3. Take a breath and switch to the alternate air source (don’t forget to blow bubbles) 4. clear the alternate air source anyway you like 5. Stay close to your buddy by holding each other with a roman arm shake 6. Swim for at least 1 minute 7. After 1 minute swimming on the alternate air source signal to your buddy: OK and UP to each other 8. Elevate the LPI and press the deflator button
CESA – Controlled Emergency Swimming Ascent
How to perform the PADI CESA Confined Water skill:
1. Start the CESA by being neutrally buoyant 2. Simulate the ascent position, with your right above your head and your left hand on the deflator button 3. Take a couple of deep breaths 4. Whenever you are ready, take a final breath in and start swimming slowly while exhaling continuously by making an aaaaaaaaaaah sound 5. Keep swimming slowly with-out touching the bottom or the surface 7. Keep exhaling making that continuous sound 8. Swim for at least 9 meters until the CESA is Finished
1. Approach the tired diver and ask him/her if they are ok and what happened 2. When they response: “I’m Tired”, ask the to inflate their BCD fully and put the mask and snorkel in 3. Explain to the tired diver that you will tow him/her back to the boat or shore 4. Grab their tank valve / first stage 5. Start swimming on your back 6. While swimming relax the tired diver by talking to them
Scuba Unit Removal & Replacement at the Surface
Steps for the PADI Scuba Unit Removal and Replacement at the Surface Skill:
1. Make sure you are fully inflated 2. Unclip the chest strap 3. Release the shoulder straps 4. Unclip the BCD / Scuba Unit buckle and remove the velcro 5. Take off the BCD / Scuba Unit 6. Remember to hold onto the BCD / Scuba Unit 7. Put back on the BCD / Scuba Unit – A trick is to sit on it 8. Secure the velcro, belly clip, shoulder releases and the chest strap 9. Double check if all your equipment is streamlined
Hover Orally Inflate for 1 Minute
Steps for the PADI Hover and Orally Inflate the BCD for One Minute Skill:
1. Make sure you are fully deflated 2. With your left hand grab the low pressure inflator hose 3. Take a deep breath into your regulator 4. Remove your regulator with your right hand (remember to hold onto it) 5. Make sure that you blow bubbles 6. With your left hand press the LPI deflate button and gently blow some air into the BCD 7. Replace your regulator into your mouth and clear anyway you like it 8. Take a deep breath in and see if you rise (if not the repeat step 1 to 7) 9. When you rise start to exhale to slow down the ascent 10. When you go down start to inhale to slow your sinking 11. Try to stay neutrally buoyant and hover on normal breathing 12. Don’t kick or scull, be streamlined 13. After 1 minute hovering, deflate the BCD 14. Done with Hovering
Steps for the PADI How To Breath From a Free Flowing Regulator Skill:
1. Tilt your head to the right
2. Take a few breaths
3. When comfortable, take out your regulator
4. Leave half the mouth piece in your mouth
5. Leave the other side of the mouth piece resting on your left cheek
6. Gently purge the regulators purge button
7. Gently breath in and out from the regulator
8. After 30 seconds replace your regulator and resume normal breathingLearn more about Free Flowing Regulator
No Mask Swim
This is how you perform the PADI No Mask Mask Swim:
1. Begin by taking your mask off in neutral buoyancy. 2. Remember to hold onto the mask and then gently start swimming forward. 3. You can use your hand along the bottom to guide yourself and make sure you go in the right direction. 4. Make sure that you are neutrally buoyant and only use your hand to guide you. 5. Remember, don’t drop your mask. 6. If you feel comfortable without your hand to guide you, you can just swim without touching the bottom in neutral buoyancy. 7. Remember to keep holding onto the mask and swim for at least 15 meters. 8. After the swim, be ready to put the mask back on. 9. Make sure that the nose pocket is down, snorkel on the side and your hair out of the way. 10. Put the mask on first and then the strap. 11. Make sure the strap is not twisted and that it is high above your ears. 12. When everything is in order, place two fingers on the top frame of your mask. 13. Breath in through your mouth and out through your nose while looking up until all the water is cleared from your mask.
Emergency Weight Belt Drop
Steps for the PADI Emergency Weight Belt Drop Skill:
1. Deflate your BCD
2. While deflating your BCD start kicking your legs
3. Once your are fully deflated, while still kick your legs remove the weight belt
1. Make sure you are fully deflated 2. Unclip the weight belt 3. Remove the weight belt 4. Make sure you hold onto the weight belt 5. Check if the weight belt is not twisted 6. Replace the weight belt 7. Make sure nothing is entangled/stuck in the weight belt 8. Secure the weight belt’s quick release 9. Double check if all your equipment is streamlined
Steps for the PADI Scuba Unit / BCD Removal and Replacement Underwater Skill:
1. Make sure you are fully deflated 2. Unclip your chest strap of the BCD 3. Release your shoulder straps of the scuba unit / BCD 4. Unclip the scuba unit / BCD belly buckle and the velcro 5. Use your LEFT hand to get out of the scuba unit / BCD 6. Use your right hand to turn your bcd to the front 7. Remember to keep holding onto the scuba unit / BCD 8. Use your right hand to get back into the scuba unit / BCD 9. Replace the velcro, secure the belly buckle, pull down the shoulder straps and secure the chest strap 10. Streamline all hoses on your scuba unit / BCD
PADI Mini Dive
Mini Dive Explanation:
1. Buoyancy Check at the Surface (with a buddy) 2. 5 Point Descent (with a buddy) 3. Swim Repeating Skills 4. Ascent with Safety Stop (with a buddy) 5. Deep Water Exit
PADI 5 Point Ascent
Steps for the PADI 5 Point Ascent Skill:
1. Signal to your buddy: OK and let’s go UP 2. Check your Dive Computer / Watch for your Dive Time 3. Go into ascent position by stretching your right arm above your head and your left hand on the deflator button (Superman position) 4. Look up and check if your ascent area is clear 5. Start slowly swimming up to the surface, while deflating and checking your ascent rate 6. At the surface first inflate your BCD fully with the LPI 7. Switch from your regulator to your snorkel
Steps for the PADI How to Disassemble Scuba Equipment Skill:
1. Turn of the air by closing the valve 2. Take out the alternate air source, grab the second stage at the same time 3. Purge both regulators to release the air from the first stage and the hoses 4. Disconnect the LPI hose 5. Unscrew the first stage and remove the regulator from the tank valve 6. Unbuckle the BCD Strap 7. Remove the BCD from the scuba cylinder 8. Secure the scuba cylinder
Conclusion PADI Open Water Skills List
I hope that this PADI Open Water Skills List has helped you to prepare for your PADI Open Water Diver Course. Remember that it is not so hard and even enjoyable if you don’t overthink it. If you do struggle a bit with some PADI Open Water Skills then just discuss it with your PADI Diving Instructor and review my video’s again. I wish you the best of fun and excitement with your future Scuba Diving Adventure and Don’t forget to share this PADI Open Water Diver Skills List.
Buddy Check for scuba diving is the most important pre-dive safety check to do before every dive to stay safe. In this article, we will explain why the buddy check is so important and how easy you can to remember the pre-dive safety check by using the acronym BWRAF.
Why is the PADI BWRAF check so important?
I can’t count the times jumping in the water forgetting my fins or weight belt when I was a beginner scuba diver. Most of the time these were funny and embarrassing moments, as they happened in good weather conditions. But what would have happened if I forgot to put on my fins in rough sea conditions? I could have been in a lot more trouble. Even worse what if I would have forgotten to open my air before the dive?
The Buddy Check BWRAF in scuba diving is incredibly important to do as a pre-dive safety. Some people scuba dive often tend to skip the buddy over time, thinking that they don’t need it anymore. However, even the most experienced scuba divers sometimes still forget something. Yes, a lot less than beginner scuba divers, but it does accidentally happen.
A diving checklist is compared to a pre-take-off checklist
Would you go into an airplane knowing the pilots didn’t do a pre-take off checklist?We all fly and every time we go into an airplane we trust our lives to the pilots. One of the reasons flying is so safe is because the pilots go through a standardized pre take off checklist before every flight. This ensures that the airplane is ready to take off.
To prevent missing a step a co-pilot will double check every step. This reduces risk significantly. In scuba diving, we also have a diving checklist which we call the buddy check. Yes, we can all follow the buddy check acronym BWRAF by ourselves but increases the risk of forgetting some steps. By having our dive buddy double-checking our diving checklist we also reduce the risk of forgetting steps, same as the pilots. This is one of the reasons why it is recommended to always scuba dive with a buddy.
Buddy check acronym
There are 5 important steps in the buddy check, but all very important. To make it easier not to forget any steps you can use a buddy check acronym.An acronym is an abbreviation formed from the initial letters of other words and pronounced as a word. The buddy check acronym is BWRAF.5 Steps for the buddy check BWRAF
B – BCD
W – Weights
R – Releases
A – Air
F – Final ok
B stands for BCD in the buddy check acronym
During the BCD check your start by inflating each other BCD until air releases from the purge valves. Now you know that the Low-Pressure Inflator hose (LPI) works. Leave the BCD inflated for a few seconds to check for any leaks in the BCD. Now deflate your buddy’s BCD to test the deflation button, followed by orally inflating your buddy’s BCD, or if you are uncomfortable with that just orally inflate your BCD in front of your buddy. Now deflate it again.
W stands for Weight System in the buddy check diving checklist
Start by checking if your buddy has a weight belt on or has weights in the integrated weight pockets. Check for a right-hand release if they have a weight belt or check if the integrated weight pockets are securely clipped into the BCD. Finally, check if all the diving weights are evenly divided and nothing is entangled in the scuba weight system.
R stands for releases in the buddy check
Check all your diving buddy’s releases on their BCD. Check the shoulder straps, chest and belly buckles, the velcro strap, and finally the BCD tank cylinder band connection. Give your buddy’s scuba cylinder a little wiggle to make sure it is connected properly.
A stands for Air Check
This is the most important step of the buddy check. First, you want to check if your diving buddy’s air is open. It is very important that you not just turn the valve. First, you carefully want to check on the side which way is open and close. I know this sounds over the top, but I have seen people accidentally turn off their buddy’s air tank before the dive. Double or even triple-check this part.
After you confirmed that your buddy’s air tank is open you can grab your SPG. Place your SPG and your buddy’s SPG next to each other. First, purge the second stage, then smell the air followed by breathing from your regulator at least 3 times while looking at both air gauges. Not only are you checking airflow, but you are also checking if the air gauge needle doesn’t move. If the needle does move you have or a problem with your first stage or you haven’t turned on the air fully.Finally, grab your own or your buddy’s alternate air source and also breathe from that at least 3 times to ensure your alternate air sources are working.
F stands for Final OK in the buddy check
To finish the buddy check you want to make sure that the scuba equipment from your buddy is streamlined and nothing is missing like the scuba mask, fins, and other essential scuba gear. If everything checks out, you give your buddy a final ok scuba diving hand signal and you are ready to begin your scuba dive.
Conclusion buddy check
The buddy check is a diving checklist that you can compare to a pre take off checklist that pilots use. You learn the buddy check in the PADI Open Water Diver Course and it is one of the most important parts before any scuba dive. You can use the buddy check acronym BWRAF to easily remember all the steps of the pre-dive safety check and I highly recommend to always do a buddy check, even when you are already an experienced scuba diver.Learn more information on how to become a PADI Diving Instructor and be able to teach the Buddy Check.
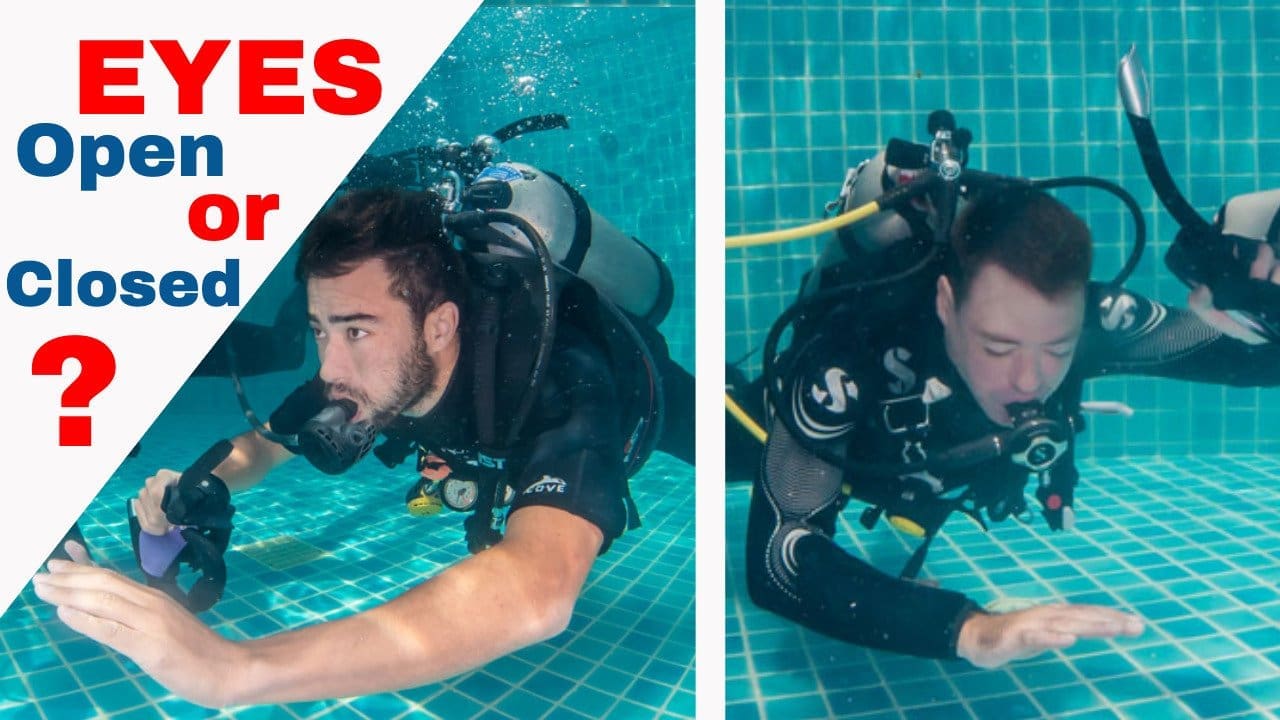
During the scuba mask clearing skills should you keep your eyes open or closed? This is a question I get a lot on my YouTube channel and from my PADI Open Water Diver students. In this article, I will explain if you need to keep your eyes open or closed while performing scuba mask clearing skills.
In this article we will explain:
Why do we need to practice scuba mask clearing skills
Is it a standard to keep eyes open or closed
More realistic to keep your eyes open
Why can’t we see well underwater with our eyes open
Getting used to dealing with water in your eyes
Having your eyes open feels more comfortable for some people
Keeping your eyes closed helps when you wear contact lenses
Some people don’t like water in their eyes
You can’t see that much underwater without a mask
Some people feel more comfortable keeping their eyes closed underwater
Scuba Mask Clearing – Eyes Open or Closed?
Why do we need to practice scuba mask clearing skills?
We (almost) always get a bit of water leaking into our mask while scuba diving. This could be because you didn’t shave, have a mask that doesn’t fit well, or just because you might smile or perform other facial expressions. This is not a problem as we can easily clear our scuba mask underwater by blowing out of our nose.
In very rare cases you might want to fully remove your scuba mask (maybe to adjust your strap) or when you lose it. Then when you replace it you need to clear it the same way by breathing out through your nose. Again this is extremely rare.
Is it a standard to keep your eyes open or closed during the scuba mask clearing skills?
No, it is not a dive industry standard to keep your eyes open or closed during the scuba mask clearing skills. It is a preference or like we like to call it: “Style”.
Not everyone in the dive industry knows this as they have been taught only one way during their scuba courses and careers, but you can choose whatever style you and/or your diving students prefer.
I like to give my Open Water Diver students the option to choose if they like to keep their eyes open or closed during the scuba mask clearing skills and in my PADI Divemaster and PADI IDC Course, I like to teach both styles so my future diving professionals know how to teach both.
There are pros and cons to keeping your eyes open or closed. I will explain both.
Pros keeping your eyes open during the scuba mask clearing skills
1. it is more realistic to keep your eyes open during the scuba mask clearing skills.
Practicing to keep your eyes open during the scuba mask clearing skills is more realistic as in real life you might have to look for your missing mask underwater. This might be a bit easier with your eyes open, but I can tell you that it is very hard to see anything without a mask underwater. Still, it might help and you can also see reef and rock formations that might guide you back to the reef or pinnacle if you are lost.
Why can’t we see well underwater with our eyes open?
This is because our lens can’t focus in the water as the front part of the eye lens does not have different refractive indices anymore. Our lens is like a curved drop of water and another curved drop of water will cancel the focussing effect.
To solve this we wear a scuba mask to allow air between the window of the scuba mask and the lens of your eye. Because that water touches the scuba mask window it doesn’t form a curved drop and we can see through it.
2. You get used to dealing with water in your eyes, especially saltwater.
You will practice the scuba mask clearing skills in the swimming pool (chlorine water), confined open water in the ocean (saltwater), or confined open water in a lake or river (freshwater).
Keeping your eyes open scuba mask clearing skill
If you never practiced having your eyes open underwater, it might come as a shock feeling the saltwater (can sting a bit), the chlorine water (can irritate a bit), or the freshwater (might be cold) first time. This might lead to panic, so a lot of people like to practice the scuba mask clearing skills with open eyes while they are still under the supervision of a PADI Diving Instructor.
3. Having your eyes open feels more comfortable for some people.
Some people just don’t like the dark, especially in a new environment. Therefore they like to keep their eyes open during the scuba mask clearing skills, even if they don’t see much without a mask.
Cons keeping your eyes open during the scuba mask clearing skills
1. Some people wear contact lenses.
I get this question a lot: Can I scuba dive with contact lenses? Yes, you can! A lot of people think you cannot scuba dive with contact lenses, but this is not true. You can easily scuba dive with contact lenses as the mask protects you from the water.
By keeping your eyes closed during the scuba mask clearing skills you make sure you don’t lose your contact lenses. Your diving instructor can squeeze your arm letting you know when you have cleared all the water from the mask.
Hard lenses are easier to lose than soft lenses. But even if you keep your eyes closed you might still lose them, so it is at your own risk. We recommend a scuba mask with prescriptive glasses if you want to make sure 100% that you don’t lose your contact lenses. I also wear contact lenses and I prefer to dive with them over prescription masks as I would like to see things on the surface.
Keeping your eyes closed during the scuba mask clearing skills
2. Some people don’t like water in their eyes.
I recommend you keep your eyes closed while performing the scuba mask clearing skills if you don’t like the feeling of water in your eyes. Especially chlorine and saltwater can be a bit irritating, so keeping your eyes closed will prevent that.
3. Can’t see that much without a scuba mask.
Like I mentioned before, you can’t see that much anyway underwater without a scuba mask. Keeping your eyes open doesn’t have a lot of benefits, so if you prefer to keep them closed then that is up to you.
4. Some people feel more comfortable keeping their eyes closed underwater.
This might sound strange but a lot of people feel more comfortable keeping their eyes closed during the scuba mask clearing skills.
This is because they are used to knowing how it feels to have their eyes closed. It is something we do when we relax, sleep, meditate, take a massage, etc. so keeping the eyes closed can make you feel more relaxed when you are practicing an already bit more stressful skill.
Also, most people know how it feels to have water surrounding their eyes when they keep them closed underwater, as they normally close them when they are putting water on their faces while taking a shower, bath, swimming, etc.
Final word
There might be more reasons that I don’t know about why someone likes to keep their eyes open or closed during the scuba mask clearing skill.
In the end, it is important to know that you can choose whatever you prefer as a diving student, fun diver, or how to teach the scuba mask clearing skills as a PADI Divemaster or Diving Instructor. Even on the PADI Instructor Exam, you can choose to keep your eyes open or closed during the scuba mask clearing skills. It is all up to you.
Having an Alternate Air Source is such a relieve for most scuba divers. One of the main concerns scuba divers have is running out of air. Another word for the Alternate Air Source is Octopus.
Many years ago in the beginning of scuba diving people did not have an Alternate Air Source. If diver ran out of air they had to Buddy Breath from a single regulator until reaching the surface. This was of course not the safest way to deal with an out of air situation, so all divers were very relived when the Octopus became available for them.
The Alternate Air Source is an extra second stage connected to the first stage of the regulator. It works exactly the same as your primary regulator second stage. If people run out of air they want to make sure that they can locate the Alternate Air Source quickly. For this reason the Octopus is usually marked with bright colours, like yellow and should be located in triangular area on the chest, from the chin the the lower ribcage.
During your PADI Open Water course you learn how to correctly use and breath from an Octopus for at least 30 seconds. First you will learn to perform the Alternate Air Source skill stationary on confined dive 1 in shallow water. Then during confined dive 3 you repeat the Octopus skill swimming and surfacing.
This is the performance requirement from the PADI Instructor Manual:
Breathe from an alternate air source supplied by another diver for at least 30 seconds.
Steps for the PADI Alternate Air Source Breathing Stationary Skill
1. Signal your buddy that you are out of air
2. Your buddy will now present his/her alternate air source
3. Take a breath and switch to the Octopus (don’t forget to blow bubbles)
4. clear the alternate air source anyway you like
5. Stay close to your buddy by holding each other with a roman arm shake
6. Signal: OK and UP to each other
7. Elevate the LPI and press the deflator button
8. Breath comfortably though the Octopus for at least 30 seconds
9. Simulate and ascent by moving a bit (PADI Dance), but stay stationary underwater
Check out this PADI Alternate Air Source Breathing Stationary Skill Video:
Owning a good Alternate Air Source can be life saving and knowing it is yours and well maintained can give a peace of mind on any dive. The Apeks By Aqua Lung Egress Octo Regulator if you are looking to get your own Octopus.
Frequently Asked Questions About the Alternate Airsource skill
What is Alternate Air Source Breathing Stationary in scuba diving?
Alternate Air Source Breathing Stationary is a scuba diving skill where two divers simulate sharing air without moving from their position. It teaches divers how to properly donate and receive an alternate air source in a controlled, stationary environment, ensuring both divers can breathe safely during an emergency underwater.
Why is Alternate Air Source Breathing Stationary important?
Practicing Alternate Air Source Breathing Stationary helps divers prepare for out-of-air emergencies. By staying stationary, both divers can focus on controlled breathing, proper communication, and maintaining eye contact. It reinforces calm behavior and reinforces safety protocols when donating or receiving an alternate air source.
When do you practice Alternate Air Source Breathing Stationary?
Divers typically practice Alternate Air Source Breathing Stationary during confined water sessions in the PADI Open Water Diver course. It is also reinforced in refresher courses and professional-level training to ensure divers are confident and capable of handling air-sharing situations.
How is Alternate Air Source Breathing Stationary different from while ascending?
In Alternate Air Source Breathing Stationary, both divers remain in place while simulating the air-sharing process. In contrast, during Alternate Air Source Ascent, the divers begin the skill and then ascend while sharing air. The stationary version builds foundational control, while the ascent version adds movement coordination.