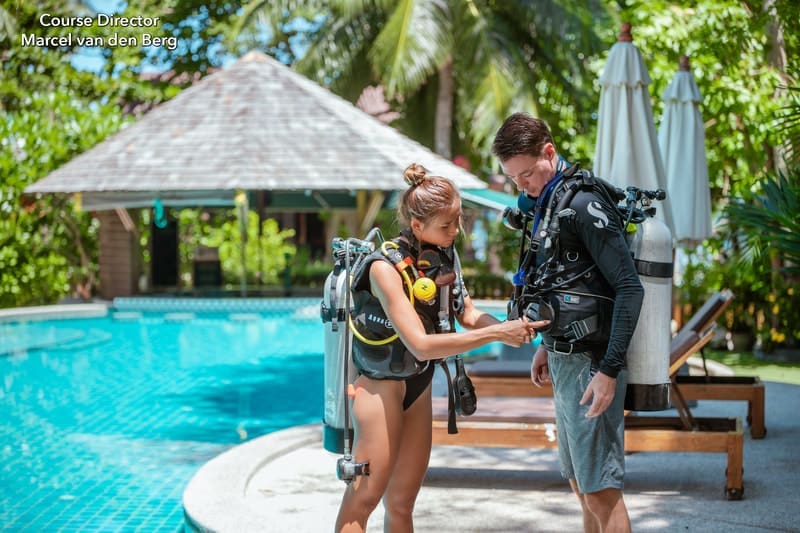
How To Assemble Dive Equipment the right way is important for safety and it can improve your Diving Experience Significantly!
It is important that you learn this skill because you need to assemble dive equipment before every dive and also as a scuba diving skill during the Open Water Diver Course. During the Divemaster and IDC Course you need to demonstrate How To Setup Dive Gear in Divemaster and IDC skill circuit.
How To Assemble Dive Equipment
There are different styles on How To Assemble Dive Equipment, in the video below we follow these steps:
1. Inspect the tank, visual inspection sticker and the hydrostatic test date
2. Check the O-Ring
3. Open the tank valve and give a little burst to clean the valve
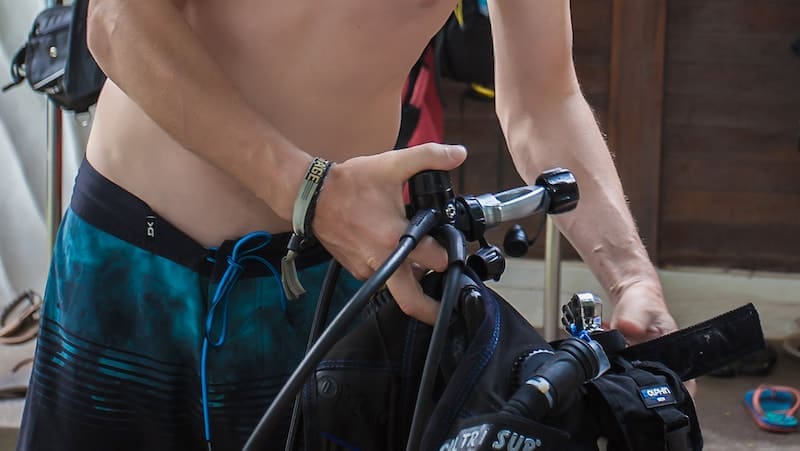
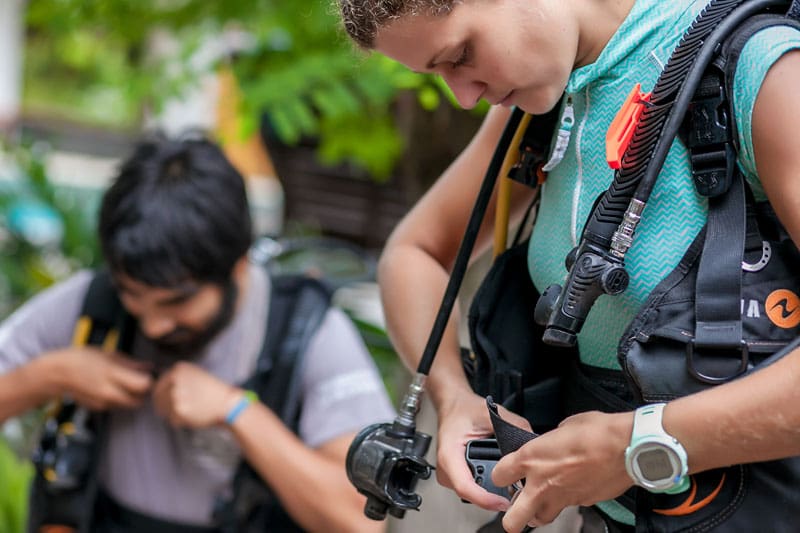
4. Put the BCD correctly over your scuba cylinder
5. At least 4 fingers from the top
6. Attach the Safety Strap
7. Make sure everything is attached correctly
8. Grab your regulator and unscrew the dust cap from the first stage
9. Place the first stage over the valve
10. Gently screw the first stage on the tank valve (Only 3 finger tight)
11. Attach the low-pressure inflator hose to the BCD
12. Attach the alternate air source
13. Streamline everything
14. Turn the SPG glass away from anyone
15. Slowly open up the tank valve
16. Finished
After finishing Assembling the Dive Equipment, you should do a full dive equipment check up:
1. Fully inflate the BCD to check for leaks and the LPI
2. Orally Inflate the BCD
3. Purge, smell and breath through the second stage, while checking the SPG
4. Check the alternate air source
5. Make sure the dive equipment is streamlined
6. Gently place your equipment on its side
How To Assemble Dive Equipment becomes much more easier after a few tries. It is still very important to do a buddy check after you assemble the dive gear to make sure you setup your dive gear correctly.
Check out this video on How To Assemble Dive Equipment 👇
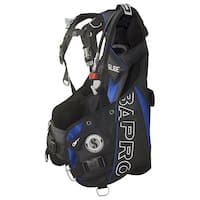
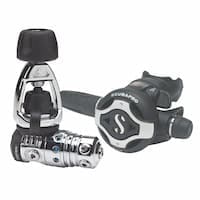
In this video we used the Scuba Pro Glide BCD, which is one of the most comfortable Scuba BCD’s on the Market. We also used the Scuba Pro MK25 Regulator which delivers more the 10.000 liters of air per minute for the easiest breathing feeling. Are you looking for a new BCD or Regulator? Then we highly recommend these 2 models:
Frequently Asked Questions About Assembling Dive Equipment
What are the essential steps to assemble scuba diving equipment?
Assembling scuba diving equipment involves several critical steps to ensure safety and functionality:
Inspect the Cylinder: Check the visual inspection sticker and hydrostatic test date to ensure the tank is within the valid inspection period.
Check the O-Ring: Ensure the O-ring on the tank valve is present and in good condition.
Purge the Valve: Briefly open the tank valve to clear any debris or moisture.
Attach the BCD: Slide the BCD onto the cylinder, positioning it so the top of the BCD aligns with the tank valve. Secure the BCD using the tank strap, ensuring it’s tight and the BCD doesn’t move.
Connect the Regulator: Remove the dust cap from the regulator’s first stage. Attach the first stage to the tank valve, aligning it properly, and tighten securely (finger-tight for yoke connections or as specified for DIN connections).
Attach Hoses: Connect the low-pressure inflator hose to the BCD’s inflator. Ensure all hoses are routed correctly and are not twisted or kinked.
Open the Tank Valve: Slowly open the tank valve fully to pressurize the system.
Check the SPG: Verify the tank pressure is adequate for the planned dive.
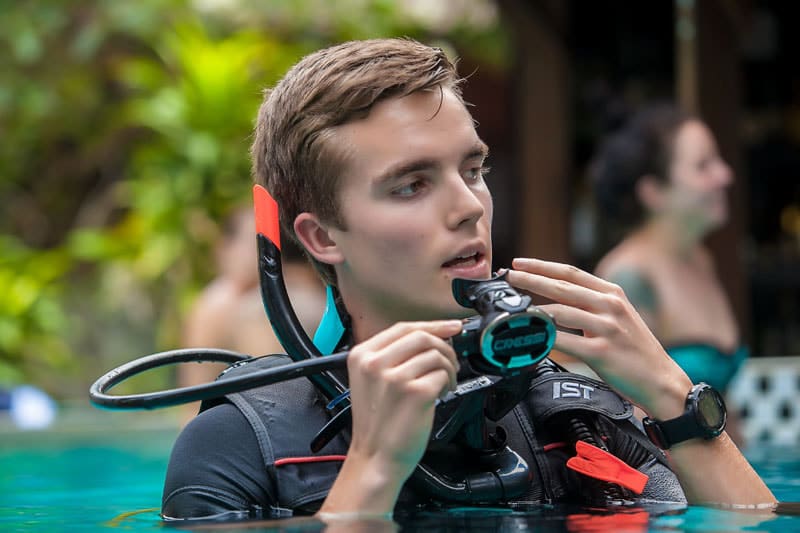
Test the Regulator: Purge and breathe from both the primary and alternate second stages to ensure proper function.
Inflate the BCD: Use the inflator to add air to the BCD, checking for leaks and ensuring the inflator and dump valves function correctly.
Streamline Equipment: Secure all hoses and accessories to prevent entanglement and ensure easy access during the dive.
Final Check: Lay the assembled gear on its side to prevent it from falling over and conduct a final inspection before donning the equipment.
Following these steps helps ensure that your dive equipment is assembled correctly, promoting safety and comfort during your dive.
Scuba Diving Hand Signals are used by divers to communicate underwater. These Scuba Hand Signals are easy to learn and understand. You don’t need to know ASL deaf sign language to scuba dive. Everyone can do it easily by learning these common scuba diving hand signals.
Why Scuba Hand Signals, why not just talk underwater?
You actually can talk underwater. The deeper you go to higher your tone will be and at one point you will be sounding like Donald Duck. So why is it that we need to use Scuba Diving Hand Signals if we can talk underwater?
This has more to do with your ability to hear underwater compared to your ability to talk underwater. Sound travels in waves around 4 times faster in water than it does in air. In the air, the sound will hit our inner ear and because we are made from an average of 65% water, the sound can hit the ossicle bones which sends signals to the brain to decipher the language.
If sounds travel through water, it can’t hit the ossicle bones in the inner ear as that is also made from water. It will now hit your mastoid bone of the skull right behind your ears and make it vibrate. In other words, you use your skull to listen underwater instead of your ears. The mastoid bone bypasses the ear canal to signal the brain and activates both ears at once. This makes it hard to understand where the sound is coming from underwater. This is why we need Scuba Diving hand Signals to communicate underwater.
Difference between Scuba Diving hand Signals and Sign Language of the Deaf
Sign languages are full-fledged natural languages with their own grammar and lexicon. This makes it possible to speak full sentences. Scuba Diving Hand Signals are shorter more simplified scuba signals that can mean multiple words or meanings with a single signal.
When do you learn Scuba Diving Hand Signals?
We recommend you to learn the most common scuba hand signals as soon as you can and before your scuba diving courses. But don’t worry if you haven’t prepared as you will also learn scuba diving hand signals in your PADI Open Water Water Diver course or any other beginner scuba diving courses from other organizations.
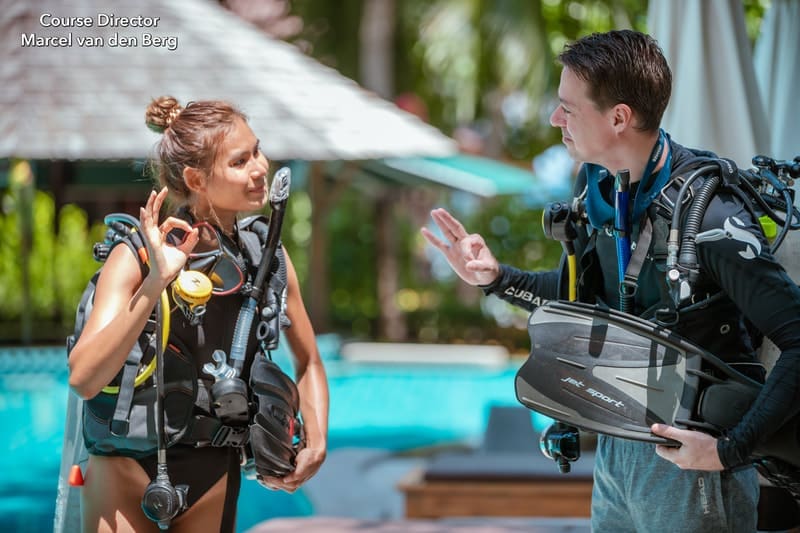
The OK Sign is one of the most common Scuba Hand Signals
You will learn these scuba hand signals from your PADI Open Water Manual, the PADI Video’s, and from your Diving Instructor. Most Dive Instructors teach the Scuba Diving Hand Signals a bit in the classroom and mostly during the PADI Confined Water Dive 1.
Your Diving Instructor will repeat these scuba signals throughout your PADI Open Water course to ensure repetition and retaining the signals. A funny note is that many scuba divers tend to unknowingly use scuba hand signals in their daily lives.
Common Scuba Hand Signals
Here we will show the most common scuba hand signals you can expect to see and use while diving. From the famous ok signal, scuba diving hand signals for air pressure to emergency scuba signals.
Full Scuba Diving Hand Signal Video:
OK Sign Hand Signal
The OK sign is instantly recognized as the famous scuba diving signal. The OK signal is maybe the most used signal in scuba diving. The OK signal can mean 2 things, the Question: Are you ok? And the answer: I am ok.
Diving Signal: SOMETHING IS WRONG WITH THE EARS
Having ear problems is very common with beginner scuba divers. To solve an ear problem you need to equalize your ears while scuba diving. For some people this is easy, but for others, this can be hard. Knowing this hand signal will help you to tell your Dive Instructor, Divemaster, or Dive Guide that you have a problem Equalizing your Ears.
Check out our PADI Medical Form page and find out if you need to check your ears with a doctor before scuba diving.
Almost all divers can equalize their ears if they know the proper technique. Many people, struggle with equalizing their ears, usually because of bad training, and not allowing enough time for new divers to equalize their ears. If you want to know more about some amazing and easy techniques to equalize your ears while scuba diving then check this video here:
Diving Signal: SOMETHING IS WRONG WITH THE STOMACH
Having a Stomach issue is not good to have on land, but it can be even more uncomfortable underwear. With this signal, you can tell your buddy or dive leader that there is something wrong with your stomach underwater.
Diving Signal: PUKE
Puking is never nice, not above, and not underwater. We highly recommend you to cancel the dive and return to the surface, if you feel sick and feel you need to puke. This is however not always possible and in the worst-case scenario, we heard about stories from people puking up underwater through their regulators. Knowing this Puking Scuba Hand Signal can help you to alert other divers about your condition.
Diving Signal: STOP
The Diving Signal STOP is used when a diver wants you to stop in whatever you are doing underwater. This signal is important as it can stop potential dangerous activities while scuba diving. The stop signal is also common when other divers swim too fast.
Diving Signal: COME CLOSER
This signal is very handy when other scuba divers are too far away from each other. Just signal to come closer to reunite with your buddy, get closer to the coral or your Dive Instructor, Divemaster, and/or Dive Guide.
Diving Signal: HAVE MORE DISTANCE
Sometimes scuba divers are too close to each other or way too close to aquatic life. Just use the scuba diving hand signal: Have More Distance to move them away.
Diving Signal: BUDDY UP
One of the most important things in scuba diving is to stay close to your buddy. You can dive solo with the PADI Self-reliant Diving certification, but that takes more training. In general, we highly recommend you always dive with a buddy. We do understand that with so much to see underwater you can quickly lose your distance between each other. This scuba signal will bring you back together.
Diving Signal: COME TOGETHER
The Come Together hand signal is very similar to the buddy up signal and it means that you come together with your buddy, another diver, aquatic life, or any object underwater.
Diving Signal: HAVE MORE SPACE BETWEEN EACH OTHER
As much as we always promote to stay close to your buddy, we sometimes see scuba divers almost clued together. This is not a good diving experience and with the signal: Have more space between each other we try to get you apart.
Diving Signal: SIT ON YOUR KNEES
This scuba signal is used a lot by dive instructors asking their students to sit on their knees. Most likely diving instructors ask this when practicing diving skills in confined water and sometimes even the open water if on a sandy bottom with no chance of hurting any aquatic life.
Diving Signal: STAND ON YOUR LEGS
This scuba diving hand signal is used when someone wants you to stand on your legs on the bottom of the pool, confined open water, or the bottom of the sea. It is of course very important that you check for any aquatic life before you give this signal to your diving students or fellow scuba diver.
Diving Signal: SLOW DOWN
The Slow Down Hand Signal can be very handy. You are supposed to do anything slowing when scuba diving. Moving fast can deplete your air much quicker. You also won’t see much aquatic life when you dive fast. This is because you scare it away and it is hard to see any details moving fast. With this scuba hand signal, you can signal your buddy to slow down and enjoy the dive better.
Diving Signal: REMEMBER
The remember scuba signal is used many times by Dive Instructors and Divemasters. This diving signal can help students to remember things while they are scuba diving. The remember signal is one of the most used scuba diving hand signals by Diving Instructors and Divemasters.
Diving Signal: CUT
his sounds a bit like a scary hand signal, but dive instructors and Divemasters use it to finish (cut) a scuba skill when the performance requirements have been met. It is also used by PADI Examiners during the PADI IE when they have seen enough and in most cases will now reward you the PADI Scuba Dive Instructor Diploma.
Besides all the teaching signals, it is also used as a signal to cut something underwater like a fishing line to net with your dive tool, scissors, or dive knife.
Diving Signal: CONTINUE
The Continue hand signal is usually used by scuba instructors that want you to do more of a scuba skill or work more on your swimming/buoyancy. The continue scuba hand signal means to keep doing what you are doing underwater.
Diving Signal: REPEAT
The Repeat hand signal is also commonly used by dive instructors. They use this signal to ask you to repeat something and in most cases that will be a diving skill. Or you might do a great move underwater and someone asks you to do it again with this diving hand signal.
Diving Signal: GO UP
The going up signal is commonly mistaken with the OK sign while scuba diving. On land, we like to use the Thumbs Up signal all the time when we are happy or agree on something. But the thumbs-up signal in scuba diving means: Going Up. We commonly use this scuba signal to ascent at the end of a dive.
Diving Signal: GO DOWN
If you want anyone to go down or descent on a scuba dive you show them this signal. Go down means descending in diving and can be very important when divers start to float up. In many cases, scuba divers don’t know that they are floating up, so having a buddy reminding them to go down with this signal can be very handy.
Diving Signal: BREATH IN AND OUT
Feeling relaxed and calm while scuba diving has all to do with your breathing. It is very important to breathe slowly and deeply while scuba diving. Also during many diving skills, you need to breathe in and out the right way. This signal can help to remind you or others to breathe in and out.
Diving Signal: OUT OF AIR
This is not one of the most positive signals, but the Out of Air Scuba Hand Signal is one of the most important ones. In the unlikely event, you might run out of air, you can use this to signal your buddy or any other diver that you are out of air and that you need to share air with an alternate air source. Knowing the Out of Air signal can potentially save your life is it ever happens.
Diving Signal: WHAT IS YOUR AIR?
Scuba Diving Hand Signals for Air Pressure are very important to make sure you don’t run Out of Air while one a dive. In this video, we show you all the Scuba Diving Hand Signals for Air Pressure.
The scuba hand signals air left should be asked every 5 to 10 minutes while scuba diving. I recommend using this signal to ask your buddy what his/her air is every 10 minutes on a dive and your buddy doing the same back to you. You should still always check your air frequently during the dive, I recommend every 5 minutes a quick look at your air gauge and every 10 minutes check your buddy or/and diving students by giving this scuba hand signal.
After someone asks you for your air, you should give them the right air signal back. What is very important is that many scuba divers use different hand signals. Not asking and checking new diver air signals can be a very dangerous mistake. It is not a problem at all that some people use different scuba diving and signals than others, but it is very important to agree on any scuba hand signals before a dive, especially air signals.
Diving Signal: LOOKING
The looking signal can be used to show a diver where to look. There are many points of interest underwater to look at. Many times I see an amazing aquatic animal and I signal to my buddy to look at it and vice versa. We also sometimes point out looking at something potentially dangerous to make sure we avoid it.
Diving Signal: INFLATE THE BCD A LITTLE BIT
This is a very common and important signal given by Diving Instructors, Divemasters, and Dive Guides. Especially if you are a new scuba diver you will see this signal a lot as you are getting a feeling for your buoyancy control. We prefer to adjust our buoyancy with our lungs, but a little bit of air in your BCD can help.
Diving Signal: DEFLATE YOUR BCD
If you are a new scuba diver then you will see this diving hand signal a lot by your dive instructor. Controlling your buoyancy is not easy when you first try out scuba diving and a lot of new divers tend to float up to the surface. This can be for different reasons like inhaling too much, no enough weights, too excited underwater, kicking up, but mostly it is because of too much air in the BCD. Knowing to recognize the Deflate Your BCD scuba signal can help you to deflate in time and stop the ascent.
Floating up is a big problem for beginner scuba divers. Most of the time it is caused by putting too much air in the BCD. A lot of diving instructors will signal you to release air from the BCD when this happens. However, in many cases, the student, diver, or you try hard to deflate the BCD but it doesn’t work.
This is because you are trying to deflate your scuba BCD in the wrong position. To effectively deflate a scuba BCD you need to be in a vertical position. This scuba diving hand signal will remind you to go into the best deflate position.
Diving Signal: PROPER WAY TO GET DOWN
This signal is given when someone wants you to go down. In most cases this means just to slowly exhale to descent again and if that doesn’t work try to deflate your BCD in the proper position to go down. In most cases, you just have to exhale while scuba diving if you are relaxed.
Diving Signal: SWIMMING
Scuba Diving is more about having neutral buoyancy and hover underwater to look at amazing aquatic life. However, you do need to swim sometimes get to another location. To swim while scuba diving is as easy as kicking your legs and fins underwater. You can use this swimming signal to remind someone to use the scissors kicks or the more advanced frog kicks to swim while scuba diving.
Scuba Diving Hand Signals Conclusion
Scuba Hand Signals are an amazing way how divers communicate underwater. Scuba Diving hand Signals are not hard to learn and we hope that this article helped you in learning these scuba signals. Please share this page with anyone interested in learning scuba diving hand signals and I wish you the best scuba diving adventures!
Frequently Asked Questions About Scuba Diving Hand Signals
Why are hand signals important in scuba diving?
Hand signals are crucial for underwater communication, as verbal communication is not possible while diving. They allow divers to convey essential information, ensure safety, and coordinate actions with their dive buddies.
What does the ‘OK’ hand signal mean underwater?
The ‘OK’ hand signal, formed by touching the thumb and index finger to create a circle while extending the other fingers, indicates that a diver is fine. It’s used both to ask and confirm if everything is okay during a dive.
How do divers signal a problem underwater?
To indicate a problem, a diver extends a flat hand with palm down and rocks it side to side. This is often followed by pointing to the area of concern, such as the ear for equalization issues.
What is the hand signal for ‘ascend’ or ‘go up’?
A thumbs-up gesture signifies the intention to ascend or end the dive. It’s important not to confuse this with the ‘OK’ sign, as they have different meanings underwater.
How do divers communicate ‘descend’ or ‘go down’?
A thumbs-down gesture indicates the intention to descend. This signal is typically used at the beginning of a dive or when moving to a deeper depth.
What does the ‘low on air’ hand signal look like?
To signal low air, a diver places a clenched fist against their chest. This indicates that the diver has reached the reserve air pressure and should begin ascending.
How do divers indicate ‘out of air’?
The ‘out of air’ signal involves moving a flat hand back and forth across the throat. This urgent signal requires immediate attention and assistance from a dive buddy.
What is the ‘safety stop’ hand signal?
The ‘safety stop’ signal is made by holding a flat hand horizontally at chest level, palm down, and moving it side to side. This indicates the need to pause at a specific depth, usually 5 meters, for a safety stop.
Are there hand signals for marine life?
Yes, divers use specific hand signals to indicate sightings of marine life, such as forming a fin on the forehead for a shark or flapping hands for a turtle. These signals enhance the diving experience by allowing silent communication about underwater creatures.
How can I learn and remember scuba diving hand signals?
Regular practice and repetition during dives help reinforce hand signal knowledge. Many dive organizations provide visual guides and training materials to assist divers in learning and memorizing these essential signals.
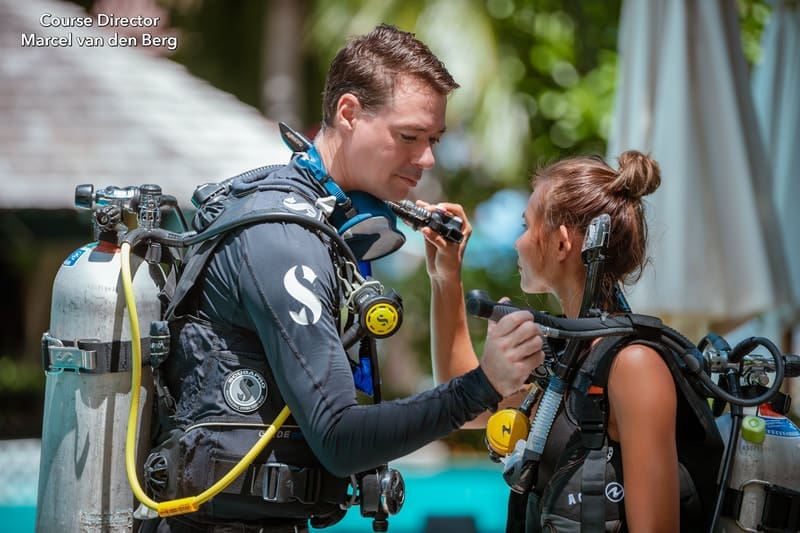
Buddy Check for scuba diving is the most important pre-dive safety check to do before every dive to stay safe. In this article, we will explain why the buddy check is so important and how easy you can to remember the pre-dive safety check by using the acronym BWRAF.
Why is the PADI BWRAF check so important?
I can’t count the times jumping in the water forgetting my fins or weight belt when I was a beginner scuba diver. Most of the time these were funny and embarrassing moments, as they happened in good weather conditions. But what would have happened if I forgot to put on my fins in rough sea conditions? I could have been in a lot more trouble. Even worse what if I would have forgotten to open my air before the dive?
The Buddy Check BWRAF in scuba diving is incredibly important to do as a pre-dive safety. Some people scuba dive often tend to skip the buddy over time, thinking that they don’t need it anymore. However, even the most experienced scuba divers sometimes still forget something. Yes, a lot less than beginner scuba divers, but it does accidentally happen.
A diving checklist is compared to a pre-take-off checklist
Would you go into an airplane knowing the pilots didn’t do a pre-take off checklist?We all fly and every time we go into an airplane we trust our lives to the pilots. One of the reasons flying is so safe is because the pilots go through a standardized pre take off checklist before every flight. This ensures that the airplane is ready to take off.
To prevent missing a step a co-pilot will double check every step. This reduces risk significantly. In scuba diving, we also have a diving checklist which we call the buddy check. Yes, we can all follow the buddy check acronym BWRAF by ourselves but increases the risk of forgetting some steps. By having our dive buddy double-checking our diving checklist we also reduce the risk of forgetting steps, same as the pilots. This is one of the reasons why it is recommended to always scuba dive with a buddy.
Buddy check acronym
There are 5 important steps in the buddy check, but all very important. To make it easier not to forget any steps you can use a buddy check acronym.An acronym is an abbreviation formed from the initial letters of other words and pronounced as a word. The buddy check acronym is BWRAF.5 Steps for the buddy check BWRAF
B – BCD
W – Weights
R – Releases
A – Air
F – Final ok
B stands for BCD in the buddy check acronym
During the BCD check your start by inflating each other BCD until air releases from the purge valves. Now you know that the Low-Pressure Inflator hose (LPI) works. Leave the BCD inflated for a few seconds to check for any leaks in the BCD. Now deflate your buddy’s BCD to test the deflation button, followed by orally inflating your buddy’s BCD, or if you are uncomfortable with that just orally inflate your BCD in front of your buddy. Now deflate it again.
W stands for Weight System in the buddy check diving checklist
Start by checking if your buddy has a weight belt on or has weights in the integrated weight pockets. Check for a right-hand release if they have a weight belt or check if the integrated weight pockets are securely clipped into the BCD. Finally, check if all the diving weights are evenly divided and nothing is entangled in the scuba weight system.
R stands for releases in the buddy check
Check all your diving buddy’s releases on their BCD. Check the shoulder straps, chest and belly buckles, the velcro strap, and finally the BCD tank cylinder band connection. Give your buddy’s scuba cylinder a little wiggle to make sure it is connected properly.
A stands for Air Check
This is the most important step of the buddy check. First, you want to check if your diving buddy’s air is open. It is very important that you not just turn the valve. First, you carefully want to check on the side which way is open and close. I know this sounds over the top, but I have seen people accidentally turn off their buddy’s air tank before the dive. Double or even triple-check this part.
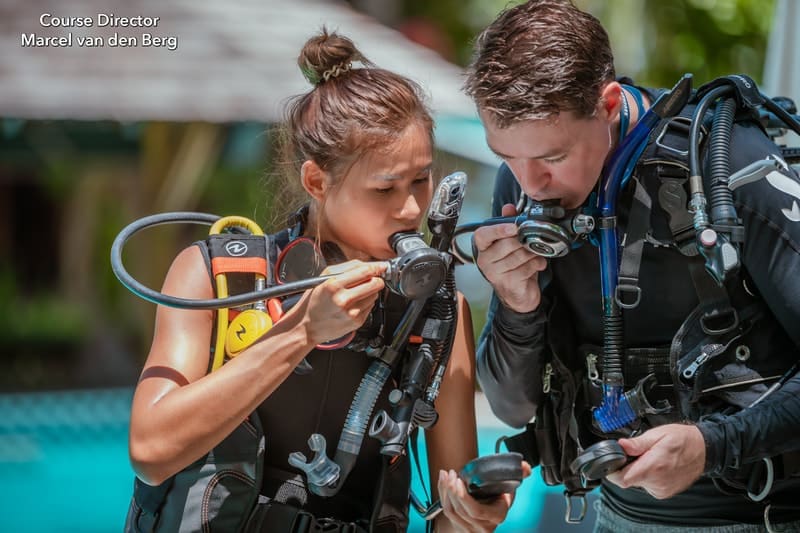
After you confirmed that your buddy’s air tank is open you can grab your SPG. Place your SPG and your buddy’s SPG next to each other. First, purge the second stage, then smell the air followed by breathing from your regulator at least 3 times while looking at both air gauges. Not only are you checking airflow, but you are also checking if the air gauge needle doesn’t move. If the needle does move you have or a problem with your first stage or you haven’t turned on the air fully.Finally, grab your own or your buddy’s alternate air source and also breathe from that at least 3 times to ensure your alternate air sources are working.
F stands for Final OK in the buddy check
To finish the buddy check you want to make sure that the scuba equipment from your buddy is streamlined and nothing is missing like the scuba mask, fins, and other essential scuba gear. If everything checks out, you give your buddy a final ok scuba diving hand signal and you are ready to begin your scuba dive.
Conclusion buddy check
The buddy check is a diving checklist that you can compare to a pre take off checklist that pilots use. You learn the buddy check in the PADI Open Water Diver Course and it is one of the most important parts before any scuba dive. You can use the buddy check acronym BWRAF to easily remember all the steps of the pre-dive safety check and I highly recommend to always do a buddy check, even when you are already an experienced scuba diver.Learn more information on how to become a PADI Diving Instructor and be able to teach the Buddy Check.
The PADI Open Water is by far the most popular scuba diving course in the world. During the PADI Open Water you learn all the necessary skills and knowledge to scuba dive around the world safely.
Scuba Diving is the closest feeling you can get to exploring a new world, like going into space. This might sound difficult as going into space takes years of training, but going underwater and getting this out-of-this-world experience can be achieved with only a few days of incredibly fun training!
PADI Open Water – Photo Credit: PeachSnaps
The PADI Open Water Diver Course is taught the same way all around the world because of the PADI Standards. This means that to be able to get a PADI Certification you need to meet the PADI performance requirements of the PADI Open Water Course that is standardised for any PADI Dive Centre, PADI Dive Instructor or PADI Divemaster worldwide.
The only difference between Open Water Courses around the world is the schedule and timeframe to complete the diving course. On this page I will explain all the ins and outs of the PADI Open Water Diver Course like the PADI Open Water skills, the knowledge development, the exams, and the best part, the Diving Experiences.
How to get the PADI Open Water Certification?
One of the questions I get most is how do I get the PADI Open Water Certification? To get this scuba diving certification is not actually that difficult and PADI have worked hard to make it easy and safe for most people to get this Open Water certification. The PADI slogan says it all: “PADI, the Way the World Learns to Dive”.
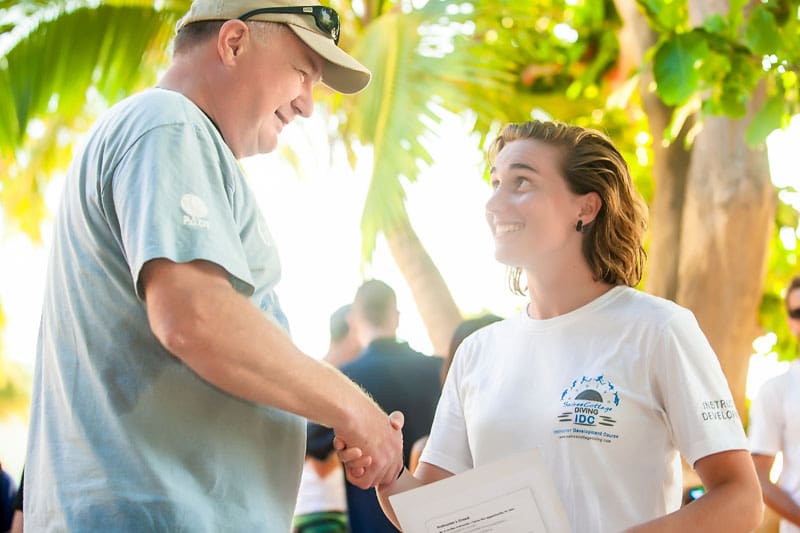
PADI Certification – Becoming a diver is really cool!
The PADI Open Water Certification is given to anyone who completes all the PADI Performance Requirements of the Course:
Complete five knowledge development segments, including quizzes and final exam.
Complete Confined Water Dives 1-5
Meet the water-skills assessment requirements
Complete Open Water Dives 1-4
Getting your PADI Certification is not hard, it’s fun and it’s an incredible experience, but you do need to follow the rules to make sure that your PADI Open Water Course is also a safe experience. After you have completed the PADI course you will receive the PADI Open Water Certification Card.
Photo Credit: PADI.com new PADI Cards to conserve the environment and be more modern.
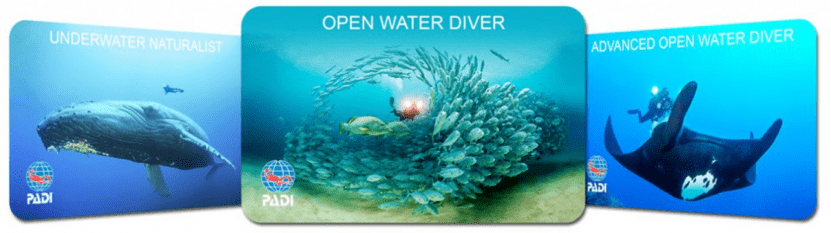
We highly recommend that you ask for the Project AWARE PADI Certification card as that card is a much nicer design with pictures of incredible aquatic life like Whale Sharks, Manta Rays, Turtles and much more. The best thing about taking a Project AWARE PADI certification card is that you will automatically donate to Project AWARE, an amazing Marine Conservation Organisation.
Project AWARE Certification Cards
How Long is the PADI Open Water Certification Good For?
The PADI Open Water certification is good for life! That means that when you get your PADI Open Water certification card you can enjoy scuba diving for the rest of your life, worldwide.
What is important to remember, though, is that any skills you learn can sometimes fade over time. If you are scuba diving regularly you don’t have to worry too much about that, but if you have breaks in between your scuba diving experiences we recommend you take a scuba refresher course called the PADI Reactivate course (which used to be called the PADI Scuba Review).
PADI Reactivate Course
When to take the PADI Reactivate course depends on how long it’s been since your last dive. It’s recommended that you reactivate (refresh) your dive skills after 6 months of no diving, but we do understand that if you have done thousands of dives you can maybe wait a bit longer before doing a PADI Reactivate course. Best to check with your PADI Dive Shop – they can give you the best advice.
The price of the PADI Open Water course depends on a few factors, like where in the world you are taking the PADI Open Water course, how many people are in your group, whether or not you get extra dives, how much the Dive Centre overheads are, how much salary the dive instructor takes and how far the boat has to travel out to complete the open water dives.
How much is the Open Water Course on average? The PADI Open Water Diver Course can cost anywhere between 250 and 700 USD depending on where you are in the world.
Just to give 4 examples, here are the average prices taken from Dive Centre websites in these areas:
Is the Cheapest PADI Open Water Course the Best Option?
The saying: “You get what you pay for” definitely applies to most circumstances in choosing your PADI Open Water. But then again some of the cheapest PADI Open Water Courses in the world are offered by fantastic dive centres with amazing Diving Instructors.
On the other hand, some of the cheapest Courses will land you with some of the worst PADI Open Water lessons and the worst Dive Instructors. Unfortunately, this question is not easy to answer.
I have seen some of the best PADI Dive Shops and PADI Dive Instructors offer some of the best Open Water Diver Courses for the cheapest prices and at the same time I have witnessed some of the worst Dive Shops and PADI Diving Instructors also offering some of the cheapest PADI Courses.
Best is to check some reviews before booking your PADI Open Water Course
The best tip I can give you is to spend some time online trying to find the best place to do your PADI Open Water Diver Course. Check their website, their Social Media, and most importantly, the reviews.
I do believe that in most cases, the best way to find the best PADI Open Water Diver course, is to not choose the cheapest option.
Where in the World is the Best Place to do the PADI Open Water Diver?
Finding the best place in the world to do the PADI Open Water Diver Course is also hard to answer. Like with the Open Water Diver course cost, it is not always as easy as saying: you should do it in that country or at that dive centre.
PADI does maintain a high quality of PADI standards across the globe to ensure that their PADI Open Water course is taught the same way around the world, but sadly we have found out that some Dive Shops and even more Dive Instructors do not always follow these standards resulting in sub-standard PADI Open Water Diver Courses.
I have heard Dive Shop owners in Europe talking negatively about dive shops in Asia, whilst hearing Dive Shops in Asia complaining about Dive Shops in the Caribbean and Dive shops in the Caribbean complaining that other places around the world are bad. What is going on?
In the end it is all about the money. Trust me on this, the moment you hear any Dive Shop, Manager, Divemaster, Dive Instructor or anyone else talking negatively about another place that is teaching the PADI Open Water, it usually means that they are bad themselves.
There are amazing Dive Shops, Divemasters and Dive Instructors teaching the PADI Open Water all around the world. The quality of the PADI Open Water Diver Course doesn’t depend on the location in the world, it depends on the people who are teaching and managing the course.
PADI Open Water Course Schedule
How long is the PADI Open Water Diver Course? This depends again on the location in the world. In some places the PADI Open Water Diver Course can take between 2 to 10 weeks, while in other places it can be as short as 3 days.
Some people say that taking a shorter PADI Open Water course is bad for quality, but that is not always true. Like I mentioned before it depends more on the Dive Shop and the Dive Instructor teaching you.Learn more about how to become a Diving Instructor
How long the PADI Open Water Dive Course
For example, in most cases a 6-week PADI Open Water course is the same a 3-day course, just stretched out over 6 weeks. In Europe for example many people have to work or go to school, so they decide to split up the PADI Confined Water training into 5 sessions. That way in Europe they can do the PADI Confined Water Dive 1 on a Monday evening, followed by the PADI Confined Water Dive 2 on a Friday Evening.
In a 3-day course you just combine all 5 PADI Confined Dives into one or two days. Some people say that this is bad, but then again staying in the flow of teaching and learning can have great benefits. In other words, depending on the circumstances there is not really a difference in quality between a 3-day or 6-week PADI Open Water Diver Course, if the Dive Shop, and most importantly, the Diving Instructor is good.
Would like to learn how to teach beginner scuba divers, then join the PADI IDC Course
Best Dive Gear to Get for Beginners
Most Dive Shops around the world now offer the use of their dive gear during the PADI Open Water. Some dive shops might ask you to pay extra for dive accessories like dive computers or dive compasses, while others don’t offer any dive equipment at all in their PADI Open Water Diver Courses.
Owning your own dive gear makes your diving experience so much better
Whether or not Dive Shops include the use of their dive gear in the course, we still recommend you purchase your own dive gear for the PADI Open Water Diver Course. The reason for this is that you are about to experience one of the coolest adventures in your life. Most rental dive shop equipment is well-maintained and safe, but not always the most comfortable version for you and almost certainly it’s been used by many divers before you.
Owning your own Dive gear is amazing as it is much more comfortable, better-fitting, cleaner (especially with Covid-19), can last a lifetime, plus you look cooler in your own brand-new Dive Equipment.
We understand that it depends on your budget when buying your own dive equipment, but you don’t always have to start with a full dive gear package. You can also start with basic dive gear like a scuba mask, snorkel, fins etc. Here you’ll find a list of some of the best dive gear that we recommend for the PADI Open Water Diver Course, listed in the order in which you should build your collection:
In each manual there are 5 chapters with knowledge review questions in the end of each chapter. To meet the performance requirements of the course you need to complete and understand all the knowledge review questions of all the chapters.
There are also 5 videos related to each of the chapters, and the answers to your knowledge review questions are also explained in the PADI Open Water Videos. This means you can use the book and the videos to help you study for your diving course.
So which Open Water manual option is the best choice? Well that depends a bit on your learning style and your dive shop policies. In the end all manuals explain the same theory you need to know to scuba dive very well.
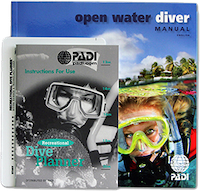
Would you like to start learning from the PADI Open Water Diver Manual now? Then get your copy here and be super-prepared for your Scuba Diving Course:
PADI Open Water Manual
What to Expect in The PADI Open Water Course
Every place in the world has different schedules for the PADI Open Water. But most likely you will start with an Orientation about the diving course. You will get some homework, watch PADI Open Water Diver course videos, learn from the diving manual or eLearning Online, practice diving skills in the PADI Confined Water sessions and of course learn how to scuba dive in the Open Water.
During and after this course you will not only build the confidence to scuba dive, but you will experience an adventure that not many people get to do in their lifetimes… it’s just incredible!
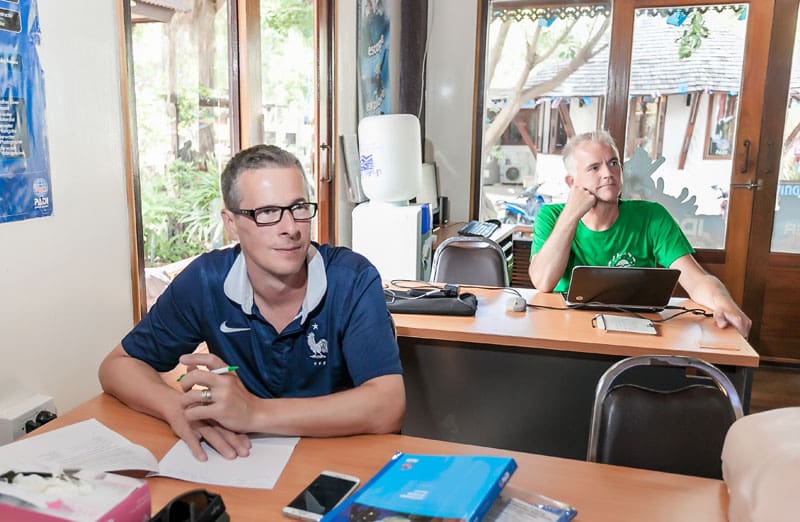
During the orientation you will get to know your PADI Diving Instructor and PADI Divemasters or Divemaster Candidates that might assist you on the Open Water course. If there are other students, you will now also meet them and get some introductions.
PADI Open Water Course Orientation
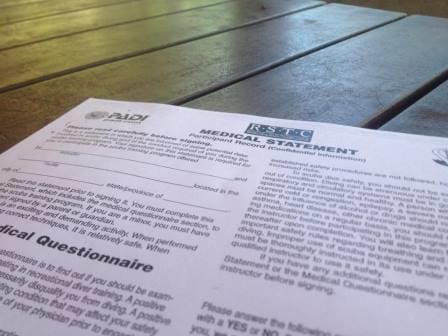
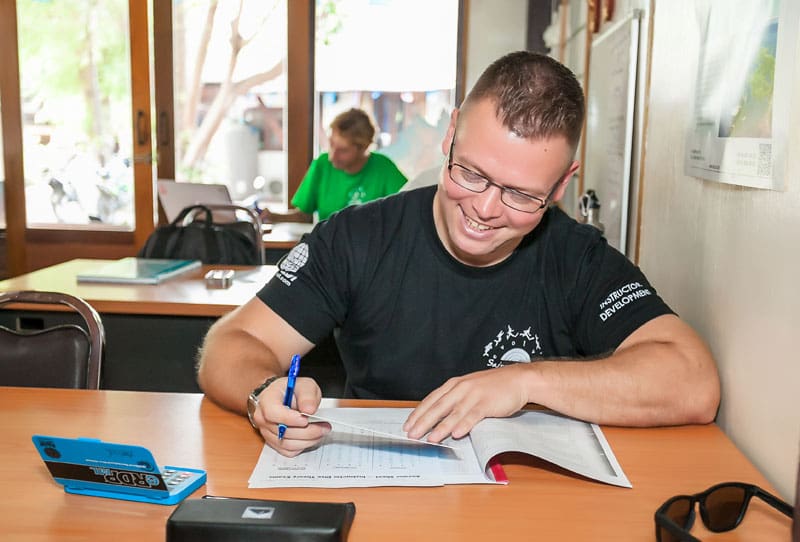
After the introductions you will go over the paperwork for the Open Water Diver course. 3 forms need to be completed:
Once the paperwork is completed you usually discuss your PADI Open Water schedule and the logistics of the course. Depending on where you choose to do the Open Water Diver course you might now get some homework to complete and/or watch some PADI Open Water Diver Course videos.
Homework and the PADI Open Water Classroom Sessions
To complete the theory of the PADI Open Water Diver course you need to complete and understand all the knowledge review questions that you will find at the end of each chapter of your manual.
Learn here more about all the PADI Open Water Diver Manual Answers of Chapter 1, 2, 3, 4, and 5.
PADI Open Water Exam
On top of that you need to complete all the quizzes and a Final Exam. The quizzes have 10 questions each and the PADI Open Water Exam has 50 questions. A lot of people worry about the exam, but I can tell you now that the Exam questions are very easy. Especially if you have a great Dive Instructor, you will have nothing to worry about. Great PADI Dive Instructors spend lots of time explaining all the Open Water Dive Theory to you.
To complete all the knowledge review questions and prepare for your PADI Open Water Exam you usually get some homework from your dive instructor and watch the PADI videos. You’ll also get classroom lectures to cover all the PADI Open Water dive course theory with your dive instructor.
I usually tell my PADI IDC Candidates – people on the Instructor Development Course who are training to become a Diving Instructor – “Babies should learn to crawl before they walk, walk before they run, and run before they fly an F-16”.
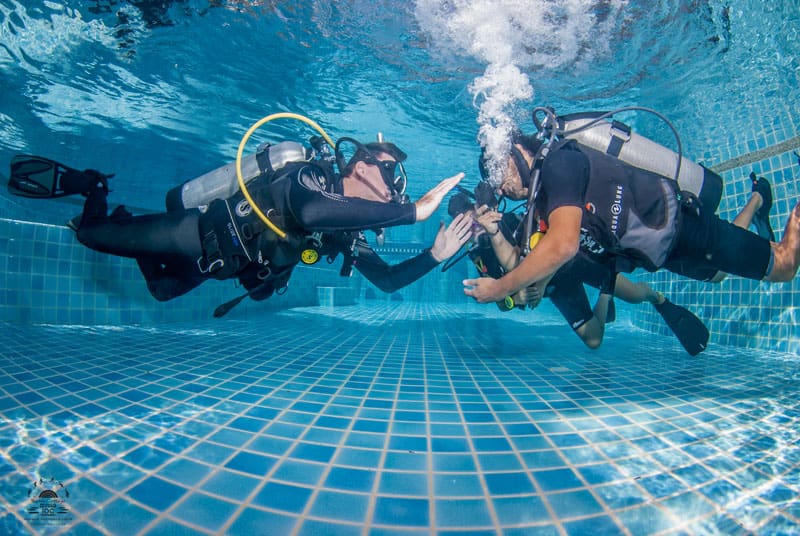
Likewise, it’s important for new students to first practice the diving skills in confined water before repeating them in deeper open water.
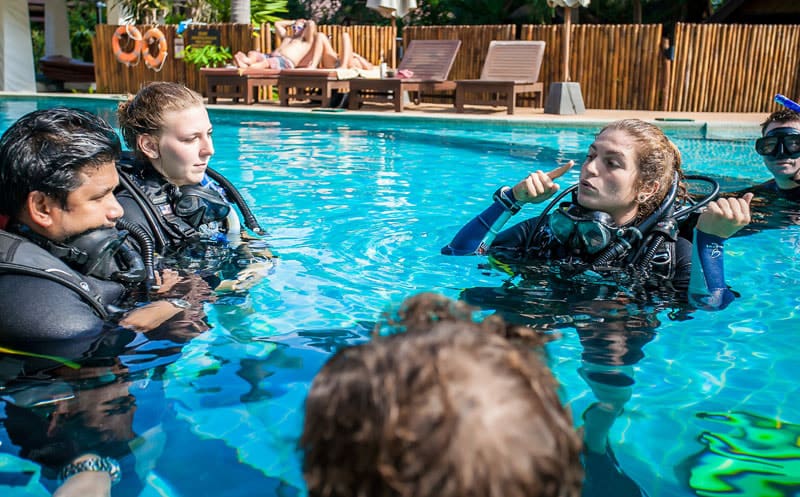
PADI Confined Water Skill Practice
What is confined water? Is that a pool? This is a very common question. Confined water is a general term that refers to either a swimming pool or confined open water. Confined open water is an open water site that offers swimming pool-like conditions with respect to clarity, calmness and depth. It has both shallow water and water sufficiently deep to allow student divers to meet all skill performance requirements.
During your confined water session, you will be practicing many scuba diving skills in a very relaxed environment. This means that if you don’t like it, or if you’re nervous, or maybe you have a little panic, it is very easy to get to the surface to catch your breath and try again. In most cases you can even stand up. This gives you a great environment to get used to breathing underwater and to grow your confidence for the open water dives.
If you want to know what diving skills you will have to perform in the PADI Open Water Course then keep reading as I will list every skill in detail further on in this article 👇
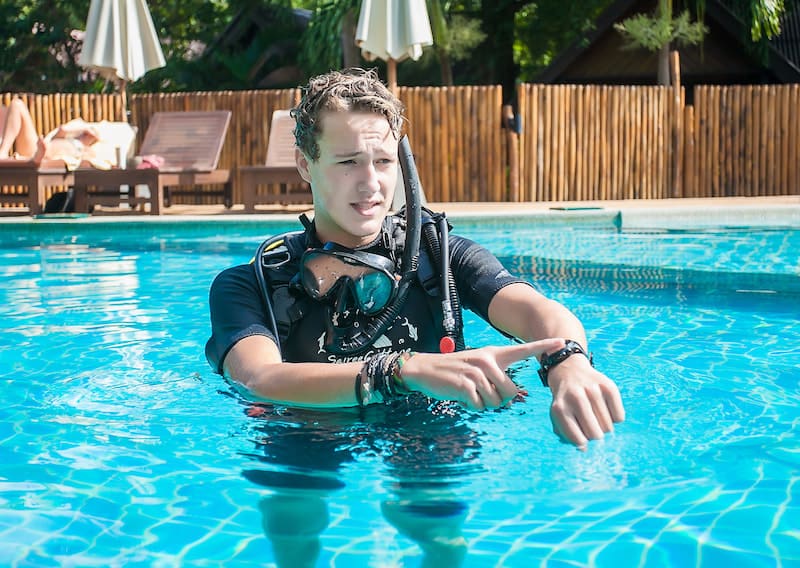
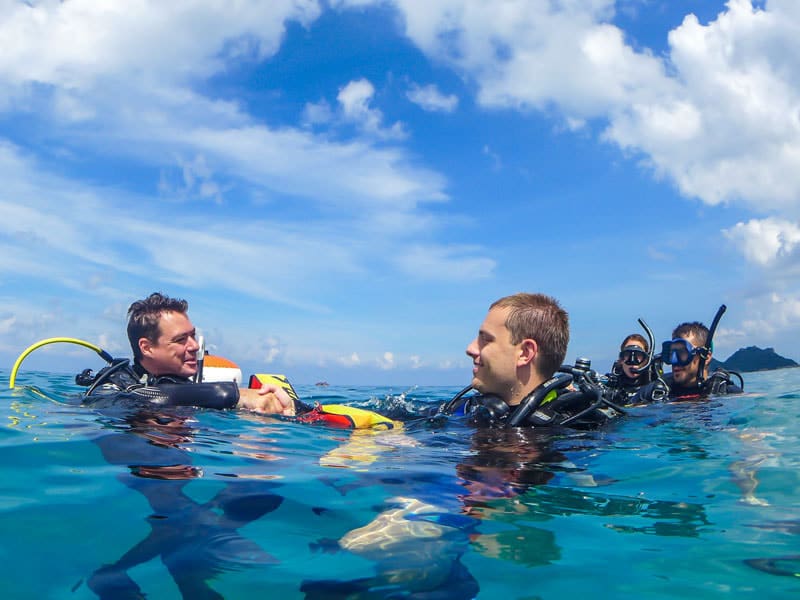
This is the big event in the PADI Open Water course, indeed most people join the course so that they can scuba dive in an open water environment like a tropical reef for example. During the PADI Open Water Diver course you need to complete 4 open water dives. This can be done in a lake, sea or ocean.
PADI Open Water Dive
Depending on where you choose to take your PADI Open Water in the world, you may get to see lots of aquatic life or not so much. To be honest if you ask my opinion, just being underwater is an incredible feeling of exploration and adventure, even if there is not so much to see. In other words, I highly recommend you try the PADI Open Water course regardless of the location.
VIDEO UNAVAILABLE
Of course, taking the PADI Open Water in a tropical area will give you more chance to see an incredible diversity of marine life like Turtles, Angel Fish, Banner Fish, Butterfly Fish, Manta Rays, lots of corals and if you are very fortunate maybe even a Whale Shark!! Diving in these tropical waters also gives you nice warm water temperatures so you can wear less dive equipment (especially exposure suits) and be more comfortable.
Taking the PADI Open Water Diver Course in colder water is also fantastic and a completely different experience than diving in warm waters. Most people say that taking the PADI Open Water in cold water feels more adventurous, you might even get better diving skills, whilst getting to see aquatic life that only lives in colder water. But if you dive in colder water, we highly recommend thicker wetsuits or even a good dry suit. Investing in good exposure protection is a must if you want to enjoy cold water diving comfortably and safely.
During the PADI Open Water Course you will have to complete some of the diving skills in confined water, followed by an amazing tour around a dive site. Besides repeating your diving skills in open water, you will be working a lot on your scuba diving hand signals, buoyancy, trim and swimming position. Just remember that this is still a course, which means that you will be mostly focussing on learning how to scuba dive safely. Yes, you will likely be seeing incredible stuff, but if you don’t, then don’t be disappointed – your main goal is to get your PADI certification. After receiving your PADI certification you can fun dive anywhere around the world to the level of your training.
Many people wonder what the skills are for the confined water session of the PADI Open Water diver course. There are 5 PADI confined water sessions. In some countries you will be doing these confined water dives separately because people need to work or study and therefore have less free time. In other places in the world you might do the 5 PADI Confined water sessions in one morning, afternoon or even better, during a whole day.
On every open water dive in the PADI Open Water Course you have to repeat some of the skills that you practiced before in the Confined Water sessions. This ensures not only that you master the skills with repetition, but it also confirms that you can use these skills when needed on real open water dives. Sometimes it is one thing to practice the skill easily in confined water, but it can be another to repeat that same skill in open water, where it is deeper and conditions can be less calm. If you choose to practice this with a good dive shop and/or PADI Dive Instructor then it shouldn’t be hard. In fact it should be a great experience.
The PADI Open Water Diver course is the world’s most popular scuba certification program, introducing beginners to the fundamentals of scuba diving. It combines theoretical knowledge, confined water training, and open water dives to equip students with the skills and confidence needed to dive independently.i
Anyone aged 10 years or older, in good physical health, and possessing basic swimming skills can enroll in the PADI Open Water Diver course. No prior scuba diving experience is required.
The course duration varies but generally spans 3 to 4 days. Some dive centers offer flexible schedules, allowing students to complete the course over consecutive days or spread out over weekends.
The PADI Open Water Diver course is available at PADI dive centers and resorts worldwide. Popular destinations include tropical locations like Koh Tao, Thailand, known for their clear waters and vibrant marine life.
Conclusion
I hope that by reading this you now have a better understanding of the PADI Open Water course. Please check out the “learn more” pages that go into much more detail of the different parts of the PADI Open Water. This diving course is amazing, easy and shouldn’t be that scary at all and it can take you to places you can only dream of and see creatures that look like they came straight out of a silence fiction movie. Forget about just watching underwater documentaries, you can be part of this underwater world by taking the PADI Open Water Diver Course.