The PADI CESA skill in the PADI Open Water Diver Course is one of the most important scuba skills to perform correctly and safely. Many people overthink the PADI CESA Skill. Still, in the end, it can be performed easily and safely by just following a few easy steps.
CESA – Controlled Emergency Swimming Ascent
Why do we practice the CESA – Controlled Emergency Swimming Ascent?
The reason why we practice the PADI CESA Skill for real life is that in the unlikely event you run out of air as a Scuba Diver and your dive buddy is too far away, you can still make a safe ascent to the surface.
When do we practice the PADI CESA Skill?
You need to complete the PADI CESA Skill twice during the PADI Open Water Diver Course. Once during Confined Water Dive 3 and as a flexible skill during Open Water Dive 2 or 3 or 4 of the PADI Open Water Course.
During Open Water Dive 2 or 3 or 4 we perform the PADI CESA vertically from 6 to 9 meters to the surface. Before we practice the PADI CESA Skill vertically in the Open Water we like to practice it first horizontally in confined water for at least 9 meters, just to be sure we are ready for the open water.
Confined open water is a swimming pool or open water site that offers swimming-pool-like conditions with respect to clarity, calmness, and depth.
PADI CESA Skill in Confined Water
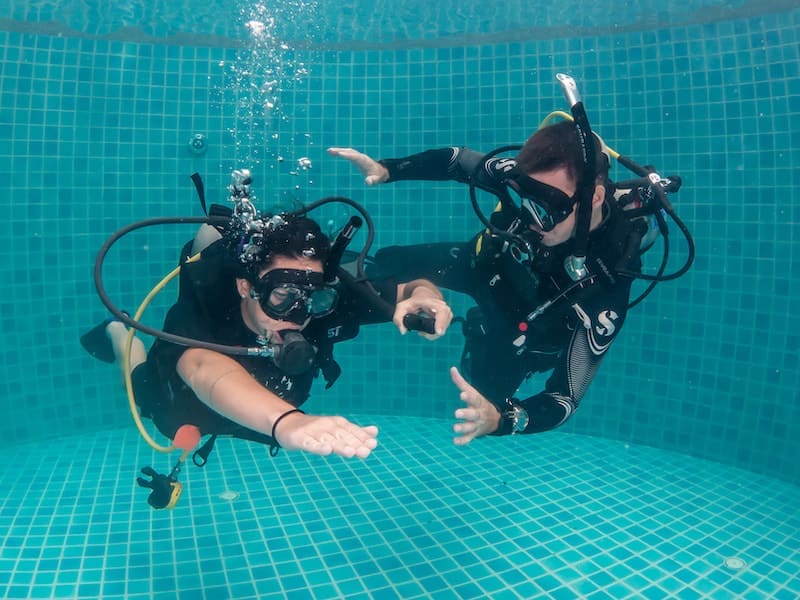
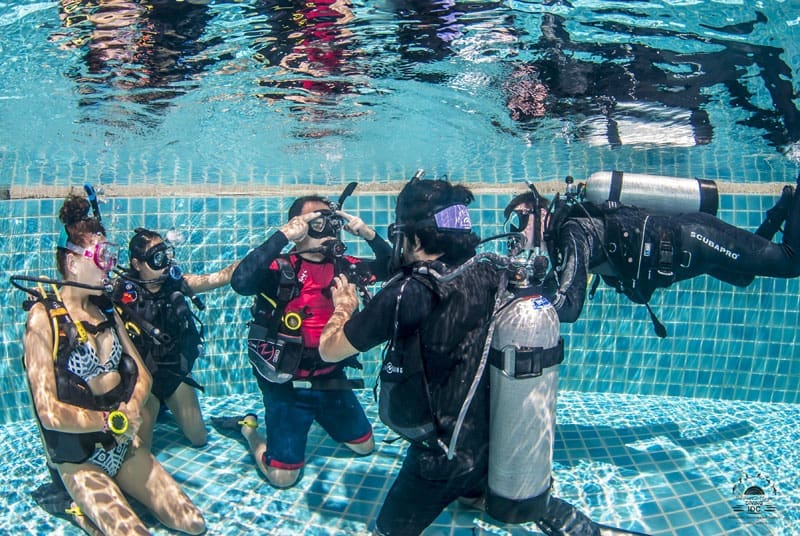
How to perform the PADI CESA Skill in Confined Water
1. Start by being neutrally buoyant, simulate the ascent position, with your right above your head and your left hand on the deflator button
2. Take a couple of deep breaths
3. Whenever you are ready, take a final breath in and start swimming slowly while exhaling continuously by making an aaaaaaaaaaah sound
4. Keep swimming slowly with-out touching the bottom or the surface
5. Keep exhaling making that continuous sound
6. Swim for at least 9 meters until the CESA is FinishedIn this video, we show how to do the CESA correctly in a swimming pool during confined dive 3 of the PADI Open Water Diver Course. We show this from a perfect diving student level:
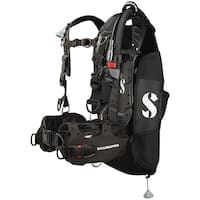
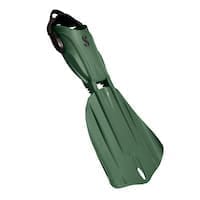
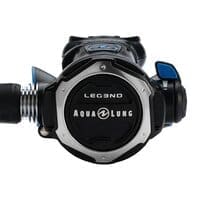
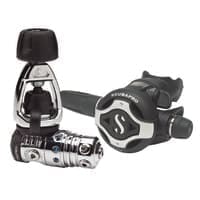
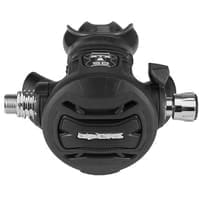
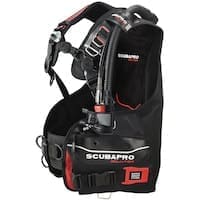
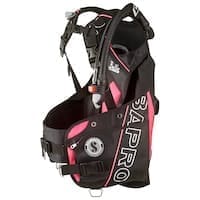
Great dive equipment to have for the PADI CESA Skill is a good scuba regulator, BCD and Fins. Have a look at the items below as they are some of the best dive gear to have:
Frequently Asked Questions About the PADI Controlled Emergency Swimming Ascent (CESA)
What is the PADI Controlled Emergency Swimming Ascent (CESA)?
The Controlled Emergency Swimming Ascent (CESA) is a critical scuba diving skill taught in the PADI Open Water Diver course. It is designed for situations where a diver runs out of air and cannot access an alternate air source. The CESA enables a diver to ascend safely to the surface while continuously exhaling, thereby preventing lung over-expansion injuries.
When is the CESA performed during PADI training?
In the PADI Open Water Diver course, the CESA is practiced in both confined water and open water settings. Initially, students perform a horizontal CESA in confined water, swimming at least 9 meters (30 feet) while exhaling continuously. Subsequently, during Open Water Dive 2, 3, or 4, students execute a vertical CESA from a depth of 6 to 9 meters (20 to 30 feet) to the surface.
What are the steps to perform a CESA?
Start Neutrally Buoyant: Begin in a neutrally buoyant state at the designated depth.
Positioning: Place your right hand over your head to protect it and your left hand on your BCD’s deflator button.
Final Breath: Take a deep breath and remove your regulator from your mouth.
Ascent: Swim slowly towards the surface, exhaling continuously by making an “ahhh” sound to ensure a steady release of air.
Maintain Control: Keep your ascent rate within safe limits, not exceeding 18 meters (60 feet) per minute.
Surface Actions: Upon reaching the surface, inflate your BCD orally to establish positive buoyancy.
Why is continuous exhalation important during a CESA?
Continuous exhalation during ascent prevents lung over-expansion injuries. As a diver ascends, the ambient pressure decreases, causing the air in the lungs to expand. Exhaling continuously allows this expanding air to escape safely, reducing the risk of pulmonary barotrauma.
What equipment is recommended for practicing the CESA?
For effective practice of the CESA, it’s advisable to use reliable scuba gear, including a well-maintained regulator, a buoyancy control device (BCD), and appropriate fins. High-quality equipment ensures safety and comfort during training exercises.
How To Assemble Dive Equipment the right way is important for safety and it can improve your Diving Experience Significantly!
It is important that you learn this skill because you need to assemble dive equipment before every dive and also as a scuba diving skill during the Open Water Diver Course. During the Divemaster and IDC Course you need to demonstrate How To Setup Dive Gear in Divemaster and IDC skill circuit.
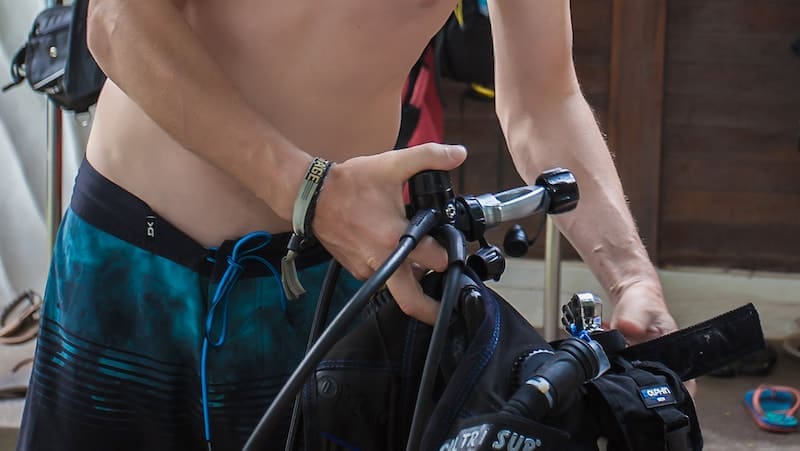
How To Assemble Dive Equipment
There are different styles on How To Assemble Dive Equipment, in the video below we follow these steps:
1. Inspect the tank, visual inspection sticker and the hydrostatic test date
2. Check the O-Ring
3. Open the tank valve and give a little burst to clean the valve
4. Put the BCD correctly over your scuba cylinder
5. At least 4 fingers from the top
6. Attach the Safety Strap
7. Make sure everything is attached correctly
8. Grab your regulator and unscrew the dust cap from the first stage
9. Place the first stage over the valve
10. Gently screw the first stage on the tank valve (Only 3 finger tight)
11. Attach the low-pressure inflator hose to the BCD
12. Attach the alternate air source
13. Streamline everything
14. Turn the SPG glass away from anyone
15. Slowly open up the tank valve
16. Finished
After finishing Assembling the Dive Equipment, you should do a full dive equipment check up:
1. Fully inflate the BCD to check for leaks and the LPI
2. Orally Inflate the BCD
3. Purge, smell and breath through the second stage, while checking the SPG
4. Check the alternate air source
5. Make sure the dive equipment is streamlined
6. Gently place your equipment on its side
How To Assemble Dive Equipment becomes much more easier after a few tries. It is still very important to do a buddy check after you assemble the dive gear to make sure you setup your dive gear correctly.
Check out this video on How To Assemble Dive Equipment 👇
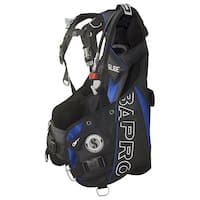
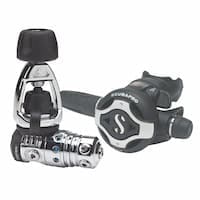
In this video we used the Scuba Pro Glide BCD, which is one of the most comfortable Scuba BCD’s on the Market. We also used the Scuba Pro MK25 Regulator which delivers more the 10.000 liters of air per minute for the easiest breathing feeling. Are you looking for a new BCD or Regulator? Then we highly recommend these 2 models:
Frequently Asked Questions About Assembling Dive Equipment
What are the essential steps to assemble scuba diving equipment?
Assembling scuba diving equipment involves several critical steps to ensure safety and functionality:
Inspect the Cylinder: Check the visual inspection sticker and hydrostatic test date to ensure the tank is within the valid inspection period.
Check the O-Ring: Ensure the O-ring on the tank valve is present and in good condition.
Purge the Valve: Briefly open the tank valve to clear any debris or moisture.
Attach the BCD: Slide the BCD onto the cylinder, positioning it so the top of the BCD aligns with the tank valve. Secure the BCD using the tank strap, ensuring it’s tight and the BCD doesn’t move.
Connect the Regulator: Remove the dust cap from the regulator’s first stage. Attach the first stage to the tank valve, aligning it properly, and tighten securely (finger-tight for yoke connections or as specified for DIN connections).
Attach Hoses: Connect the low-pressure inflator hose to the BCD’s inflator. Ensure all hoses are routed correctly and are not twisted or kinked.
Open the Tank Valve: Slowly open the tank valve fully to pressurize the system.
Check the SPG: Verify the tank pressure is adequate for the planned dive.
Test the Regulator: Purge and breathe from both the primary and alternate second stages to ensure proper function.
Inflate the BCD: Use the inflator to add air to the BCD, checking for leaks and ensuring the inflator and dump valves function correctly.
Streamline Equipment: Secure all hoses and accessories to prevent entanglement and ensure easy access during the dive.
Final Check: Lay the assembled gear on its side to prevent it from falling over and conduct a final inspection before donning the equipment.
Following these steps helps ensure that your dive equipment is assembled correctly, promoting safety and comfort during your dive.
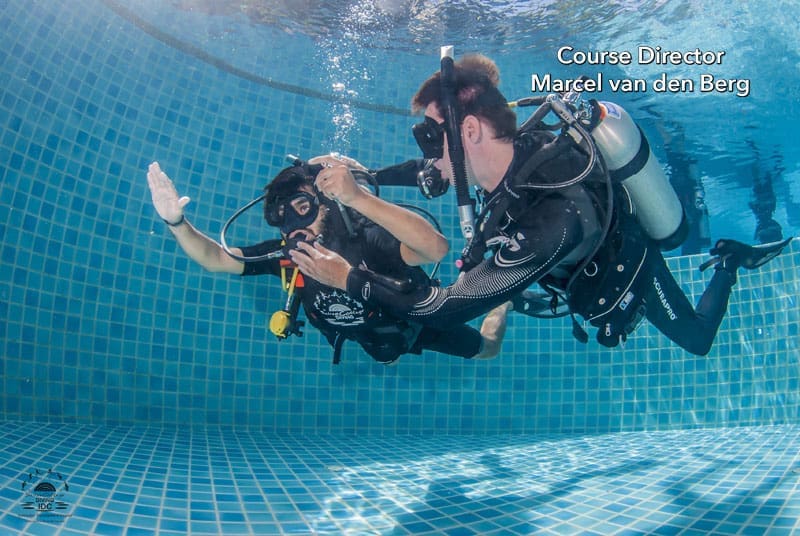
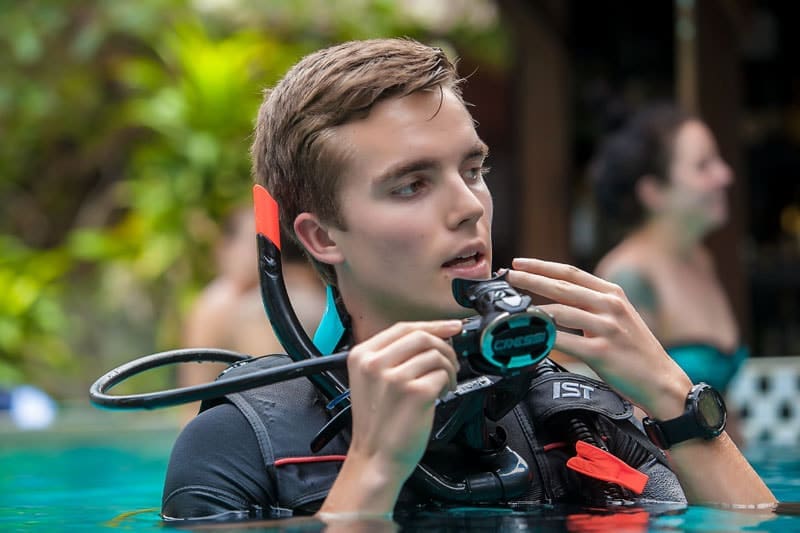
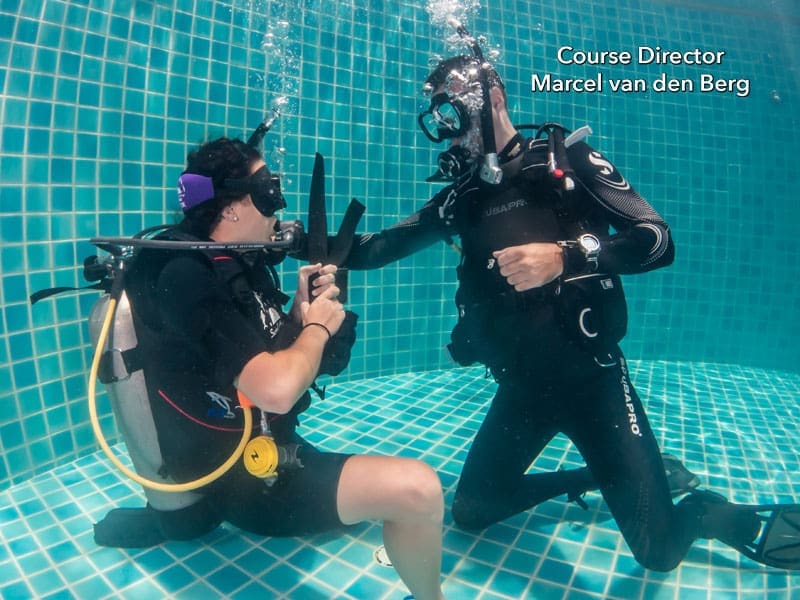
The Regulator Recovery and Clearing is another famous PADI Open water Diver course skill. It is also one of the first skills that you will do in Confined Water Dive 1. The PADI Regulator Recovery and Clearing skill is surprisingly easy to do, however many new scuba divers are nervous for this skill.
Regulator Removal and Clearing
The reason why some new scuba divers are nervous to perform the Regulator Recovery and Clearing skills that it involves taking your regulator second stage out and dropping it next to you. For the first time you have no mouth piece in your mouth, and you feel a bit out of control not holding it in your hands like in the previous regulator clearing 2 Methods skill.
Don’t worry as you will find out that the Regulator Recovery and Clearing is easy to perform and you will have a lot of time to recover your regulator. The trick is to blow small bubbles from your mouth when you remove the scuba regulator.
The smaller the bubbles the longer you have to recover the second stage. The reason why we blow small bubble is that you can never hold your breath underwater. We solves this by exhaling small bubble instead of holding our breath.
Frequently Asked Questions About Regulator Recovery and Clearing
What is regulator recovery and why is it important?
Regulator recovery is a fundamental scuba diving skill that enables a diver to retrieve their regulator if it becomes dislodged underwater. Mastering this skill ensures that divers can maintain access to their air supply in unexpected situations, enhancing safety and confidence during dives.
How do you perform the sweep method for regulator recovery?
To execute the sweep method:
Exhale continuously to prevent breath-holding.
Lean to the right, allowing the regulator to dangle.
Extend your right arm downward, touching your thigh.
Sweep your arm back along your leg and then outwards in a wide arc.
Catch the regulator hose on your arm and guide the mouthpiece to your mouth.
Clear the regulator before resuming breathing.
This method is widely taught in scuba courses and is effective for quickly retrieving a lost regulator.
What are the two methods for clearing a regulator underwater?
Blast Clear: Forcefully exhale into the regulator to expel water.
Purge Button Clear: Press the purge button on the regulator to release a burst of air, clearing water from the mouth piece
Both methods are effective, and divers should practice each to determine personal preference.
Why is continuous exhalation emphasized during regulator recovery?
Continuous exhalation prevents lung over-expansion injuries by ensuring that expanding air escapes as pressure decreases. It also helps maintain buoyancy and composure during the recovery process.
How can divers overcome anxiety related to regulator recovery?
Building comfort with regulator recovery involves:reddit.com
Regular practice in controlled environments.
Gradual progression, starting with holding the regulator before letting it go.
Visualization techniques to mentally rehearse the skill.
Seeking guidance from instructors to address specific concerns.
Consistent practice and support can significantly reduce anxiety associated with this skill.
How to clear a mask when scuba diving is for many new scuba divers the hardest diving skill to complete in their diving course. However, in many cases people overthink it and with some practice and a good diving instructor this skill is not so hard to master.
First of all I recommend you to not overthink the how to clear a scuba mask skill. In the end you breath into your mouth and out of your nose to clear it. But as soon as you start to overthink it, you start to worry. This leads to loss of confidence and when we loose confidence we have a tendency to shake, not think clearly and sometimes do the opposite of what we want to do. In this case we see new diving students breath into their nose instead of their mouth. If this happens you get water in your throat and that leads to panic.
Clearing a Partially Flooded Mask
So we learn that confidence is key in completing the mask clearing skill while scuba diving. In the PADI Open Water Diver Course you will be practicing how to clear your scuba mask many times to ensure mastery before getting your diving certification.
In the PADI Open Water course you will practice the mask skills first in confined shallow water. This makes it easy for you to stand up if somethings go wrong and it makes people relax knowing they can stand up if needed. In confined water you will practice in order: Partially Flooded Mask, Fully Flooded Mask, Mask Removal and Replacement, Mask Removal and Replacement breathing for 1 minute and No Mask Swim. Then on the open water dives you will repeat: Partially Flooded Mask, Fully Flooded Mask and Mask Removal and Replacement. All these mask skills need to be completed in a comfortable, fluid and most importantly repeatable manner to ensure completion of the course and achieving your PADI Certification.
Improve your mask clearing skills by owning your own scuba mask
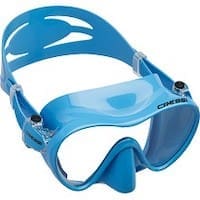
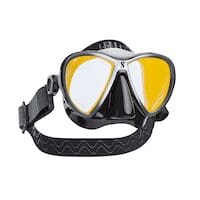
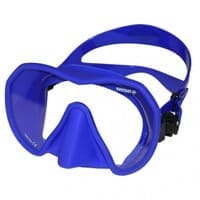
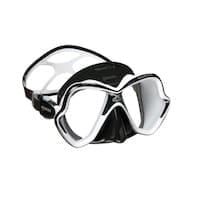
Owning your own scuba mask is great as it will fit you much better than most rental masks. It is very easy to travel with a scuba mask, much more hygienic and the latex will seal much better on your face. This prevents the mask from leaking and good latex will also make it much easier to clear it from water. Have a look at these 3 masks I recommend you get:
Frequently Asked Questions About Clearing a Partially Flooded Scuba Mask
Why is it important to learn how to clear a partially flooded scuba mask?
Mastering this skill ensures uninterrupted vision and comfort underwater. It enhances safety by preventing panic and allows divers to handle unexpected water ingress confidently.
What causes a scuba mask to partially flood during a dive?
Common causes include an improper fit, facial movements breaking the seal, stray hair under the skirt, or accidental bumps dislodging the mask.
What are the steps to clear a partially flooded scuba mask?
Remain calm and maintain steady breathing through your mouth using the regulator.
Gently press the top of the mask against your forehead to create a seal.
Tilt your head slightly upward.
Exhale slowly and steadily through your nose to expel the water from the bottom of the mask.
If water remains, repeat the process until the mask is clear.
Should I close my eyes while clearing the mask?
If you’re wearing contact lenses or have sensitive eyes, it’s advisable to close your eyes to prevent irritation from saltwater.
How can I practice mask clearing skills?
Begin in a shallow pool or controlled environment. Practice flooding and clearing your mask incrementally, starting with small amounts of water. Gradually increase to full floods as you build confidence. Consistent practice will enhance your comfort and proficiency.
What if I struggle with clearing my mask underwater?
It’s common for new divers to face challenges. Regular practice, focusing on calm and controlled breathing, and seeking guidance from a certified instructor can help overcome difficulties.
Can owning a personal scuba mask help with clearing issues?
Yes, a well-fitted personal mask reduces the likelihood of leaks and makes clearing easier. It also enhances overall comfort and hygiene compared to rental masks.
Are there any tips to make mask clearing more effective?
Ensure the mask skirt is free from hair and properly sealed against your face.
Avoid overtightening the mask strap, which can cause discomfort and leaks.
Practice the skill regularly to build muscle memory and confidence.
Is mask clearing covered in scuba certification courses?
Absolutely. Mask clearing is a fundamental skill taught in entry-level scuba certification courses, such as the PADI Open Water Diver course, to ensure divers can handle water ingress safely.
What should I do if I panic during mask clearing?
If you feel overwhelmed, signal your buddy or instructor, ascend if necessary, and take a moment to regroup. With time and practice, your confidence will grow, reducing panic responses.
Scuba Diving Hand Signals are used by divers to communicate underwater. These Scuba Hand Signals are easy to learn and understand. You don’t need to know ASL deaf sign language to scuba dive. Everyone can do it easily by learning these common scuba diving hand signals.
Why Scuba Hand Signals, why not just talk underwater?
You actually can talk underwater. The deeper you go to higher your tone will be and at one point you will be sounding like Donald Duck. So why is it that we need to use Scuba Diving Hand Signals if we can talk underwater?
This has more to do with your ability to hear underwater compared to your ability to talk underwater. Sound travels in waves around 4 times faster in water than it does in air. In the air, the sound will hit our inner ear and because we are made from an average of 65% water, the sound can hit the ossicle bones which sends signals to the brain to decipher the language.
If sounds travel through water, it can’t hit the ossicle bones in the inner ear as that is also made from water. It will now hit your mastoid bone of the skull right behind your ears and make it vibrate. In other words, you use your skull to listen underwater instead of your ears. The mastoid bone bypasses the ear canal to signal the brain and activates both ears at once. This makes it hard to understand where the sound is coming from underwater. This is why we need Scuba Diving hand Signals to communicate underwater.
Difference between Scuba Diving hand Signals and Sign Language of the Deaf
Sign languages are full-fledged natural languages with their own grammar and lexicon. This makes it possible to speak full sentences. Scuba Diving Hand Signals are shorter more simplified scuba signals that can mean multiple words or meanings with a single signal.
When do you learn Scuba Diving Hand Signals?
We recommend you to learn the most common scuba hand signals as soon as you can and before your scuba diving courses. But don’t worry if you haven’t prepared as you will also learn scuba diving hand signals in your PADI Open Water Water Diver course or any other beginner scuba diving courses from other organizations.
The OK Sign is one of the most common Scuba Hand Signals
You will learn these scuba hand signals from your PADI Open Water Manual, the PADI Video’s, and from your Diving Instructor. Most Dive Instructors teach the Scuba Diving Hand Signals a bit in the classroom and mostly during the PADI Confined Water Dive 1.
Your Diving Instructor will repeat these scuba signals throughout your PADI Open Water course to ensure repetition and retaining the signals. A funny note is that many scuba divers tend to unknowingly use scuba hand signals in their daily lives.
Common Scuba Hand Signals
Here we will show the most common scuba hand signals you can expect to see and use while diving. From the famous ok signal, scuba diving hand signals for air pressure to emergency scuba signals.
Full Scuba Diving Hand Signal Video:
OK Sign Hand Signal
The OK sign is instantly recognized as the famous scuba diving signal. The OK signal is maybe the most used signal in scuba diving. The OK signal can mean 2 things, the Question: Are you ok? And the answer: I am ok.
Diving Signal: SOMETHING IS WRONG WITH THE EARS
Having ear problems is very common with beginner scuba divers. To solve an ear problem you need to equalize your ears while scuba diving. For some people this is easy, but for others, this can be hard. Knowing this hand signal will help you to tell your Dive Instructor, Divemaster, or Dive Guide that you have a problem Equalizing your Ears.
Check out our PADI Medical Form page and find out if you need to check your ears with a doctor before scuba diving.
Almost all divers can equalize their ears if they know the proper technique. Many people, struggle with equalizing their ears, usually because of bad training, and not allowing enough time for new divers to equalize their ears. If you want to know more about some amazing and easy techniques to equalize your ears while scuba diving then check this video here:
Diving Signal: SOMETHING IS WRONG WITH THE STOMACH
Having a Stomach issue is not good to have on land, but it can be even more uncomfortable underwear. With this signal, you can tell your buddy or dive leader that there is something wrong with your stomach underwater.
Diving Signal: PUKE
Puking is never nice, not above, and not underwater. We highly recommend you to cancel the dive and return to the surface, if you feel sick and feel you need to puke. This is however not always possible and in the worst-case scenario, we heard about stories from people puking up underwater through their regulators. Knowing this Puking Scuba Hand Signal can help you to alert other divers about your condition.
Diving Signal: STOP
The Diving Signal STOP is used when a diver wants you to stop in whatever you are doing underwater. This signal is important as it can stop potential dangerous activities while scuba diving. The stop signal is also common when other divers swim too fast.
Diving Signal: COME CLOSER
This signal is very handy when other scuba divers are too far away from each other. Just signal to come closer to reunite with your buddy, get closer to the coral or your Dive Instructor, Divemaster, and/or Dive Guide.
Diving Signal: HAVE MORE DISTANCE
Sometimes scuba divers are too close to each other or way too close to aquatic life. Just use the scuba diving hand signal: Have More Distance to move them away.
Diving Signal: BUDDY UP
One of the most important things in scuba diving is to stay close to your buddy. You can dive solo with the PADI Self-reliant Diving certification, but that takes more training. In general, we highly recommend you always dive with a buddy. We do understand that with so much to see underwater you can quickly lose your distance between each other. This scuba signal will bring you back together.
Diving Signal: COME TOGETHER
The Come Together hand signal is very similar to the buddy up signal and it means that you come together with your buddy, another diver, aquatic life, or any object underwater.
Diving Signal: HAVE MORE SPACE BETWEEN EACH OTHER
As much as we always promote to stay close to your buddy, we sometimes see scuba divers almost clued together. This is not a good diving experience and with the signal: Have more space between each other we try to get you apart.
Diving Signal: SIT ON YOUR KNEES
This scuba signal is used a lot by dive instructors asking their students to sit on their knees. Most likely diving instructors ask this when practicing diving skills in confined water and sometimes even the open water if on a sandy bottom with no chance of hurting any aquatic life.
Diving Signal: STAND ON YOUR LEGS
This scuba diving hand signal is used when someone wants you to stand on your legs on the bottom of the pool, confined open water, or the bottom of the sea. It is of course very important that you check for any aquatic life before you give this signal to your diving students or fellow scuba diver.
Diving Signal: SLOW DOWN
The Slow Down Hand Signal can be very handy. You are supposed to do anything slowing when scuba diving. Moving fast can deplete your air much quicker. You also won’t see much aquatic life when you dive fast. This is because you scare it away and it is hard to see any details moving fast. With this scuba hand signal, you can signal your buddy to slow down and enjoy the dive better.
Diving Signal: REMEMBER
The remember scuba signal is used many times by Dive Instructors and Divemasters. This diving signal can help students to remember things while they are scuba diving. The remember signal is one of the most used scuba diving hand signals by Diving Instructors and Divemasters.
Diving Signal: CUT
his sounds a bit like a scary hand signal, but dive instructors and Divemasters use it to finish (cut) a scuba skill when the performance requirements have been met. It is also used by PADI Examiners during the PADI IE when they have seen enough and in most cases will now reward you the PADI Scuba Dive Instructor Diploma.
Besides all the teaching signals, it is also used as a signal to cut something underwater like a fishing line to net with your dive tool, scissors, or dive knife.
Diving Signal: CONTINUE
The Continue hand signal is usually used by scuba instructors that want you to do more of a scuba skill or work more on your swimming/buoyancy. The continue scuba hand signal means to keep doing what you are doing underwater.
Diving Signal: REPEAT
The Repeat hand signal is also commonly used by dive instructors. They use this signal to ask you to repeat something and in most cases that will be a diving skill. Or you might do a great move underwater and someone asks you to do it again with this diving hand signal.
Diving Signal: GO UP
The going up signal is commonly mistaken with the OK sign while scuba diving. On land, we like to use the Thumbs Up signal all the time when we are happy or agree on something. But the thumbs-up signal in scuba diving means: Going Up. We commonly use this scuba signal to ascent at the end of a dive.
Diving Signal: GO DOWN
If you want anyone to go down or descent on a scuba dive you show them this signal. Go down means descending in diving and can be very important when divers start to float up. In many cases, scuba divers don’t know that they are floating up, so having a buddy reminding them to go down with this signal can be very handy.
Diving Signal: BREATH IN AND OUT
Feeling relaxed and calm while scuba diving has all to do with your breathing. It is very important to breathe slowly and deeply while scuba diving. Also during many diving skills, you need to breathe in and out the right way. This signal can help to remind you or others to breathe in and out.
Diving Signal: OUT OF AIR
This is not one of the most positive signals, but the Out of Air Scuba Hand Signal is one of the most important ones. In the unlikely event, you might run out of air, you can use this to signal your buddy or any other diver that you are out of air and that you need to share air with an alternate air source. Knowing the Out of Air signal can potentially save your life is it ever happens.
Diving Signal: WHAT IS YOUR AIR?
Scuba Diving Hand Signals for Air Pressure are very important to make sure you don’t run Out of Air while one a dive. In this video, we show you all the Scuba Diving Hand Signals for Air Pressure.
The scuba hand signals air left should be asked every 5 to 10 minutes while scuba diving. I recommend using this signal to ask your buddy what his/her air is every 10 minutes on a dive and your buddy doing the same back to you. You should still always check your air frequently during the dive, I recommend every 5 minutes a quick look at your air gauge and every 10 minutes check your buddy or/and diving students by giving this scuba hand signal.
After someone asks you for your air, you should give them the right air signal back. What is very important is that many scuba divers use different hand signals. Not asking and checking new diver air signals can be a very dangerous mistake. It is not a problem at all that some people use different scuba diving and signals than others, but it is very important to agree on any scuba hand signals before a dive, especially air signals.
Diving Signal: LOOKING
The looking signal can be used to show a diver where to look. There are many points of interest underwater to look at. Many times I see an amazing aquatic animal and I signal to my buddy to look at it and vice versa. We also sometimes point out looking at something potentially dangerous to make sure we avoid it.
Diving Signal: INFLATE THE BCD A LITTLE BIT
This is a very common and important signal given by Diving Instructors, Divemasters, and Dive Guides. Especially if you are a new scuba diver you will see this signal a lot as you are getting a feeling for your buoyancy control. We prefer to adjust our buoyancy with our lungs, but a little bit of air in your BCD can help.
Diving Signal: DEFLATE YOUR BCD
If you are a new scuba diver then you will see this diving hand signal a lot by your dive instructor. Controlling your buoyancy is not easy when you first try out scuba diving and a lot of new divers tend to float up to the surface. This can be for different reasons like inhaling too much, no enough weights, too excited underwater, kicking up, but mostly it is because of too much air in the BCD. Knowing to recognize the Deflate Your BCD scuba signal can help you to deflate in time and stop the ascent.
Floating up is a big problem for beginner scuba divers. Most of the time it is caused by putting too much air in the BCD. A lot of diving instructors will signal you to release air from the BCD when this happens. However, in many cases, the student, diver, or you try hard to deflate the BCD but it doesn’t work.
This is because you are trying to deflate your scuba BCD in the wrong position. To effectively deflate a scuba BCD you need to be in a vertical position. This scuba diving hand signal will remind you to go into the best deflate position.
Diving Signal: PROPER WAY TO GET DOWN
This signal is given when someone wants you to go down. In most cases this means just to slowly exhale to descent again and if that doesn’t work try to deflate your BCD in the proper position to go down. In most cases, you just have to exhale while scuba diving if you are relaxed.
Diving Signal: SWIMMING
Scuba Diving is more about having neutral buoyancy and hover underwater to look at amazing aquatic life. However, you do need to swim sometimes get to another location. To swim while scuba diving is as easy as kicking your legs and fins underwater. You can use this swimming signal to remind someone to use the scissors kicks or the more advanced frog kicks to swim while scuba diving.
Scuba Diving Hand Signals Conclusion
Scuba Hand Signals are an amazing way how divers communicate underwater. Scuba Diving hand Signals are not hard to learn and we hope that this article helped you in learning these scuba signals. Please share this page with anyone interested in learning scuba diving hand signals and I wish you the best scuba diving adventures!
Frequently Asked Questions About Scuba Diving Hand Signals
Why are hand signals important in scuba diving?
Hand signals are crucial for underwater communication, as verbal communication is not possible while diving. They allow divers to convey essential information, ensure safety, and coordinate actions with their dive buddies.
What does the ‘OK’ hand signal mean underwater?
The ‘OK’ hand signal, formed by touching the thumb and index finger to create a circle while extending the other fingers, indicates that a diver is fine. It’s used both to ask and confirm if everything is okay during a dive.
How do divers signal a problem underwater?
To indicate a problem, a diver extends a flat hand with palm down and rocks it side to side. This is often followed by pointing to the area of concern, such as the ear for equalization issues.
What is the hand signal for ‘ascend’ or ‘go up’?
A thumbs-up gesture signifies the intention to ascend or end the dive. It’s important not to confuse this with the ‘OK’ sign, as they have different meanings underwater.
How do divers communicate ‘descend’ or ‘go down’?
A thumbs-down gesture indicates the intention to descend. This signal is typically used at the beginning of a dive or when moving to a deeper depth.
What does the ‘low on air’ hand signal look like?
To signal low air, a diver places a clenched fist against their chest. This indicates that the diver has reached the reserve air pressure and should begin ascending.
How do divers indicate ‘out of air’?
The ‘out of air’ signal involves moving a flat hand back and forth across the throat. This urgent signal requires immediate attention and assistance from a dive buddy.
What is the ‘safety stop’ hand signal?
The ‘safety stop’ signal is made by holding a flat hand horizontally at chest level, palm down, and moving it side to side. This indicates the need to pause at a specific depth, usually 5 meters, for a safety stop.
Are there hand signals for marine life?
Yes, divers use specific hand signals to indicate sightings of marine life, such as forming a fin on the forehead for a shark or flapping hands for a turtle. These signals enhance the diving experience by allowing silent communication about underwater creatures.
How can I learn and remember scuba diving hand signals?
Regular practice and repetition during dives help reinforce hand signal knowledge. Many dive organizations provide visual guides and training materials to assist divers in learning and memorizing these essential signals.
The Scuba Diving Regulator Clearing Two Methods Skill is part of the PADI Open Water Diver course. It is one of the first scuba diving skills you will learn and also one of the most used skills in diving.
You want to remove any water every time you get a bit of water in your scuba regulator. You can easily do that using the PADI Regulator Clearing 2 Methods. Another reason why this skill is great to learn is when you take out your scuba regulator to perform a skill. Every time you remove your scuba regulator from your mouth it will fill up with water. With the PADI regulator clearing skill you can easily clear it from water.
There are 2 methods of clearing your scuba regulator. One method is to forcefully exhale or spit through your second stage and the second method is to use the purge button.
PADI Scuba Diving Regulator Clearing Two Methods Skill Video:
Having your own scuba regulator will be one of the best pieces of dive equipment you will buy. Owning your own regulator has many benefits like, much better breathing experience, cleaner and it is easy to travel with. A regulator is the main piece of dive equipment that make breathing underwater possible. Knowing that you personally take care if it and service it can be a peace of mind when scuba diving. There are many regulators to choose from, but here are our 3 recommendations:
Frequently Asked Questions About Scuba Regulator Clearing
Why is it important to learn regulator clearing techniques?
Learning regulator clearing is essential because water can enter your regulator during dives, especially when removing it for skills practice or if it’s accidentally dislodged. Being proficient in clearing ensures you can resume breathing safely and comfortably underwater.
What are the two methods for clearing a scuba regulator?
Exhalation Method: After reinserting the regulator into your mouth, forcefully exhale to expel water from the mouthpiece.
Purge Button Method: Press the purge button on the front of the regulator to release a burst of air, clearing water from the mouthpiece.
When should I use each clearing method?
Exhalation Method: Ideal when you have sufficient air in your lungs and prefer a quieter approach.
Purge Button Method: Useful when low on breath or if exhalation doesn’t effectively clear the water.
How do I perform the exhalation method correctly?
Take a deep breath.
Remove the regulator, keeping the mouthpiece facing downward.
Blow bubbles continuously to prevent water entry.
Reinsert the regulator into your mouth.
Forcefully exhale to clear the water.
How do I perform the purge button method correctly?
Take a deep breath.
Remove the regulator, keeping the mouthpiece facing downward.
Blow bubbles continuously to prevent water entry.
Reinsert the regulator into your mouth.
Use your tongue as a splash guard.
Gently press the purge button to clear the water.
Are there any tips to make regulator clearing easier?
Always keep the mouthpiece facing downward when removing the regulator to minimize water entry.
Practice both methods regularly to build confidence and muscle memory.
Use your tongue to block water from entering your throat during clearing.
Yes, regulator clearing is a fundamental skill taught early in the PADI Open Water Diver course. Students practice both methods to ensure they can handle situations where water enters the regulator.
Knowing how to perform the PADI Weight Belt Removal and Replacement Underwater Skill can be handy when you need to adjust your weights underwater. It is rare to adjust weights underwater, but it can happen. You also might want to give an extra weight to another diver or your buddy if they need it.
PADI Weight Belt Removal and Replacement Underwater Skill
You will learn the Weight Belt Removal and Replacement Skill during PADI Confined Water Dive 5 of the PADI Open Water Course. This is the performance requirement in the PADI Instructor Manual:
Remove, replace, adjust and secure all or part of the weight system without losing control of buoyancy, body position and depth.
With weight belt and weight integrated BCD on the bottom in water too deep in which to stand.
With any weight system that requires reassembly after
Owning your own Weight Belt is really handy as you can rig the perfect amount of weight on it. This way you never have to adjust your weight belt before and after a dive! On top of that knowing your weight belts quick release buckle can also help you in and emergency or when you just want to adjust your weights underwater.
Frequently Asked Questions About Weight Belt Removal and Replacement Underwater
What is the purpose of the weight belt removal and replacement underwater skill?
This skill is designed to ensure that divers can safely and effectively manage their weight systems underwater. It prepares divers to handle situations where adjusting or removing the weight belt is necessary, such as equipment malfunctions or emergencies, without compromising buoyancy control or body position.
The weight belt removal and replacement underwater skill is typically introduced during Confined Water Dive 5 of the PADI Open Water Diver course. It is a performance requirement outlined in the PADI Instructor Manual.
What are the steps to perform the weight belt removal and replacement underwater?
Ensure you are fully deflated.
Unclip the weight belt.
Carefully remove the weight belt, maintaining control.
Hold onto the weight belt securely.
Check that the weight belt is not twisted.
Replace the weight belt around your waist.
Ensure nothing is entangled or stuck in the weight belt.
Secure the weight belt’s quick-release buckle.
Double-check that all equipment is streamlined.
Why is it important to maintain control during this skill?
Maintaining control ensures that you do not lose buoyancy or body position, which could lead to uncontrolled ascents or descents. It also prevents the weight belt from being lost or causing entanglement.
What is the emergency weight belt drop, and when should it be used?
The emergency weight belt drop is a procedure where a diver releases their weight belt to achieve positive buoyancy in critical situations, such as uncontrolled descents or equipment failures. It should be performed only when necessary and when other buoyancy control methods are ineffective.
The PADI BCD Inflate Deflate skill in the PADI Open Water Diver Course is really important dive skill to master as many new divers have problems with properly deflating the BCD underwater and inflating on the surface.
Every time we reach the surface after entry or in the end of a dive we should inflate the BCD fully as soon as possible to become neutrally buoyant. From the few accidents that occurs on the surface, most are caused by not being fully buoyant. Water is very dense and trying to swim to stay above the surface can exhaust you very quick. If you are fully inflated you can rest and easily stay on the surface to prevent most accidents.
Underwater we see a lot of new scuba divers having issues with deflating their BCD properly. A lot of times new scuba divers are in the wrong position/angle or have the deflator hose in a wrong position that prevents them from releasing air from the BCD. Therefore it is really important that if you want to release air from the BCD, is that you are in the upright position (vertical, head up, legs down) and that you stretch the BCD deflator as high as possible and the start deflating the BCD.
How easy it is to Inflate or Deflate the BCD usually depends on the inflator button of your low pressure inflator hose on the BCD. On some brand BCD’s the inflator is a bit slow resulting in a longer time to inflate or deflate. We found that the Scuba Pro BCD’s have some of the best and fastest power inflators from all other brands. Have a look at these BCD’s:
Frequently Asked Questions About BCD Inflate & Deflate at the Surface
What is the purpose of inflating and deflating the BCD at the surface?
Inflating and deflating the Buoyancy Control Device (BCD) at the surface is a fundamental skill in scuba diving. Inflating the BCD provides positive buoyancy, allowing divers to float comfortably on the surface before or after a dive. Deflating the BCD removes air, enabling the diver to descend below the surface. Mastery of this skill ensures safety and control during dives.
How do you properly inflate the BCD at the surface?
To inflate the BCD at the surface:
Ensure your mask is on and your snorkel or regulator is in your mouth.
Press the inflator button on the low-pressure inflator hose until the BCD is fully inflated.
Lean back slightly to achieve a comfortable floating position.
Confirm that you are positively buoyant and can float effortlessly.
What is the correct method to deflate the BCD at the surface?
To deflate the BCD at the surface:
Stand or maintain an upright position in the water.
Raise the inflator hose above your head to allow air to escape efficiently.
Press and hold the deflate button until air stops releasing.
Use your right hand to gently squeeze the BCD, expelling any remaining air.
Ensure you are neutrally buoyant or slightly negative before beginning your descent.
Why is mastering BCD inflation and deflation important for divers?
Proper control of the BCD is crucial for maintaining buoyancy, ensuring safety, and conserving energy during a dive. Mastery of inflation and deflation techniques allows divers to ascend, descend, and maintain desired depths with confidence and control.
Is this skill practiced during PADI Open Water Diver training?
Yes, inflating and deflating the BCD at the surface is a core skill taught during the PADI Open Water Diver course. It is typically introduced in Confined Water Dive 1 and reinforced throughout the course to ensure proficiency and safety.
You are half way through during PADI Confined Water Dive 3. On this confined dive you will on doing more advanced skills in deeper water and you will learn the famous PADI CESA skill.
Also during PADI Confined Water Dive 3 you will be practicing buoyancy skills like the Hover. Good buoyancy is one of the most skills in scuba diving. Buoyancy is like a feeling. In the beginning it will be weird but by the end of Confined Dive 3 you will be so much more comfortable with you buoyancy.
PADI Confined Water Dive 3
Tips for the PADI CESA Skill in Confined Water 3
The PADI CESA Skill is a famous skill that you learn in the PADI Open Water Diver Course. It is an important skill to learn for in the unlikely event you might run out of air then you can still safely reach the surface using this skill from 9 meter depth. before you learn this skill in open water you will first practice the CESA in Confined Water Dive 3.
The best tips we can give is to not overthink it. It is the same as a normal ascent just with a continuous sounds (exhalation) and in confined you swim diagonal as is not deep enough.
Tips for Buoyancy Skills in Confined Dive 3
In dive 1 and 2 you have already swim around and practiced some buoyancy, but in confined dive 3 you will fully focus on your buoyancy and using your lungs with the PADI Hover skill.
The trick to hover perfectly is to understand that there is a delay in inflating and deflating your lungs. It is true that when you inhale you should rise and when you exhale you should fall (descent). However, because of the delay in filling up your lungs you should almost do it the other way around. let me explain:
If needed add a bit of air into your BCD and slowly breath in. After a delay you should start to rise slowly. Then the moment you start to rise you start to exhale gently. This makes you slow down in your ascent and makes you fall. The moment you fall start to slowly inhale, this will slow down your descent and with make you go up again. Keep repeating this. I know it is not easy in the beginning, but trust me you will get it with some practice. Learning buoyancy is the same as learning how to ride a bicycle.
During confined dive 3 you are becoming a diver and almost ready for the real open water dives. An item that every scuba should have is a diving computer.
PADI Confined Water Dive 2 will be your next experience after passing Confined Dive 1. During Confined Dive 2 you will be focussing mostly on the scuba mask skills to get ready for deeper water skills.
A lot of Dive Instructor will first teach dive 1 and go straight into teaching dive 2, but in some cases you might come back a few days later to complete confined dive 2.
PADI Confined Water Dive 2
More confidence in PADI Confined Water Dive 2
Dive 1 was all about getting used to breathing underwater and feeling relaxed while scuba diving. PADI Confined Water Dive 2 is all about focussing on more advanced scuba skills like the PADI Mask Removal and Replacement skill. Confined Dive 2 also prepares you for Confined Dive 3.
Scuba Mask Skills during Confined Dive 2
Some new scuba diver students worry a bit about the mask clearing skills, especially the Mask Removal, Replacement and Clearing skill. This is not needed as the skills are simple if you stay relaxed and don’t overthink. We wrote some great tips on how to clear a scuba mask here.
First we recommend you to stay relaxed and know that you are in shallow water, so you can always stand up if you don’t like the skill. Slowly take off your mask and then when you are ready put it back on. The mask will now be full of water. To clear this you just breath into your mouth and then out of your nose while slightly looking up.
All PADI Confined Water Water Dive 2 Skills in order
You will be practicing a lot of scuba mask clearing skills during Confined Dive 2. We recommend you to get your own to ensure the best seal for your face. We recommend these 3 great scuba diving masks: